Maid Service

Tools and Gadgets Professionals Use for a Perfect Spring Clean

The Tools and Gadgets Professionals Use for a Perfect Spring Clean

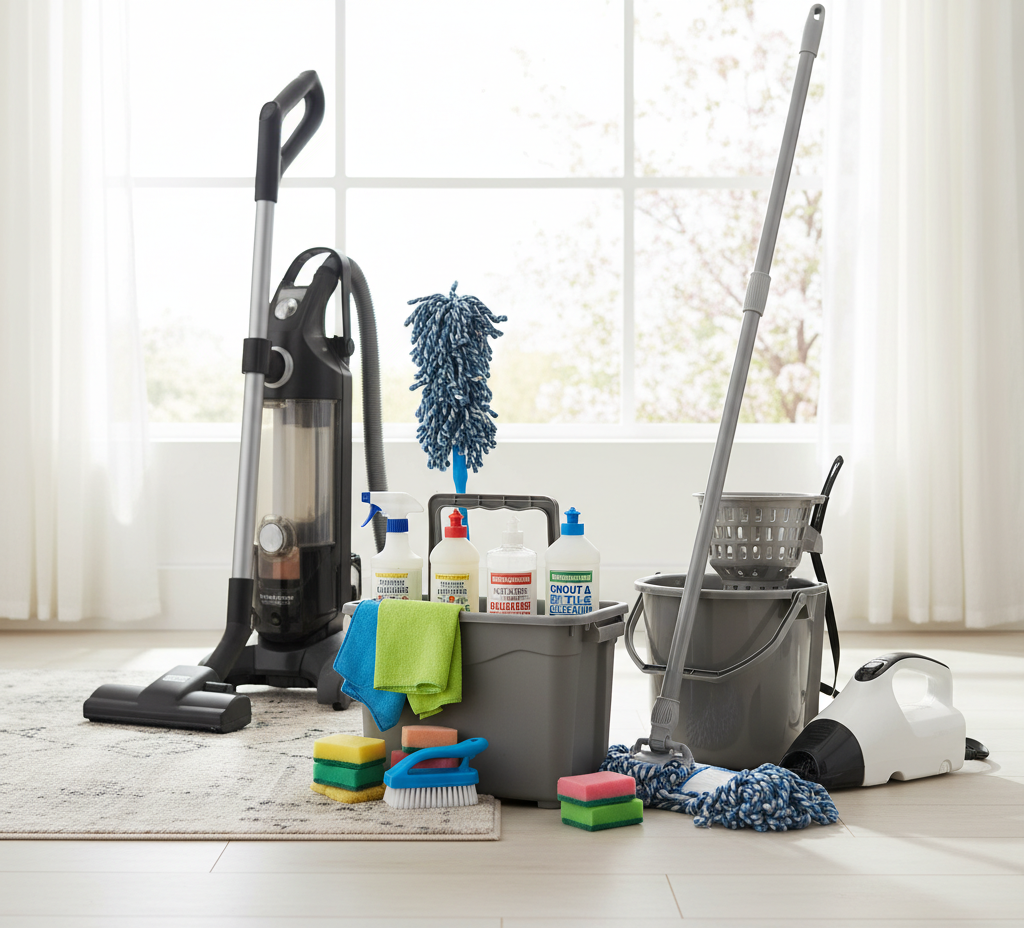
Spring Cleaning Gadgets That Do the Heavy Lifting A proper spring clean is a full reset after a winter of sealed windows, tracked-in salt, and dust that settled on every surface. It asks far more of your equipment than a weekly wipe down does. A thin sponge cannot touch a season of soap scum, and a feather duster just launches the dust back into the air. Crews that finish a whole house in hours work from a compact kit in which every tool solves one problem. These five gadgets are that kit, in the order we use them. 1. A HEPA Vacuum With the Full Attachment Kit The vacuum is the only non-negotiable item in the kit. Months of closed windows leave indoor air loaded with dust, pet dander, and pollen that has drifted onto every horizontal surface. A standard filter lets much of that fine material blow straight back out of the exhaust, so a sealed HEPA (High-Efficiency Particulate Air) filter matters: it traps microscopic particles instead of recirculating them, the principle behind Health Canada’s guidance on indoor air contaminants. Dry pickup comes before wet work, so you never turn loose dust into mud. The three attachments that decide the outcome Long crevice tool: pulls dense dirt, dead insects, and dust out of window tracks, squeezes between couch cushions, runs along baseboards, and reaches the gap between the stove and the counter. Soft-bristled dusting brush: lifts winter dust off blinds, lampshades, and carved furniture without scratching, and clears air vents and return registers. Upholstery tool: works sofas, armchairs, and curtains, and matters most on the mattress, where it removes the dead skin cells that feed dust mites. 2. A Drill Brush Set for Caked-On Grime Vacuuming handles loose debris, but a deep clean means dealing with grime that has bonded to a surface. A drill brush set is a handful of durable nylon brushes that chuck into any cordless drill, turning a tool you already own into a power scrubber running hundreds of rotations per minute. The large flat brush covers wide areas such as a fiberglass shower floor or tile floor. The small bullet-shaped brush, paired with a paste of oxygen bleach, drives into grout lines and brings years of grey back toward the original colour. The round corner brush fits the curved inside of a bathtub or sink basin, where the stubborn soap scum ring sits at the waterline. Because a chemical and a spinning brush are involved, ventilate the room, follow the label as Health Canada’s household products guidance recommends, and never mix cleaners. 3. An Extendable Microfiber Duster for High and Low Zones The lines that define a spring clean are the ones routine cleaning never reaches, and this tool is built for exactly that. The telescoping handle cleans ceiling fan blades from the floor instead of a wobbly chair, and the bendable head locks at a ninety-degree angle so you can run it across the tops of tall kitchen cabinets, bookcases, and door frames where a thick furry layer collects. Microfiber is statically charged, so it traps particles rather than flicking them up to resettle later, and the sleeve washes. Shorten the handle and the same duster saves your knees on every baseboard. 4. A Handheld Steam Cleaner for Chemical-Free Sanitizing For hygiene without a cabinet of chemicals, a handheld steam cleaner delivers. A small internal boiler pushes water past its boiling point and sends high-pressure steam through interchangeable nozzles. The heat melts baked-on stovetop grease, dissolves the grimy collar around faucet bases and drains, and softens burnt-on food in a microwave. Steam kills 99.9% of common household germs and bacteria, so it suits high-touch surfaces, toilet bases, and garbage cans, in line with the CDC advice to clean a surface before disinfecting it. A concentrated jet nozzle blasts gunk out of shower door tracks and window frames, while a brush attachment lifts dirt and mildew from porous grout. 5. A Melamine Foam Sponge for the Final Pass The last 10% is what makes a home look professionally done, and a melamine foam eraser is the best finishing tool in the kit. It behaves like ultra-fine sandpaper, lifting marks no spray can touch. Lightly dampened, it erases shoe scuffs from walls, crayon from a hallway, and greasy fingerprints around light switches. Use light pressure, since too much force can burnish a paint finish. It also clears tea and coffee stains inside mugs, lifts soap scum off glass shower doors, and whitens rubber sneaker soles. Spring Cleaning Gadget Quick Reference Gadget Best use Where it beats elbow grease HEPA vacuum and attachments Dust and dry debris Tracks, vents, seams, and mattresses before any water Drill brush set Caked-on grime and grout Hundreds of rotations per minute, not hand scrubbing Extendable microfiber duster High and low neglect lines Fan blades and cabinet tops, no ladder needed Handheld steam cleaner Grease and sanitizing Plain water only, into crevices a cloth cannot reach Melamine foam sponge Scuffs and final detail Marks on paint, glass, and rubber When a Gadget Kit Is Not Enough Buying all five tools costs money and cupboard space, and the kit is still only half a deep clean; the rest is hours on your knees. Our deep cleaning service for homes brings the whole kit plus the crew to use it. The pricing page lists rates before HST: a deep clean starts at $270.38 for a studio or one-bedroom and $393.75 for a two-bedroom, and a regular maid service visit from $212.63 for a studio or one-bedroom keeps the result from sliding back. Frequently Asked Questions What is the most useful spring cleaning gadget? A vacuum with a sealed HEPA filter and a crevice tool. It removes dust and allergens first, so every wet step afterwards works on grime instead of loose soil, and the crevice tool reaches gaps nothing else can. Is steam cleaning as effective as a chemical disinfectant? On most household surfaces, yes, provided the steam is hot enough and

The Tools and Gadgets Professionals Use for a Perfect Spring Clean Read More »
The 20 Spots You’re Forgetting on Your Spring Cleaning Checklist

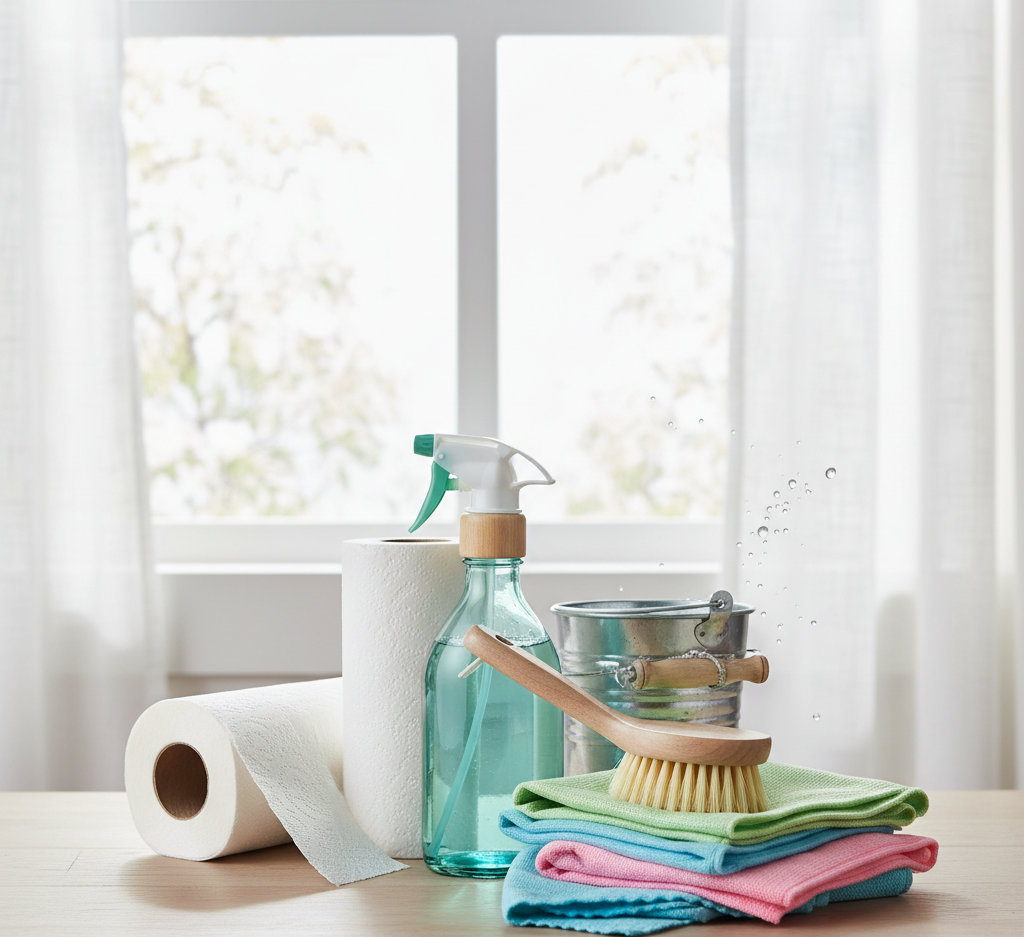
The 20 Spots You Are Forgetting on Your Spring Cleaning Checklist Spring cleaning is a full-scale, top-to-bottom reset: a chance to clear away the dust, clutter, and grime of the colder months. The scale of the task can be overwhelming, and the secret to managing it is a single, indispensable tool, the checklist. A well-structured checklist is a strategic roadmap that breaks an overwhelming goal into clear, achievable steps. The most effective way to build one is by room, turning the job of cleaning an entire house into a series of focused projects with a clear sense of accomplishment as each space is checked off. Kitchen: The Most Intensive Room The kitchen is where grease, food particles, and daily traffic converge, so it should be a top priority. Deep cleaning it means going far beyond wiping counters: Tops of cabinets and the refrigerator, where a sticky greasy film of dust collects The refrigerator interior, removable shelves, condenser coils, and the floor beneath it The oven interior and stovetop grates, soaked and scrubbed rather than surface-wiped The sink, faucet, drain, and garbage disposal, descaled and deodorized For the fridge, empty it completely, discard expired food, wash shelves and drawers in warm, soapy water, and pull the unit away from the wall to vacuum the dusty condenser coils. For the oven, tackle baked-on residue with the self-cleaning function or a non-toxic baking soda paste left to sit overnight. Soak stovetop grates and burner caps in hot, soapy water before scrubbing, flush the drain with boiling water and a baking soda and vinegar solution, and finish with backsplash grout, baseboards, and a thorough mop. Bathrooms: Sanitation and Soap Scum Bathrooms need a focus on sanitation and the removal of soap scum and mineral deposits. The four spots people skip most are the exhaust fan cover, the showerhead and grout, the toilet exterior, and the vanity and medicine cabinet. Remove the fan cover, wash it, and vacuum the blades and housing. Descale the showerhead by soaking it in vinegar, then scrub walls, tub, and doors with a soap-scum cleaner, working every grout line with a stiff brush. Clean the entire toilet exterior, including the tank, base, and the floor line where the toilet meets the floor. Clear the vanity completely, polish fixtures, scrub the basin and overflow hole, and discard expired products from the medicine cabinet. Launder the shower curtain and bath mats, then finish with baseboards and a mopped floor. Bedrooms: Dust and Allergens Bedrooms are less about grime and more about dust and allergens, and the goal is a fresh, restful environment. Strip the bed and vacuum the entire mattress with an upholstery attachment, spot-clean stains, and deodorize with a baking soda sprinkle that is vacuumed up after sitting. Wash everything you often overlook: the duvet or comforter, pillows, and mattress protector. Use the season for a wardrobe switch: empty the closet, wipe the shelves, and bring spring and summer clothes forward. Dust from the top down, starting with ceiling fan blades, light fixtures, and dresser tops, then clean windows, curtains, and blinds, and finish with a thorough vacuum including under the bed. Living and Common Areas: Deep Dusting and Order High-traffic areas need deep dusting and restored order. Remove cushions and use a crevice tool in upholstery seams and under frames to reach years of crumbs and dust. Move furniture to vacuum normally covered areas, and consider professional carpet cleaning to remove embedded winter dirt and allergens. Wipe baseboards and spot-clean wall scuffs, dust the tops of door frames, picture frames, and electronics, and clean windows and treatments to let in the fresh spring light. The Forgotten Whole-Home Spots These tasks apply to the entire house and are the ones most often missed in a room-by-room approach. Add them to the end of your checklist: Doors and doorframes, especially around handles and on top ledges Light switches and outlet covers, disinfected in every room Air vents and registers, covers removed and washed Smoke and carbon monoxide detectors, tested with fresh batteries Window tracks, deep cleaned on every window you open Room Most forgotten spot Method Kitchen Fridge condenser coils Vacuum with the unit pulled out Bathroom Exhaust fan cover Wash cover, vacuum blades Bedroom Mattress surface Vacuum, spot-clean, baking soda Living room Upholstery seams Crevice tool, cushions removed Whole home Air vents and registers Remove covers, wash, replace A checklist transforms an amorphous, stressful concept into a clear, actionable plan. Physically checking off each item reinforces progress and turns a mountain of chores into a series of conquered hills. When the process feels too time-consuming, professional help delivers the result without the labor. Toronto Shine Cleaning specializes in deep, restorative work: the team systematically tackles every item on a spring cleaning checklist, from deep cleaning services that cover kitchens, bathrooms, and baseboards to regular maid service that keeps the results lasting. Our bonded and insured cleaners carry a $1,000,000 insurance policy, and deep cleaning starts from $270.38 before HST for a studio or one-bedroom home. See the full pricing page and find your neighbourhood on our locations page, then call (647) 424-0355 to book. For healthy indoor air while you clean, see the Government of Canada guide on air contaminants, and follow the CDC handwashing guidance after handling vents, filters, and dusty surfaces. Spring Cleaning Checklist FAQ Why is a checklist the best way to spring clean? A checklist breaks an overwhelming whole-house project into clear, room-by-room steps, so nothing is forgotten and each completed room provides a sense of accomplishment. It turns a mountain of chores into a series of manageable tasks. What is the most forgotten area in the kitchen? The tops of cabinets and the refrigerator, plus the condenser coils and floor underneath the fridge. These out-of-sight areas trap a sticky greasy film of dust and are easy to skip in a routine wipe-down. How do I deep clean my mattress during spring cleaning? Strip the bed and vacuum the entire mattress with an upholstery attachment. Spot-clean

The 20 Spots You’re Forgetting on Your Spring Cleaning Checklist Read More »

The Solution to Your Mother’s Day Gift Dilemma: A Professional Clean

The Mother’s Day Gift That Does Not Wilt Every May, the same hunt begins. Flowers peak on Sunday and brown by midweek, chocolates vanish in days, and a spa day ends with a return to the same to-do list. For the mother who has spent years keeping a household running, the present that actually lands is time: hours removed from her calendar and handed back with nothing attached. That is the case for a professional clean as a Mother’s Day gift, and why so many Toronto families now book one instead of a bouquet. What You Are Really Buying A thorough deep clean is a time machine. A full reset of a home typically takes five, six, or more hours of hard, detailed labour, and that is exactly the block of hours a gift clean returns to her. Picture the usual weekend for a mother: Saturday taken up scrubbing floors, Sunday given to bathrooms and laundry, a running mental list that never quite empties. Booking a team wipes that weekend off the calendar. In its place she gets a Saturday with a book and a coffee, a Sunday with friends she has not seen in months, or simply a day with family that is not shadowed by a to-do list. The Invisible Gift: Less Mental Load Keeping a home is not just scrubbing; it is the management behind the scrubbing. When did the guest bathroom last get cleaned? Who will handle the fridge before the in-laws arrive? That low, constant buzz of unfinished tasks is real stress, and it is worth protecting against. The CDC’s overview of mental health basics makes clear that feeling well is about more than the absence of illness, and living in a space that always feels behind can quietly erode that. One deep clean breaks the cycle in a single stroke. The whole home reaches a pristine baseline at once, the checklist goes quiet, and she can enjoy the space as a sanctuary instead of seeing it as an endless project. Not a Critique, a Compliment Presentation matters. A cleaning gift should never read as “your house is dirty.” It works when it is framed as a luxury experience, a spa day for the home, an acknowledgement that she deserves a break from the work that keeps the place running. And it is genuinely a different service from a weekly tidy. Professionals arrive with a system, the right tools, and the experience to handle the jobs that get postponed for years: Pulling the refrigerator out to clean the floor behind it and vacuum the dust-packed condenser coils that drag down efficiency. Washing baseboards through the house to erase a season of scuffs. Degreasing the tops of kitchen cabinets and dusting light fixtures and ceiling fan blades that are just out of comfortable reach. Scrubbing soap scum and hard water film off shower doors until they are clear again. That depth is hard for one person to reach without losing a whole weekend, which is where our deep cleaning service comes in. Why the Benefit Lasts Longer Than Flowers A bouquet lasts a week. A reset home keeps giving for weeks and months, because upkeep from a clean starting point is faster and lighter. Daily tidying gets done in minutes when there is no layer of built-up grime to fight, so the original five or six hours keep paying off. It also removes clutter instead of adding to it, which suits anyone trying to own less and enjoy more. For the mother of young children, it is a lifeline during the most physically draining years. For the mother working a demanding job, it hands back the weekend she would otherwise spend on a second shift of chores. For grandparents and empty-nesters, it means the tubs, high shelves, and heavy lifting stop being an ordeal. Swapping heavy scrubbing for genuine rest matters for physical health too; the CDC’s summary of the benefits of physical activity is a good reminder that movement should be a choice, not an obligation. Choosing the Right Level of Service Gift cleans come in a few shapes, and the right one depends on how much running the household does. A first-time Mother’s Day gift usually lands best as a one-time deep clean, with optional add-ons like inside-oven or inside-fridge work. If the goal is ongoing relief, a recurring plan removes the chore from her calendar for good. Gift option Best for Ongoing value One-time deep clean First gift, seasonal reset, moving season Lasting baseline plus an easier few months of upkeep Recurring regular clean Mothers who juggle work and family full time Chores leave the calendar, week after week Move-in or move-out clean Families helping a mother relocate A fresh start in the new home from day one Rates are on the pricing page and depend on home size and service level. Regular cleans start from $212.63 before HST for a studio or one-bedroom, $273 for a two-bedroom and $327 for a three-bedroom; deep cleans start from $270.38 for a studio or one-bedroom, $393.75 for two bedrooms, $441 for three and $527.63 for four; move-in and move-out cleans start from $242.63. Our crews are bonded and insured with a $1,000,000 policy and $10,000 accidental breakage coverage, which is a polite way of saying your gift comes with zero risk to her belongings. You can read how past clients describe the experience on our reviews page, or browse the regular cleaning service if you are leaning toward a recurring plan. General guidance on what a full home clean should cover is available from the CDC’s page on when and how to clean your home. How to Present It Half the impact sits in the card. A line such as “a whole weekend with the schedule cleared, because your time should be yours” or “a spa-style reset for the home, handled start to finish” carries the message better than a receipt. Add the booked date to the card, or offer three dates so she

The Solution to Your Mother’s Day Gift Dilemma: A Professional Clean Read More »

Refrigerator

Refrigerator Cleaning: The Professional Way to Clean a Refrigerator

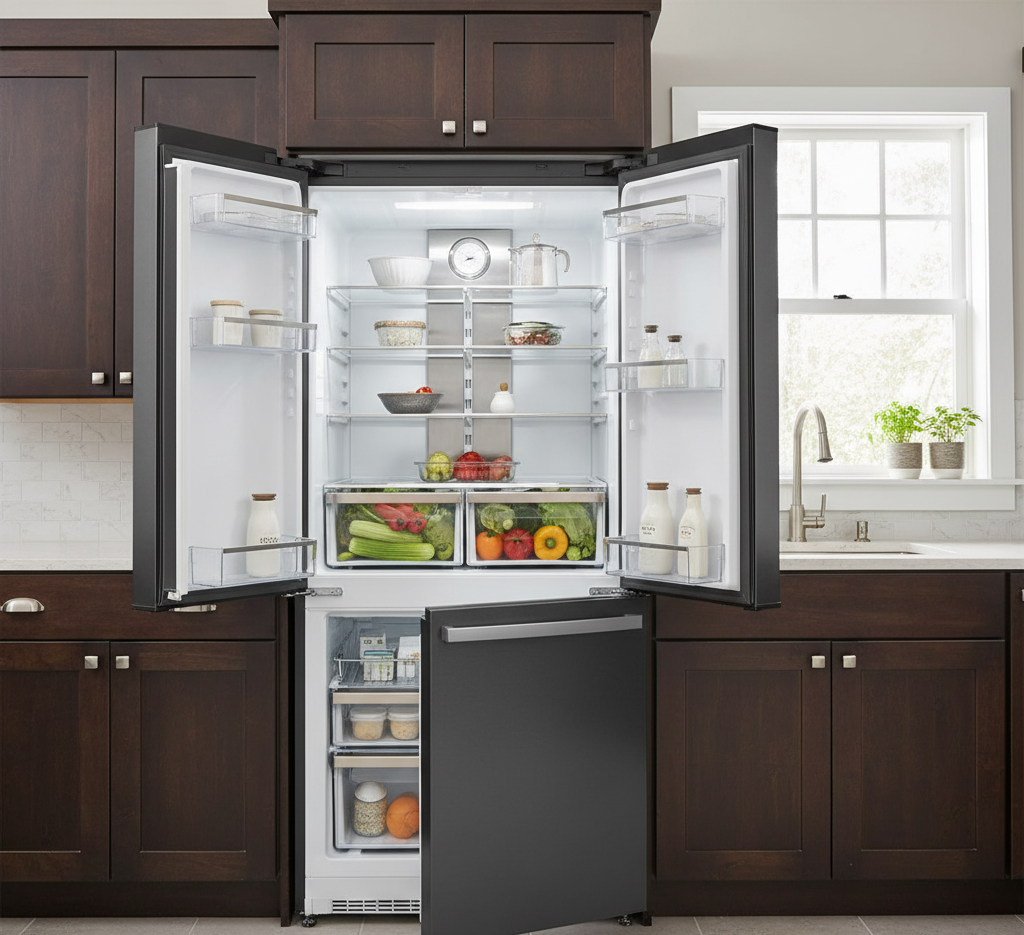
Refrigerator Cleaning: The Professional Way to Clean a Refrigerator A clean refrigerator is essential for food safety, efficient operation, and a fresh-smelling kitchen. Over time, spills, crumbs, and sticky residues accumulate on shelves, drawers, and door bins. Hidden grime can harbour bacteria, cause unpleasant odours, and reduce cooling efficiency. A thorough refrigerator deep clean resets your appliance and keeps your food stored in a sanitary environment. Toronto Shine Cleaning offers professional kitchen cleaning services that include detailed refrigerator cleaning to ensure your appliance is spotless inside and out. Signs Your Refrigerator Needs a Deep Clean Unpleasant odours: Lingering smells from spoiled food or spills indicate bacteria growth that requires a full interior clean to eliminate. Visible spills and sticky residue: Dried food spills on shelves and drawers attract pests and can transfer bacteria to fresh food items. Ice build-up in the freezer: Excess frost reduces cooling efficiency and takes up valuable freezer storage space. Warm spots or uneven cooling: Dust on condenser coils forces the compressor to work harder, leading to inconsistent temperatures and higher energy bills. Step 1: Empty and Sort Everything Remove every item from the refrigerator and freezer compartments. Place perishables such as meat, dairy, eggs, and leftovers in a cooler with ice packs to keep them at a safe temperature below 4 degrees Celsius. As you remove each item, check expiration dates and discard anything past its prime, along with any containers that show signs of spoilage or freezer burn. This is also the ideal time to wipe down jars, bottles, and containers with a damp cloth so you do not reintroduce sticky residue into your clean fridge. Sorting as you go creates a natural opportunity to reorganize your food storage system and reduce future food waste. Step 2: Remove Shelves and Drawers Take out all removable components: glass shelves, crisper drawers, meat drawers, door bins, and any other detachable parts. Allow them to come to room temperature before washing to prevent thermal shock, which can crack glass or warp plastic. Wash each piece in warm, soapy water using a mild dish soap and a non-abrasive sponge to avoid scratching. For stubborn, dried-on spills, let the component soak for ten to fifteen minutes before scrubbing. Rinse each piece thoroughly with warm water and allow them to air dry completely or dry by hand with a clean towel. Reinstalling damp components can trap moisture and promote mildew growth in crevices. Step 3: Wipe Down the Interior With the fridge empty and unplugged for safety, wipe down all interior surfaces using a mixture of equal parts white vinegar and warm water in a spray bottle. Vinegar is a natural, food-safe disinfectant that effectively cuts through sticky residues without leaving harmful chemical residues. Work from the top down so drips fall onto already-cleaned areas. Pay special attention to corners, drainage channels, and rubber door gaskets where crumbs and mould tend to accumulate. An old toothbrush or small detailing brush helps reach grooves and tight spots. Once clean, wipe the entire interior with a cloth dampened with plain water to rinse away any vinegar residue, then dry thoroughly with a clean microfiber towel. Refrigerator Area Cleaning Method Key Tips Glass shelves Warm soapy water, air dry completely Let warm to room temperature first to prevent cracking from thermal shock Crisper drawers Soapy water soak, rinse, towel dry Remove entirely; food debris hides under drawer tracks and in corners Door gaskets Vinegar-water solution with soft toothbrush Mould and bacteria commonly hide in gasket crevices; dry thoroughly after cleaning Condenser coils Coil brush plus vacuum brush attachment Clean coils improve energy efficiency and can extend appliance lifespan significantly Step 4: Clean the Exterior and Condenser Coils For stainless steel fronts, wipe in the direction of the grain using a microfiber cloth and either stainless steel cleaner or your vinegar-water solution. Spray onto the cloth not directly onto the surface, then buff with a second dry cloth for a streak-free shine. Clean door handles and the water or ice dispenser area thoroughly, as these high-touch surfaces harbour the most bacteria. Gently pull the refrigerator away from the wall to access the back and floor area. Vacuum the condenser coils using a coil brush and vacuum brush attachment to remove the dust and lint that accumulates over time. Clogged coils force the compressor to work harder, increasing energy consumption by up to 15 percent and shortening the appliance’s lifespan. Sweep and mop the area behind the fridge before pushing it back into place. Step 5: Reassemble and Reorganize Strategically Once all components are clean and dry, place them back in the refrigerator in a logical arrangement. Group similar items together: dairy products on one shelf, condiments and sauces in the door bins, produce in designated crisper drawers, and meats in the coldest section. Adopt a first-in, first-out system by placing newer items behind older ones so older items get used before they expire. Using clear storage bins helps corral small items like yogurt cups, cheese sticks, and condiment packets, making them easy to find and reducing the time you spend with the door open. This thoughtful reorganization saves energy, reduces food waste, and makes future cleaning easier. Frequently Asked Questions How often should I deep clean my refrigerator? Every three to four months, or immediately after a spill that could cause odours or cross-contamination between raw and ready-to-eat foods. Can I use bleach inside the fridge? No. Bleach can damage interior plastic and rubber seals while leaving harmful residues. White vinegar and water or mild dish soap provide safe, effective cleaning. Should I unplug the fridge before cleaning? Yes. Unplugging is a safety precaution when using water near electrical components and allows the interior to reach room temperature for comfortable cleaning. What if my fridge still smells after cleaning? Place an open box of baking soda on a middle shelf to absorb lingering odours. Replace it every three months for best results. Do you clean the freezer too? Yes. A professional refrigerator clean

Refrigerator Cleaning: The Professional Way to Clean a Refrigerator Read More »

Get a Perfect Spring Clean Without Sacrificing Your Weekends

A Perfect Spring Clean Without Losing Your Weekends to It The first warm weekend in Toronto empties the parks and fills the patios, and it is a bad trade to spend those days on a ladder wiping blinds. Spring cleaning still has to happen: a winter of closed windows leaves dust, grease, and odours that a weekly tidy never touches. The fix is to stop treating the project as one enormous Saturday and instead work through a short list of zones in a fixed order. That structure lets a busy household finish in two days, and it is the same sequence our crews follow on a deep clean. Where the Time Actually Goes A spring clean is deeply uneven. A handful of neglected zones swallow most of the hours, and the rest of the house moves quickly once the heavy work is done. Zone The heavy tasks Realistic DIY time Kitchen Range hood, cupboard interiors, the fridge 4 to 6 hours Bathrooms Soap scum, grout, the toilet inside and out 2 to 3 hours each Living room Curtains, upholstery, blinds, lamps 2 to 3 hours Bedrooms Under the bed, fan blades, fresh linens 1 to 2 hours each Outdoor areas Patio furniture, deck, windows, garden tools 3 to 4 hours Kitchen: Degrease From Handles to Range Hood The kitchen is the greasiest room in the house and it gets the deepest attention. Wipe the cupboard handles and fronts, then pull everything out and wash the shelving inside. Appliances need the same two-layer treatment: scrub the stove, dishwasher, and fridge exteriors, where grime cakes onto the handles, then the inside of the fridge, where spills sit in places a sponge never reaches. A soft sponge and an old toothbrush cover most of it, with the toothbrush working the corners, the tracks, and the interior door seals. Three tasks homeowners skip The range hood: degrease the filter and the housing, since cooking oil settles there and re-deposits on every surface below. Inside the cupboards: empty them, wash the shelves, and restock while everything is out anyway. Sink and faucets: clear the buildup at the faucet base and the drain collar, then dry the basin so water spots do not return. Bathrooms: The Scrub You Keep Postponing Bathrooms hide germs in plain sight, so a true clean goes well past the bowl. Scrub the toilet inside and out, including the hinges and the handle, and lift the lid to wipe the tank as well. Then the bathtub or shower, where soap scum dulls the surface and the grout lines and mouldy caulk need real attention; that damp fungal buildup is exactly what the CDC’s guidance on mould and health tells you to control early, before it spreads. A mirror cabinet gets cleaned inside and out, and the toiletries go back inside it so the counter stays clear. Finish with the sinks, faucets, and showerheads, which hold a hard-water film no splash rinse removes. Living Room: Dust Traps and Light Fixtures The living room shows dust faster than anywhere else because it holds more fabric than any other room. Vacuum the curtains before the warm weather returns, spot clean the carpet where the kids and pets sit, and vacuum the sofa to pull embedded dust out of the cushions. Blinds respond to a damp microfiber cloth wiped one slat at a time. Then the fixtures: lamps collect a grey coat on the bulbs and inside the shades, and the switch panels and plates go dull from being handled all winter. Settled dust is also the main carrier of indoor allergens, and Health Canada’s advice on indoor air contaminants starts with removing it from soft surfaces. Bedrooms: Under the Bed and the Mattress Bedrooms are where dust bunnies go to breed, so get under the bed with the vacuum rather than a broom. The ceiling fan is the other hidden source: every blade carries a ridge of dust that the airflow throws into the room, so wipe the blades with microfiber or a duster built for the job. Then strip the bed, wash the blankets that have been storing body odour all winter, and flip or rotate the mattress while it is bare. Curtains, rugs, and upholstered chairs all take their turn in the wash or under the vacuum. Outdoor Areas: Patios, Decks, and Garden Tools The outdoor spaces are the parts of the home you actually live in all summer, so they belong on the list. Patio furniture wipes down with dish soap and a sponge, then rinses with a hose or a pressure washer. Sweep and wash the patio floor, the porch, the deck, and the balcony, scrub the outdoor carpet, and clean the windows that winter left streaked with rain marks. Garden tools are the item nobody thinks of: wipe the sap and soil off the blades and handles before it hardens. Two Days, Or the Whole Project Handed Over A schedule beats a heroic day. Kitchen and bathrooms on the first morning, when drying time helps, then living room and bedrooms in the afternoon, and the outdoor zone on day two while the weather holds. Work top to bottom and back to front in every room so you never cross a surface you just finished. If those two days are the ones you refuse to give up, our deep cleaning service covers exactly these zones with a bonded and insured crew. Rates sit on our pricing page before HST, including $393.75 for a two-bedroom deep clean and $441 for a three-bedroom, and a seasonal regular house cleaning visit holds the result. Confirm your borough on our locations page, and when cleaners are part of the plan, follow Health Canada’s household chemical safety rules on ventilation and storage. Frequently Asked Questions How long does a full spring clean take? A homeowner doing the whole house usually needs two full weekends. Working zone by zone in the order above is what stops it becoming a third, and handing the kitchen and bathrooms

Get a Perfect Spring Clean Without Sacrificing Your Weekends Read More »

cleaning walls

Don’t Ruin Your Walls: 5 Common Mistakes Homeowners Make When Washing Walls

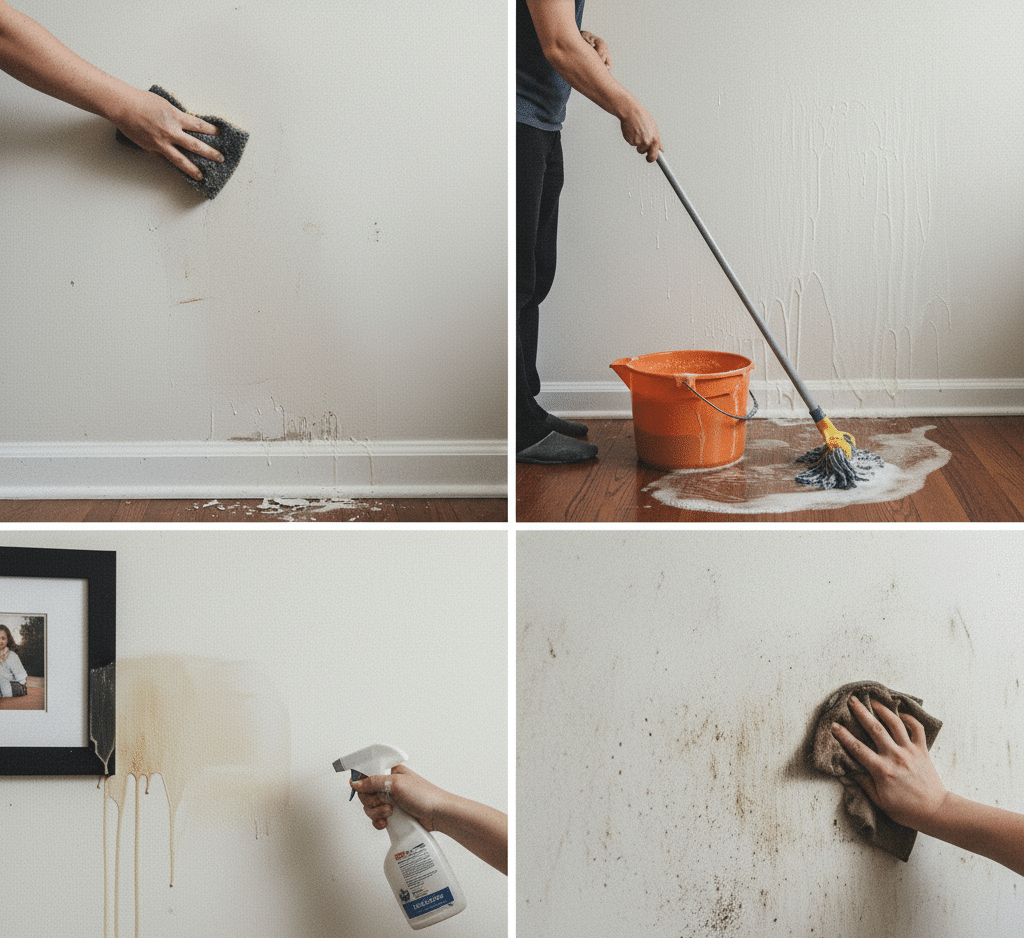
Why Washing Walls Is the Missing Step in Your Spring Clean Most cleaning routines look down: floors, carpets, and grout get all the attention, while the largest surface area in every room stays ignored. Walls, doors, and baseboards escape foot traffic, but they suffer their own assault during a sealed winter. Dry furnace air creates static charges on painted drywall, and convection currents carry dust, pet dander, cooking oils, and soot past those charged surfaces, where the particles bond into a grey film that dulls paint and absorbs light. Faint dark streaks above baseboard heaters and vents, sometimes called thermal tracking or ghosting, are this buildup made visible. Worse, the walls become a reservoir for allergens that drift back into the breathing zone every time a door slams. Washing them is a real health task, but five common mistakes turn the job into a disaster. Mistake 1: Washing From the Top Down Intuition says start at the top and let gravity help, but on painted walls gravity is the enemy. A wet sponge squeezed against a dry, dirty upper wall releases water that trickles down in rivulets, cutting clean streaks through the dust and soot layer. Dry porous paint absorbs that dirty water instantly, and the streaks become permanent stains; you have essentially stained the wall with cleanliness. Use the professional bottom up technique instead: start at the baseboard and work toward the ceiling. Drips from the sponge land on an already wet, clean surface below, where they float on the film of water and wipe away without marking, leaving a uniform finish with no crying lines. Mistake 2: Reaching for Harsh Cleaners Strong chemicals do not equal clean walls. Painted walls need nothing harsher than warm water with a little dish soap or a pH neutral wall cleaner. Aggressive products strip the sheen from eggshell and satin paints, leaving dull patches that look as bad as the dirt they removed. Match the cleaner to the surface and test any product on a hidden corner first. Gentle and consistent beats strong and patchy every time. Mistake 3: Wetting Dusty Baseboards First Baseboards collect everything gravity drops, and in winter that dust mixes with bathroom and kitchen humidity into a grey, paste like sludge that clings to the molding profiles. The classic error is grabbing a wet rag immediately, which turns the dust into mud that gets pushed into corners and caulking lines, where it dries into dark, hard grout. Clean baseboards in two stages: Remove the loose dust first with a vacuum brush attachment or a dry microfiber duster. Follow with a damp cloth only once the dry debris is gone, to lift the adhered grime. Use extension handles, like a flat microfiber mop turned on its side, to save your back and knees. Mistake 4: Skipping Doors and Switch Plates While walls collect environmental dust, doors and switch plates collect biological evidence. Look closely at the halo around a light switch or door handle: it is a buildup of skin oils, hand lotion, and microscopic dirt transferred by fingertips thousands of times. That oily residue is sticky, traps dust, and forms the dark smudges that signal poor hygiene, and as flu and cold season winds down these touchpoints remain prime vectors for cross contamination. Clean them with a mild degreaser to break down the lipid bonds without damaging paint or hardware, then apply a disinfectant and respect its dwell time to neutralize lingering pathogens. Give extra attention to the front door handle and bathroom switches, which see the most traffic from the outside world. The CDC’s home cleaning guidance lists light switches among the hard surfaces that benefit from regular cleaning, with disinfecting recommended when someone in the home is sick. Mistake 5: Waiting Until the Grime Is Visible The winter film on walls is largely invisible until the low spring sun rakes across it, and by then the dust has had months to bond with the paint. Waiting costs more than looks: every draft and slammed door flicks allergen laden particles off the walls and back into the air you breathe. A seasonal wash, done before the sun exposes the damage, keeps the paint vibrant and resets the room’s air quality for allergy season. If the walls feel fine but condensation has left damp patches near windows or behind furniture, deal with the moisture quickly, because Health Canada advises controlling humidity and fixing moisture problems to keep mold from taking hold on walls and fabrics. Wall Washing Mistakes and the Fixes Mistake What goes wrong Correct approach Top down washing Dirty drips stain the paint permanently Wash bottom up so drips land on wet surface Harsh cleaners Sheen stripped from eggshell and satin Mild dish soap or pH neutral wall cleaner Wet rag on dusty baseboards Dust turns to mud that cakes in corners Vacuum dry first, then damp cloth Ignoring doors and switches Oily germs spread from high touch spots Degrease, then disinfect with dwell time Waiting for visible grime Allergen film bonds and dulls the paint Seasonal bottom up wash before spring sun Frequently Asked Questions About Washing Walls Why should walls be washed from the bottom up? Drips from the sponge land on an already wet, clean lower surface and wipe away without marking, while top down washing lets dirty water soak into dry paint and leave permanent streaks. What is the safest cleaner for painted walls? Warm water with a scant amount of dish soap or a pH neutral wall cleaner; harsh chemicals strip the sheen from eggshell and satin paint and leave dull patches. Can washing walls really help with allergies? Yes, winter dust, dander, and soot bond to statically charged walls and re enter the air when disturbed, so a seasonal wash removes the reservoir and lowers the particles you breathe. What are the dark streaks above baseboard heaters? Called thermal tracking or ghosting, they are dust patterns created by temperature differences between wall studs and insulation; washing bottom up with

Don’t Ruin Your Walls: 5 Common Mistakes Homeowners Make When Washing Walls Read More »

Valentine's Day and cleaning home

Valentine’s Day: 5 Essential Cleaning Tasks You Should do Before February 14th

A Five-Day Valentine’s Cleaning Countdown That Ends With You Relaxing, Not Scrubbing February 14th has quietly moved indoors. Between crowded restaurants and simple fatigue, more couples are turning their own home into the venue, and that shift changes the job description of cleaning: when the house is the restaurant, the state of the house is the atmosphere. Visual noise competes for attention. A dust bunny rolling across the floorboards or a stack of mail on the coffee table pulls the brain back to management mode at the exact moment you were trying to leave it. This countdown spreads the essential work across five days so nothing lands on the 13th. The principle behind every stop below: clean surfaces are the foundation of romance, and the goal is to let the only thing your guests notice be each other. Day Five: Declutter the Shared Spaces Start broad and cheap. Clear the surfaces that have quietly turned into drop zones: Every counter that collects keys, mail, and unopened post The coffee table and anything stacked on the dresser The dining table itself, which in most homes moonlights as a desk, a mail station, and a laundry folding bench A table in three other jobs cannot set a scene, so reclaim it, polish it, and let it mean an occasion again: tablecloth, candles, the good plates. A cleared space reads bigger, brighter, and calmer than any product buys you. Day Four: Reset the Kitchen If dinner is happening at home, the kitchen is the stage, and cooking in a dirty one is a fight, not a date night. Degrease the stovetop, wipe the cabinet fronts where splatter has quietly glued itself, run the dishwasher so it is empty and ready to catch plates as you cook, and clear the sink entirely. Logistical preparation is what lets the evening flow: the empty dishwasher matters more than fancy ingredients, because it keeps the aftermath from swallowing the night. Day Three: Give the Bathroom a Spa Pass Nothing punctures a romantic illusion like a ring in the tub, a mirror spotted with toothpaste, or a trash can nobody has emptied. Scrub the grout until any mildew at its edges is gone, polish the chrome fixtures until they reflect candlelight properly, and swap in fresh, fluffy towels. Remove the visible evidence of daily biological maintenance so the room reads as pampering rather than plumbing. The CDC’s baseline on when and how to clean and disinfect your home is a good checklist for which surfaces deserve the extra attention, and the fresh towel and hand-wash routine doubles as a nod to the CDC’s handwashing guidance for guests who will be brushing their teeth beside you. Day Two: Rebuild the Bedroom The bedroom carries the holiday, and it usually carries boxes, cables, and the chair holding tomorrow’s laundry too. Launder sheets, duvet cover, and pillowcases first: sliding into crisp, fresh bedding is the single loudest luxury signal in the house. Then vacuum under the bed, where dust settles undisturbed for months and quietly contributes to that faint stale bedroom smell. Clear the nightstands and dresser tops, because candles and dim lamps need real estate, and wax flames beside clutter is a hazard, not a mood. Day One: Fix the Light and the Air Lighting and scent are the final layer, and both depend on cleanliness to work. A bulb filmed with dust throws dim light; dusty shades and grubby windows diffuse everything into grey, so wipe the fixtures and clean the glass, and the same lamps will suddenly glow like a rented venue. Scent works the same way in reverse. Pumping a vanilla candle over a full garbage bin or a musty carpet produces a cloying fog. Take out every trash can, scrub the sink drains, and vacuum or deep-clean carpets so the air starts neutral, then let flowers or a quality candle carry a note that is not competing with funk. Two finishing touches worth their minutes: the entryway, where shoes tripping you in the door and a salt-gritty floor strangle the mood before your coat is off, and the question of who does all this. Acting of service is a real love language, and scrubbing beside your partner sends it loudly. The strategic error is compressing the whole plan into February 13th, because aching and exhausted is not a valentine. Hand the heavy layer to professionals instead and arrive at the night fresh: Toronto Shine Cleaning handles under-bed vacuuming, tub scrubbing, fixture polishing, and the rest as a bookable deep cleaning that is honestly a gift to the relationship. Call (647) 424-0355 to lock a slot before the week fills, or keep the whole February baseline simple with our regular maid service; you can compare what to expect from each option and check current rates on our pricing page. Days out Focus The one visible win 5 Declutter shared rooms Table reclaimed for two 4 Kitchen degrease Empty sink, ready dishwasher 3 Bathroom detail Grout lines and gleaming chrome 2 Bedroom reset Fresh linens, vacuumed floor 1 Light and scent Bright lamps, neutral air Valentine’s Cleaning Questions How many days before Valentine’s Day should I start? Spreading the work over roughly a week keeps each session short and keeps the 13th free. The bedroom and bathroom details especially benefit from breathing room instead of a single panicked Saturday. Is hiring cleaners before a date night weird? It is one of the highest-leverage moves available. You trade a sore back for a spotless venue, and arriving at the evening rested changes the entire quality of the time you actually spend together. What should I do about cooking smells afterward? Simmer water with cinnamon or citrus peels to refresh the air gently, ventilate briefly even in February, and take out trash the same night so nothing ferments while you relax. Which single task matters most if I only do one? Fresh laundry on the bed. It is the tactile luxury guests notice first and the signal that the

Valentine’s Day: 5 Essential Cleaning Tasks You Should do Before February 14th Read More »

Storage Ornaments: 8 Amazing Tips For Storing Christmas Decorations Efficiently

Why Smart Christmas Decoration Storage Pays Off The week after the holidays has a particular feel: the guests are gone, the anticipation has faded, and the house that sparkled in December now looks tired and cluttered. Taking the tree down is nobody’s favorite chore, so most of us rush, cramming lights into grocery bags and piling wreaths into the basement corner. That haste has a price, paid next November when you unpack crushed ornaments, knotted lights, and a flattened artificial tree. Efficient Christmas storage protects the money invested in your decor and keeps the holiday magic easy to reach. These eight tips will carry your decorations safely through the off season. Tip 1: Audit Everything Before You Pack It Away Storage starts with a ruthless purge, not a box. As you pull ornaments off the tree and garlands off the banister, check the condition of every item. A light string that flickered all season or has a dead section will not fix itself in the attic, so recycle it now. Ornaments with cracked caps, shattered glass, or a style you no longer love should be donated or tossed. Storing broken or unwanted items wastes space and guarantees you will sort through the same junk next year. Keep only what is functional and brings you joy. Tips 2 and 5: Trees, Wreaths, and Garlands Need Structure The artificial tree is the biggest item you store, and its original cardboard box rarely survives more than one season. Cardboard weakens with moisture and attracts pests, and fighting a fluffy tree back into its factory box is a losing battle. A dedicated canvas tree bag is moisture resistant and roomy enough to hold the sections without crushing needles, and binding each section with cinch straps or old belts shrinks the bundle dramatically. With enough ceiling height, upright storage bags let the tree stand tall all year, so you skip most of the fluffing next December. Wreaths and garlands are the opposite problem: bulky and airy, they flatten under heavy boxes. Hard-shell wreath containers preserve the shape, or hang wreaths on a simple hook in the garage or basement. Coil garlands into a clear bin, or wrap them around a coat hanger, but never let them get compressed. Tips 3 and 4: Protect Ornaments and Tame the Lights Throwing every bauble into one giant bin is a recipe for heartbreak. Fragile glass and ceramic ornaments need individual protection: plastic cups glued to a sheet of cardboard make crush-proof cells for round ornaments, egg cartons cradle small baubles, and bubble wrap is essential for heavy or irregular keepsakes. Then group ornaments by color, theme, or room, so the set for the dining room tree lives in its own labeled box and you never unpack everything to decorate one corner. For lights, the enemy is entropy. Never wind a strand around your arm and drop the coil in a box, because it will tangle as it relaxes. Instead, cut notches in a flat piece of cardboard, wind the strand tautly around it, and plug the male end into the female end to lock it. Masking tape labeled “Mantel” or “Tree Bottom” saves hours of testing next year. Tips 6 and 7: Textiles, Bins, and Labels Stockings, tree skirts, holiday pillows, and table runners face a biological enemy: fabric attracts dust mites, moths, and mildew, especially with food crumbs still in the fibers. Launder or dry-clean everything first, then vacuum-seal bags compress bulky textiles while sealing out moisture and insects. Without vacuum bags, latching plastic bins with a silica gel packet inside are the next best thing. Opaque bins hide their contents, so switch to clear plastic bins and label with detail: “Christmas” is useless, while “Living Room: Stockings, Mantle Lights, and Nutcrackers” is helpful. Load by logic: the items you need first, like Advent calendars and the door wreath, go in last so they sit at the front of the stack, and number the bins so nothing goes missing. Christmas Storage Cheat Sheet Item Best Storage Method Mistake to Avoid Artificial tree Canvas tree bag, sections bound with straps Reusing the original cardboard box Glass ornaments Cups glued to cardboard, egg cartons, bubble wrap Throwing everything loose into one bin Light strings Taut wind on a notched cardboard spool Winding around your arm and dropping in a box Wreaths and garlands Hard-shell containers or hanging hooks Stacking heavy boxes on top Stockings and pillows Laundered, then vacuum-sealed Storing dirty fabric in cardboard Everything Clear bins with specific labels, numbered Opaque bins marked only “Christmas” Your 8-Step Packing Sequence Audit every item and purge broken lights and ornaments first. Bind tree sections with straps and slide them into a canvas bag. Wrap fragile baubles in cups, egg cartons, or bubble wrap. Group ornaments by color, theme, or room in labeled boxes. Wind light strands on cardboard spools and label each plug. Box wreaths in hard shells; coil garlands without compression. Launder textiles, then vacuum-seal or bin them with silica gel. Load bins so first-needed items sit at the front and top. Frequently Asked Questions Can I store Christmas lights by wrapping them around my arm? No, that coil relaxes into knots as soon as it hits the box. Wind each strand tautly around a notched cardboard spool and plug the ends together instead. Are cardboard boxes fine for storing decorations? They are risky long-term. Cardboard weakens with moisture and invites pests, so clear plastic latching bins with silica gel packets are safer, especially in a basement. Should I wash stockings and tree skirts before storing them? Yes, launder or dry-clean textiles first. Food crumbs attract moths, while vacuum-sealed clean fabric stays fresh all year. What is the best way to store fragile glass ornaments? Give each bauble its own cell: plastic cups glued to cardboard for round ornaments, egg cartons for small ones, and bubble wrap for irregular or heavy pieces, then group them by room in labeled boxes. Tip 8: Finish With a Clean House Reset

Storage Ornaments: 8 Amazing Tips For Storing Christmas Decorations Efficiently Read More »

Woman making a to-do list for January after the holiday season.

The January Reset: 8 Essential Tasks to Recover from the Holidays

The January Reset: 8 Essential Tasks to Recover From the Holidays January in Canada is a stark transition: festive lights down, hosting adrenaline gone, and the coldest, darkest stretch of the year arrived. Your home shifts from hosting mode into defense mode, because dry air, road salt, and wasted heat all attack at once. This reset list is a strategic plan for your home’s most vulnerable season, not just a cleaning schedule. 1. Take Down the Tree and Recover From the Holidays Takedown is the first priority, beyond boxing ornaments. By the first week of January, a real tree is usually a dehydrated fire hazard, dropping debris that embeds in carpets and scratches hardwood. Bag the tree before hauling it out, then vacuum with the hose attachment, never the beater bar, which jams on needles. Pull needles out of baseboards, vents, and deep rug pile, label boxes by room as you pack, and toss any light string that failed this year. 2. Win the War on Road Salt January is when salting trucks are busiest, and your entryway floors suffer most. The white crust on boots is calcium chloride or sodium chloride, highly alkaline and abrasive: on hardwood it eats through the polyurethane finish and stains the fibers grey, and on tile it degrades the grout. Wet mopping just spreads the brine, so neutralize it with one cup of vinegar per gallon of warm water, whose acidity breaks the salt bonds. Rinse boot trays in a utility sink, and enforce a no-shoes-past-the-mat policy, your flooring’s best defense all month. 3. Manage Indoor Air Quality and Humidity The house is sealed tight and the furnace runs around the clock, circulating air that grows drier and dustier by the day. Ideal winter humidity sits between 30% and 40%: any lower, and hardwood shrinks and cracks while static pulls dust onto every surface; any higher, and condensation forms inside windows, inviting mold on the sills. Run a humidifier if needed but clean it weekly so it does not spray bacteria, and change the furnace filter, since a clogged one restricts airflow and recirculates allergens. Health Canada’s guidance on indoor air contaminants and health covers the topic in detail. 4. Cut the Dust: Coils, Fans, and Vents With the furnace blasting, convection piles dust onto door frames, fan blades, and refrigerator coils. Vacuum the coils: coated in dust, the fridge cannot shed heat, so the compressor runs longer, wasting energy and shortening its life. Bathroom fans matter too: ventilation is the only exit for shower moisture in a sealed house, and a grille clogged with fuzz traps humidity, inviting mildew on cold exterior walls. 5. Detox the Kitchen After December The kitchen carries the scars of December excess. Purge the refrigerator ruthlessly: bin anything past its date or looking questionable, then scrub the shelves in hot soapy water until every sticky residue is gone. If the oven skipped its pre-turkey scrub, avoid the high-heat self-clean: with sealed windows the fumes have nowhere to escape, so hand-scrub with a baking soda paste instead. Scrub the dishwasher filter too, since it processed a season of grease and gravy. 6. Check Safety Systems Carbon monoxide kills silently, and the danger peaks each winter as furnaces, water heaters, and gas stoves overwork behind sealed windows. Test every CO detector and smoke alarm now, and clear snow and ice off external vents, including the dryer duct and furnace exhaust; a blocked flue can push deadly CO back indoors. Finally, vacuum the dryer vent hose: dry air breeds static and lint ignites easily. 7. Refresh Winter Gear and Declutter One In, One Out The laundry room needs attention too, since coats, scarves, and mittens sponge up sweat, street grime, and bacteria yet rarely get washed. Launder down coats with tennis balls to re-fluff the fill, wash hats and scarves, and treat cuff salt stains with vinegar before the fibers are damaged. December also left a flood of new gifts, so apply the one-in-one-out rule: for every new sweater, donate an old one; for every new toy, take out a broken one. Clutter gathers dust and blocks heat flow, so take on one closet or drawer weekly. The January Reset Checklist Bag and remove the tree, then vacuum needles with the hose attachment. Neutralize entryway salt with a vinegar and water solution. Keep indoor humidity between 30% and 40%; clean the humidifier weekly. Vacuum fridge coils, bathroom fan grilles, and change the furnace filter. Purge the fridge and clean the oven with a baking soda paste. Test CO detectors and clear snow from exterior vents. Wash winter gear and treat salt stains quickly. Declutter with the one-in-one-out rule, one closet a week. January Home Risks at a Glance Threat Damage If Ignored Fast Fix Dry indoor air Shrinking hardwood, heavy static dust Humidifier, cleaned weekly, aiming for 30-40% Road salt Grey stains in finish, ruined grout Vinegar-water wash and no shoes past the mat Clogged furnace filter Overheating furnace, recirculated allergens Fresh filter early in the month Dusty fridge coils Longer compressor runs, wasted energy Vacuum coils at the back or bottom Blocked vents Carbon monoxide backing into the home Clear snow and ice; vacuum dryer hose lint Humid bathroom Mildew on cold walls Clean exhaust fan grille Frequently Asked Questions Why is 30-40% indoor humidity recommended in a Canadian winter? Below that range, hardwood shrinks and static electricity builds; above it, condensation forms on windows and mold can grow on sills. That band keeps both problems away. Can I vacuum pine needles with a regular upright vacuum? Not with a spinning brush running; the beater bar jams on needles and the motor can overheat. Switch to the hose attachment or a hard-floor setting instead. Is the oven self-clean cycle safe in January? In a tightly sealed winter home it is a poor choice, since the high-heat cycle releases fumes with nowhere to escape. Manual cleaning with a baking soda paste protects your indoor air. How do I remove road

The January Reset: 8 Essential Tasks to Recover from the Holidays Read More »

The house needs cleaning after the Christmas party.

Removing Glitter from Upholstery: The Best Hacks for a Sparkle-Free Sofa

The Morning After the Party: Assess the Damage Honestly The winter sun on the morning of December 26 illuminates what the season hid. The sofa glitters where an ornament burst, the floor is a mosaic of fallen pine needles, and the rug near the dining table hides a solidified patch of turkey gravy. Restoring the house from this beautiful chaos is a triage operation: prioritize what causes permanent damage, then clear the rest. For a seasonal reset that covers every room, our deep cleaning service handles the heavy lifting. Removing Glitter from Upholstery Without Losing Your Mind Glitter clings to fabric through static electricity, which is why dry dusting fails: wiping a dry cloth charges the particles further, so they jump to vertical surfaces or stick to your clothes. On hard surfaces, use a damp microfiber cloth; moisture neutralizes the charge and adds weight so the particles lift instead of scattering. On a sofa or carpet, the trouble is deeper: vacuuming misses glitter trapped at the base of the pile. Press a ball of children’s play dough, or a wad of masking tape, into the sparkled area; the glitter adheres to the compound more readily than to the fibers. A lint roller is faster across large areas but slightly less precise. Tackle glitter immediately: left alone it migrates into HVAC vents and circulates for months. A simple toolkit makes the sparkle manageable: A lint roller for fast passes over large cushion surfaces. Play dough or masking tape pressed into the pile to lift charged particles. A damp microfiber cloth, which neutralizes static on hard surrounds like coffee tables. Pine Needles: Put Down the Broom By the 26th the tree is dropping hundreds of resin-coated needles. Sweeping is a tactical error: broom bristles flick them into the air or drive them deeper into grout and rug weave, and the sap smears into sticky streaks that attract dirt. Work on your hands and knees with a vacuum hose and crevice tool instead, and do not run the upright beater bar over needles, which jam the mechanism and burn out the belt. On upholstery, wrap duct tape sticky-side out around your hand and pat the cushions. For sap on hardwood, water does nothing; rubbing alcohol or hand sanitizer on a microfiber cloth dissolves it instantly. Holiday Food Stains: The Triage Table Needles and glitter are annoyances, but food stains are a structural threat to textiles. Each type needs a different first move. Stain Do this first Never do this Gravy Scrape solids with a dull knife, mound baking soda over the spot for 15 minutes to pull the fat out, vacuum, then blot with lukewarm water and clear bleach-free dish soap Scrub with hot water, which cooks the protein and sets the stain, or skip the powder and go straight to water, which locks the grease in Red wine Blot immediately with a clean white cloth, pour club soda on the spot and keep blotting; if pigment remains, use one part white vinegar to two parts water with a drop of dish soap Rub, which untwists fibers into permanent blooming, or pour white wine on it, which adds sugar that turns sticky and gray Candle wax Let it harden or speed it up with ice, then shatter and scrape up the chunks and vacuum; melt residue by running a low, no-steam iron over a brown paper bag, moving the paper frequently Wipe hot wax, which smears oil deeper; iron synthetic carpets without testing an inconspicuous spot first Cranberry sauce and chocolate Remove solids, treat cranberry with cool water and vinegar, and chocolate with cold water before an enzyme cleaner digests the cocoa butter and milk proteins Use hot water on fruit dyes, which sets them Do Not Forget the Walls or the Guest Bathroom A magic eraser sponge handles scuffs gently on painted walls; for food splashes, warm water with dish soap beats anything harsher. For product safety context, Health Canada’s household products guidance covers how to choose cleaners responsibly. Then disinfect the powder room high-touch points: flush handle, faucet taps, and doorknob have been touched by every guest. Per CDC cleaning and disinfecting guidance, the surface must stay wet for several minutes before the chemicals actually kill viruses, a detail a quick wipe skips entirely. Glitter and Holiday Mess FAQ Why can I still see glitter after vacuuming the sofa? Suction alone cannot beat static. Vacuum first for the loose layer, then press play dough or masking tape into the pile to pull out charged particles. Can I wash a glitter-covered throw rug in the machine? Shake and tape it outside first to remove loose sparkle, then wash cold. Run the cycle again if glitter remains. Is club soda really better than white wine on red wine? Yes. Carbonation lifts dye particles to the surface without adding sugar that will turn sticky and gray in the carpet. How long do disinfectants need to sit on surfaces? As the CDC notes, the surface must remain visibly wet for several minutes. Read the label’s dwell time and do not wipe early. When Triage Stops Being Enough None of this is easy when your energy is already spent. Post-party cleanup means bending and scrubbing at the moment you would rather enjoy break, and resetting an entire house from Christmas chaos to January calm is a massive undertaking worth delegating. Toronto Shine Cleaning brings industrial extraction that pulls glitter from carpet and professional products that degrease the kitchen after weeks of hosting. Book through our pricing page, keep the year tidy with a regular cleaning plan, or call (647) 424-0355 and let reinforcements handle the hangover.

Removing Glitter from Upholstery: The Best Hacks for a Sparkle-Free Sofa Read More »