Mental Health

Hostess relaxing on the sofa before the New Year's Eve party.

Final Touch: How to Curate the Perfect Atmosphere for New Year’s Eve

The heavy lifting is finally done. The floors have been scrubbed, the carpets vacuumed, and the refrigerator purged of its expired condiments to make way for platters of food. You have likely spent the last week in a state of high-functioning anxiety, managing a checklist of chores that seemed to grow longer with every item you crossed off. Now, however, you have reached the final countdown. The guests will be arriving in a matter of hours. This is the transition point where you must shift your mindset from that of a cleaner to that of a host. The “final touches” are not about deep sanitation; they are about staging, atmosphere, and logistics. It is the subtle art of curation that transforms a house from a sterile box into a warm, inviting sanctuary ready for celebration. These last-minute adjustments are what guests actually notice, influencing how they feel the moment they step across the threshold. Lighting The most immediate and transformative change you can make in the final hour is the lighting. Lighting is the makeup of the home; it can hide flaws, soften edges, and create intimacy. The harsh glare of overhead recessed lighting or a central chandelier is the enemy of a party atmosphere. It makes guests feel exposed and highlights every speck of dust you might have missed. Walk through your home and turn off the “big lights.” Instead, rely on floor lamps, table lamps, and sconces to create pools of warm, amber light. This lowers the visual center of gravity in the room, encouraging people to sit and relax. If you have dimmer switches, use them aggressively. If you lack sufficient lamp light, candles are your best friend. A few well-placed votives on the mantle or the entryway table create a flickering movement that feels alive and festive. However, ensure these are placed safely away from where coats might swing or elbows might knock them over. Smell Closely tied to lighting is the olfactory experience. The smell of a home is the first thing a guest registers, often before they even take off their coat. You want to avoid the chemical scent of the cleaning products you just used. A house that smells like bleach and lemon pine-sol screams “I just panic-cleaned,” which is not the vibe of effortless hospitality you want to project. Conversely, you must be careful with artificial air fresheners. A heavy, cloying “Vanilla Cookie” candle can be headache-inducing and compete with the aroma of the food you are serving. The best approach for the final touch is a natural, subtle scent. A simmer pot on the back of the stove is an old real estate trick for a reason. Simmering water with a cinnamon stick, a few cloves, and orange peels creates a warm, spicy humidity that permeates the house without smelling synthetic. It smells like the season itself. Entryway The entryway is the bottleneck of the evening, the zone of highest friction. In the final sweep, look at this space through the eyes of a guest who is carrying a bottle of wine, a gift, and a heavy winter coat. Is there actually room for them? A common mistake is leaving the family’s own coats and shoes in the prime spots. Clear out the coat closet entirely. Move your family’s winter gear to a bedroom or the basement for the night. Leave the hangers empty and ready. If you expect a large crowd, a closet might not be enough. Setting up a temporary garment rack or clearing a bed in a nearby room for coats is a thoughtful logistical touch that prevents the dreaded “coat pile” from toppling over on the sofa. Check the floor mat. If it is soaked from your own preparations, swap it for a dry one or lay down a secondary runner. A wet sock is a terrible way to start a party. Bathroom The powder room-the guest bathroom-requires a specific level of detail because it is the one space where your guests will be alone, with time to look around. You have likely already scrubbed the toilet, but the final touches are about comfort. Check the hand towel situation. A single cloth towel will be damp and germ-ridden after the third guest uses it. Consider a stack of single-use paper guest towels, or have a basket of fresh cloth towels ready to be swapped out halfway through the night. Ensure the hand soap dispenser is full; nothing kills the mood like a guest having to water down the dregs of the soap bottle. Check the toilet paper supply. Do not force your guest to root through your vanity cabinets in a panic. A spare roll should be visible and accessible, perhaps in a basket on the tank or a designated holder. Finally, wipe the faucet and the mirror one last time with a microfiber cloth to remove any water spots. That gleam of chrome suggests a level of cleanliness that reassures the guest. Kitchen In the kitchen, the goal of the final touch is to defend your workspace. The kitchen is a magnet; guests will inevitably gravitate toward the island or the counters where you are trying to plate food. To manage this, you must clear the decks. Remove any appliance that is not essential for the party. The toaster, the blender, and the coffee maker (unless coffee is being served) should be stowed away to maximize surface area. Empty the dishwasher and the trash can completely before the first doorbell rings. You will need an empty dishwasher to hide dirty prep dishes quickly as the party starts, and you will need a completely empty trash bin to accommodate the disposable plates and napkins of the evening. If the trash is already half-full of your prep waste, it will overflow within an hour. Set up a “drinks station” away from the main cooking area. By placing the wine, beer, and water glasses on a sideboard or a table in the living room, you physically draw the

Final Touch: How to Curate the Perfect Atmosphere for New Year’s Eve Read More »

woman needing to organize the house for holiday guests

5 Ways to Organize Your Home to Accommodate Extra Guests

The end of the year brings a significant change to the atmosphere of a home, and we need to organize for guests; the house transforms from a private sanctuary, used for daily work and study routines, into a semi-public space dedicated to hospitality and celebrations. This metamorphosis brings with it a unique set of logistical challenges. Hosting guests, whether for a single dinner party or an extended stay, requires more than just a surface-level clean; it demands a structural reorganization of the living environment. The house must function differently when occupancy doubles or triples. Pathways need to be clearer, storage needs to be accessible, and the visual noise of daily life needs to be silenced to create a welcoming backdrop for the festivities. Organizing for guests is an exercise in empathy, requiring the host to walk through their own home with the eyes of a stranger to identify the friction points that might go unnoticed during the rest of the year. Entryway The organization process must begin at the threshold. The entryway is the bottleneck of the holiday home. In the winter months, this area is subjected to an onslaught of bulky coats, wet boots, scarves, and bags. A common mistake is failing to clear the family’s personal gear before the guests arrive. If the coat rack is already full of the host’s jackets, guests are left holding their outerwear or piling it on a bed in a distant room. The first step of organization is a ruthless purge of the front hall closet. Move the family’s winter gear to a secondary location, such as a garage, a basement, or a bedroom closet, to leave the prime real estate empty for visitors. Provide ample, sturdy hangers-not the flimsy wire ones that buckle under the weight of a wool peacoat. If the closet is small, setting up a temporary garment rack can prevent the “coat pile” on the sofa, which immediately clutters the living space. Floor space in the entryway is equally critical. In many regions, the end of the year means snow, mud, and salt. A standard doormat is rarely sufficient for a party’s worth of wet boots. Investing in large, rubber boot trays protects the flooring and keeps the slush contained. Organizing this area also means removing the visual clutter of mail, keys, and school permissions forms that tend to accumulate on entry tables. A clear surface at the door allows guests to set down a purse or a gift comfortably without knocking over a stack of bills. It sets the tone for the rest of the home; a chaotic entryway signals a chaotic visit, while a streamlined one suggests order and calm. Guest Room Moving into the guest accommodations, the definition of organization shifts from storage to comfort. If you have a dedicated guest room, it often serves as a storage unit for the other eleven months of the year, housing wrapping paper, out-of-season clothes, or exercise equipment. This debris must be removed, not just pushed into the corner. The guest needs to feel that the room was prepared specifically for them, not that they are invading a storage locker. This means clearing out the closet and the dresser drawers. It is uncomfortable for a guest to live out of a suitcase for a week because the drawers are full of the host’s old sweaters. Empty at least two drawers and provide cleared hanging space. The bedside area requires specific attention to modern needs. In the past, a lamp and a clock were sufficient. Today, the most important amenity is an accessible power outlet. Guests should not have to crawl under the bed or move heavy furniture to charge their phones. Organizing the room means checking the outlet situation and, if necessary, adding a power strip or an extension cord that sits on the nightstand. Bedding should be checked for freshness well in advance. Linens that have sat in a cupboard for a year often develop a stale, musty smell. Washing everything, including the duvet cover and the mattress protector, ensures the bed feels fresh. Adding an extra blanket at the foot of the bed is a functional organizational touch that prevents the guest from having to ask for more heat in the middle of the night. The bathroom is perhaps the most scrutinized room in the house. When organizing for guests, the goal is to make the space intuitive. Guests should never have to search for the essentials. Toilet paper should be stocked visibly, either in a basket or a clear stack, so there is no awkwardness when a roll runs out. Towels need to be distinct and plentiful. A common organizing tactic is to provide a specific color of towel for guests, separating them from the family’s daily linens. This prevents confusion and ensures that the guest always knows which towel is theirs. The countertops must be cleared of the host’s personal clutter. Toothbrushes, makeup bags, and razor stands should be stowed away in drawers or medicine cabinets. A guest needs surface area to place their own toiletries. If the shower is to be shared, clear the rim of the tub of half-empty shampoo bottles. A streamlined shower feels cleaner and more inviting than one crowded with the family’s grooming products. Kitchen The kitchen, usually the hub of the holiday, requires a zoning strategy. The danger in a kitchen during a party is that guests naturally congregate there, often blocking the work triangle (stove, sink, refrigerator) and hindering the cook. Organizing the kitchen for guests involves creating “self-serve” stations that draw people away from the active cooking zones. Set up a drinks station with glasses, ice, and beverages on a sideboard or a separate table. Create a snack zone on the island or a coffee table in the adjacent room. By physically separating the consumption areas from the preparation areas, you manage the flow of traffic. Inside the kitchen, the countertops must be ruthlessly decluttered. Appliances that are not essential for the holiday meal-the toaster,

5 Ways to Organize Your Home to Accommodate Extra Guests Read More »

flu season

Flu Season: Is Your “Clean” Home Making You Sick? The Hidden Germs You Missed

Why Your “Clean” Home Can Still Spread the Flu Flu season in Canada peaks in December and January, when homes are sealed tight against the cold and filled with guests. Influenza viruses travel in droplets from coughs and sneezes, but they also ride on hands and settle on surfaces, where they can survive on hard materials like stainless steel and plastic for up to 48 hours. A home that looks spotless can still be a transmission hub, because the germs are hiding on the objects everyone touches and almost no one sanitizes. Protecting your household means shifting from cosmetic cleaning to targeted, health-focused cleaning. Clean First, Then Disinfect: the Order Matters Cleaning and disinfecting are two different steps, and skipping the first one makes the second fail. Cleaning physically removes dirt, dust, and germs from a surface using soap or detergent and water. Disinfecting then kills the germs that remain, using a registered chemical product. If you spray disinfectant onto a visibly dirty surface, the organic soil shields the germs and inactivates the product, so the process wastes time and leaves pathogens behind. The CDC home cleaning guidance recommends always cleaning surfaces before disinfecting them, and doing both steps more often during cold and flu season. Respect the Dwell Time The most common mistake is wiping disinfectant off too soon. Registered disinfectants need to stay visibly wet on the surface for a set contact time, usually three to ten minutes depending on the product, before they actually kill viruses. Spray and immediately wipe removes the product before it works. Read the label, apply enough product to keep the surface wet for the full dwell time, and let it air dry. This one habit separates real disinfecting from just moving germs around. The Hidden Germ Hotspots Most Homes Miss We all wipe kitchen counters, but the flu spreads through the objects fingers touch constantly. The handle of the refrigerator, the buttons on the microwave, the flush lever in the bathroom, the light switch plate, and the remote control all pass from hand to hand dozens of times a day, and they rarely see a disinfectant. Door hardware deserves special attention in winter: the entry doorknob, the deadbolt, the storm door handle, and any garage keypad or smart lock are touched by every person entering the house, often right after touching outdoor surfaces. These surfaces turn a family home into a germ relay during a busy holiday week. Room Hidden hotspots Flu-season routine Entryway Doorknobs, deadbolt, keypad, handrails Wipe with disinfectant daily Kitchen Fridge and oven handles, coffee maker, salt and pepper shakers Clean, then disinfect twice weekly Living room Remote controls, game controllers, light switches Sanitize weekly with alcohol wipes Bathroom Flush lever, faucet handles, toothbrush holder Disinfect every day during peak season Home office Keyboard, mouse, phone screen Wipe weekly, never drip liquid inside Electronics, Towels, and the Germs You Carry Daily Smartphones are the ultimate high-touch objects: they go from kitchen counter to bathroom to bed, and they are pressed against the face dozens of times a day. Most modern phone screens handle gentle disinfection well; wipes with 70 percent isopropyl alcohol are generally safe for touchscreens, while bleach, abrasive cleaners, and dripping liquids are not. Apply the wipe, let the surface dry completely, and avoid pooling moisture in ports and speakers. Keyboards and mice need the same attention, especially in households where several people share one workspace. Hand towels are another overlooked link in the chain. A shared bathroom towel can be touched by every member of a household, plus guests, many times a day during the December party season. During flu season, swap bathroom hand towels daily, wash them in hot water, and consider paper towels for gatherings so every guest dries their hands on a fresh sheet. The CDC handwashing guidance reminds us that clean hands stop the spread, but only if the towel that dries them is not itself a shared surface. Pillowcases and bedding deserve more frequent washing too, since flu sufferers shed virus onto linens while they sleep. Air, Humidity, and the Bigger Picture Viruses do not only wait on surfaces. Flu droplets hang in the air and attach to dust particles, which is why heating vents, ceiling fans, and dusty baseboards deserve a vacuum pass before and during flu season. Keeping indoor humidity around 40 to 60 percent also helps: flu viruses survive longer and transmit more easily in dry air, and comfortably moist air keeps the nasal passages that trap viruses working properly. A humidifier, regular ventilation, and thorough dusting work alongside surface disinfection to lower the viral load. Build a Daily Germ-Breaking Routine Disinfect entry door hardware and light switches every morning Wipe down kitchen appliance handles and counter zones after each meal Sanitize the flush lever, faucet handles, and toothbrush holder daily Give remotes, phones, and keyboards an alcohol wipe weekly Switch to fresh hand towels daily or paper towels when guests visit Vacuum vents, baseboards, and under furniture to remove dust that carries particles Consistency beats intensity. A two-minute pass over the high-touch map every day does more to protect a family than a marathon cleaning session once a month, because germs are reintroduced constantly by the people who live there. When someone in the house is already sick, add daily disinfection of everything they touch, wash your own hands after contact, and keep their linens and towels separate until they recover. Frequently Asked Questions About Flu Season Germs What is the difference between cleaning and disinfecting? Cleaning removes dirt and some germs with soap and water; disinfecting uses chemicals to kill the germs that remain. You need both, in that order, because dirt stops disinfectants from working. How long should disinfectant stay on a surface? Read the label: most registered disinfectants need to stay visibly wet for three to ten minutes to kill viruses. Wiping them off early defeats the purpose, so apply enough product and let it air dry. Is it safe to clean my

Flu Season: Is Your “Clean” Home Making You Sick? The Hidden Germs You Missed Read More »

Dangerous to Your Health: 5 Common Products That are Dangerous For Your Daily Life

Are Everyday Cleaning Products Dangerous to Your Health? Your home feels like the safe place, sealed off from city pollution. Inside many Toronto houses the opposite is true: the sprays under the sink can make indoor air more toxic than the air outside. Health Canada warns that household chemical products can cause poisonings, burns, fires and explosions when handled unsafely. A strong chemical smell is not proof of clean. Here is what five everyday products actually do, and the simpler habits that keep homes safe. Five Common Products Dangerous to Your Health 1. Bleach Bleach, the sodium hypochlorite default against mold, mildew and bathroom grime, is corrosive enough to burn skin and eyes on contact, and it is highly volatile. In a closed shower stall or small bathroom, its fumes react with organic matter and form chlorinated volatile organic compounds that immediately inflame the mucous membranes of the throat and lungs, especially dangerous with respiratory conditions. The deadliest habit is mixing: bleach plus ammonia, which lives in urine and many glass cleaners, generates chloramine gas, and bleach plus an acidic cleaner releases chlorine gas. Both can lead to hospitalization or worse. 2. Ammonia Glass and Window Cleaners Ammonia is why glass cleaner dries fast without streaks, and why it demands respect. It hunts moisture, so inhaled ammonia attacks the eyes, throat and lungs directly. High concentrations cause chemical burns in the respiratory tract and aggravate chronic conditions like asthma. Trigger-sprays aerosolize it into a fine mist that lingers in your breathing zone. That sharp odor is a warning signal, not evidence the glass needs you. 3. Fragrance, Air Fresheners and Fabric Deodorizers The word fragrance, or parfum, on a label is a regulatory loophole: scents count as trade secrets, so the hundreds of chemicals behind the scent are never listed. The cocktail commonly includes phthalates, added to make scents linger, which are known endocrine disruptors that mimic hormones and can interfere with reproductive development over long-term exposure. Air fresheners and fabric sprays do not clean anything. Some release agents that deaden your nerves or coat nasal passages with oily film; others bury odors under volatile organic compounds tied to headaches, dizziness and fatigue. Aerosol propellants add flammable lung irritants. The Government of Canada’s household products safety hub lists hazards in everyday cleaning items. 4. Oven Cleaners and Drain Openers Oven cleaners are built on lye, or sodium hydroxide, which strips baked-on grease by turning it into soap. That same reaction destroys living tissue: splashes cause severe burns and permanent blindness. Spraying a warm oven vaporizes the lye into a toxic cloud that fills the kitchen. Drain openers burn through hair and grease clogs with concentrated sulfuric acid or lye, generating intense heat that can damage old pipes; if a plumber later snakes a surviving clog, the splash-back is caustic. 5. Disinfectant Wipes and Sprays Quaternary ammonium compounds, the quats behind most disinfectant wipes and sprays, kill germs well, but they are powerful lung irritants. Growing evidence suggests frequent exposure can cause asthma even in otherwise healthy users. Quats also leave a residue, and a child who touches a wiped table then sucks their fingers is ingesting a pesticide. Blanketing whole rooms instead of high-touch points adds chemical load and feeds antibiotic resistance. Two Traps Behind Friendly Labels Carpet cleaners and upholstery shampoos bring their own risks. Many spot removers rely on perchloroethylene, a dry-cleaning solvent that is a neurotoxin and a classified carcinogen, and across a large floor it keeps off-gassing for days or weeks. Naphthalene, the mothball chemical in some carpet cleaners, releases fumes that can cause confusion, nausea and liver damage. Fibers trap all of it and release it back with every step and sit. Green labels deserve the same skepticism. The word natural is largely unregulated in cleaning products, and a green bottle can still carry allergens like limonene, a citrus oil that reacts with ozone in your air to form formaldehyde, a known carcinogen. Concentrated plant-based detergents can still irritate skin and lungs. Read the ingredient list, not the leaf on the label. The Real Risk Is the Daily Total Toxicologists call the running tally your body burden. One spray does little; a weekly ritual of glass cleaner, floor polish, counter spray, toilet cleaner and air freshener becomes a chemical soup the body must filter. When that load stays high, chronic inflammation, skin conditions and respiratory sensitivity can follow. Children and pets pay the most because smaller bodies and faster metabolisms process the same exposure less efficiently. Safer Swaps That Still Clean The most effective cleaner is usually the simplest: mechanical action. Removing dirt beats masking it. Instead of Reach for Why it works Everyday surface sprays Microfiber cloth, water and real scrubbing Fibers trap dirt and pathogens, removing more bacteria than a light chemical wipe, with no residue left behind Bleach on general surfaces Hydrogen peroxide Disinfects without chlorine fumes or toxic residue Commercial limescale removers White vinegar A mild acid that dissolves mineral deposits and soap scum without off-gassing Scouring powders Baking soda Gentle physical abrasion for sinks, tubs and baked-on messes Ventilation and Protection: The Free Upgrades Even safe cleaners need discipline. Health Canada’s page on using household chemicals safely covers the buying, use and storage rules that prevent accidents, and these habits carry it into daily practice: Ventilate. Never clean a sealed room: open a window and run the exhaust fan, especially in small bathrooms where fume levels spike fastest. Protect your skin. It is the body’s largest organ and absorbs chemicals readily, so glove up around degreasers and solvents and wear a mask for concentrated products. Remove, don’t mask. The goal is neutral air and residue-free surfaces, not a perfume cloud that signals a fresh chemical dose. Frequently Asked Questions Is it really dangerous to mix cleaning products? Yes. Bleach plus ammonia releases chloramine gas, and bleach plus any acidic cleaner releases chlorine gas. Both react within seconds in a closed room and can lead to hospitalization. Use one product

Dangerous to Your Health: 5 Common Products That are Dangerous For Your Daily Life Read More »

Make Your Stove Look New Again with These Simple Tools

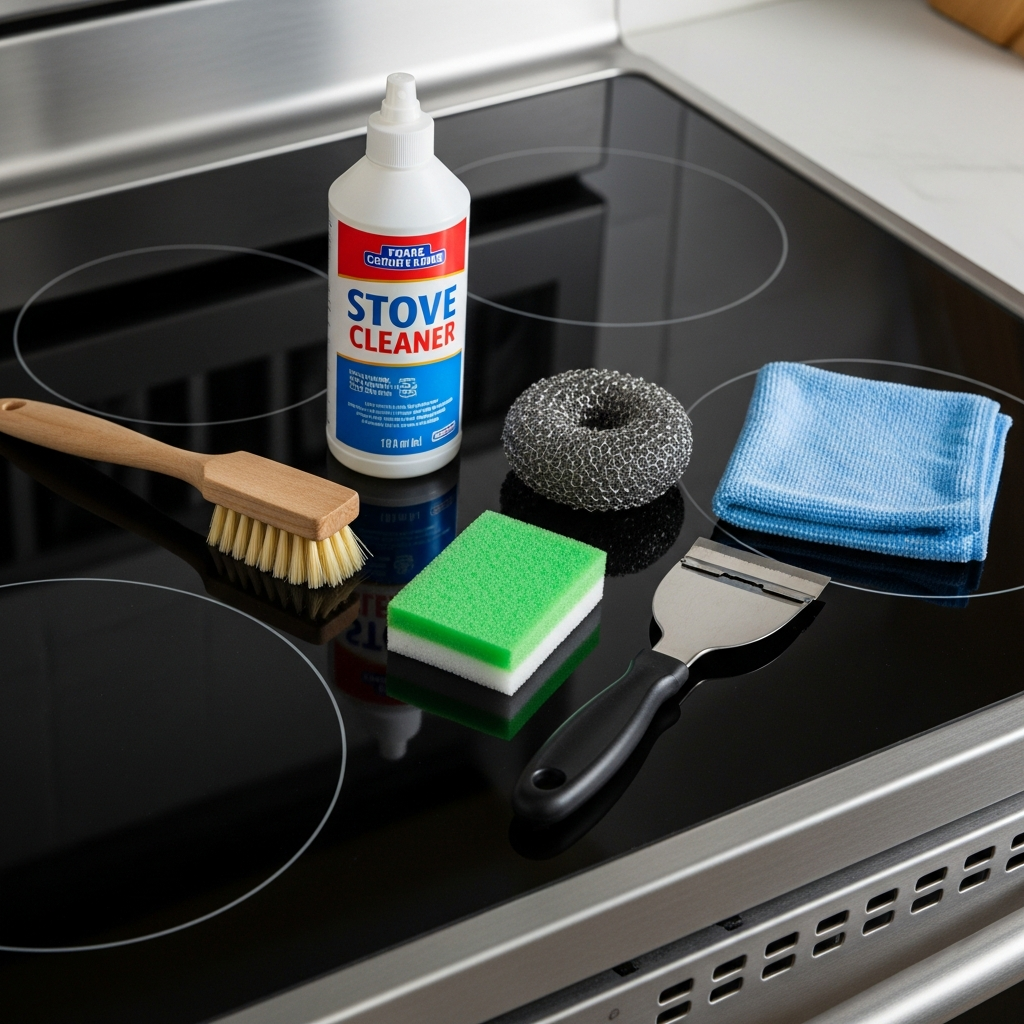
The stove is the undeniable workhorse of the kitchen, the command center where raw ingredients are transformed into meals. It is also, by nature of its function, the appliance most prone to filth. Every splatter of oil, every boil-over of pasta water, and every dropped crumb contributes to a layer of grime that, if left unchecked, hardens into a substance nearly as tough as the metal it sits upon. Cleaning a stove is not merely a matter of aesthetics; it is a matter of safety and efficiency. A grease-laden stovetop is a fire hazard, and clogged burner ports result in uneven heating that ruins food. Yet, despite its importance, stove cleaning is often performed incorrectly, with homeowners using the wrong chemicals on the wrong surfaces, scratching delicate glass, or neglecting the hidden areas where grease accumulates the most. Mastering the art of stove maintenance requires understanding the specific materials you are working with-whether it is tempered glass, cast iron, or enamel-and applying the right chemical and mechanical leverage to remove residue without causing damage. 1.Glass-Ceramic Cooktop The glass-ceramic cooktop, a staple of modern kitchens, presents a unique paradox: it is the sleekest surface to look at but often the most frustrating to maintain. The smooth, black surface shows every fingerprint and dust mote, but the real enemy is burnt-on food. A common mistake is attacking these surfaces with abrasive scouring pads. The rough side of a standard kitchen sponge is practically sandpaper to a glass cooktop. Over time, this creates a haze of micro-scratches that dulls the finish and, more importantly, traps dirt, making future cleaning even harder. The correct tool for a glass top is not a scrubber, but a razor blade scraper. When food is burnt onto the surface-especially sugary substances which can actually pit the glass if left to cool-a metal scraper held at a forty-five-degree angle is the only way to physically shear the carbon off without damaging the substrate. This should be done while the surface is wet with a specific glass cooktop cleaner or a paste of baking soda and water, which acts as a lubricant. The goal is to lift the debris, not grind it into the glass. Polishing with a dry microfiber cloth afterwards is what restores the shine, but the heavy lifting is done by the blade. 2.Gas Stove Gas ranges offer a completely different set of challenges, primarily centered around the heavy, cast-iron grates. These grates are porous and subjected to direct flame, meaning that grease spills are baked into the iron almost instantly. Scrubbing these by hand at the sink is a labor-intensive task that rarely yields perfect results. The structure of the grates, with their many corners and rough texture, shreds sponges and resists brushes. The most effective method for cleaning heavy cast iron grates utilizes the chemistry of ammonia fumes. By placing the grates inside a heavy-duty garbage bag with a splash of ammonia and sealing it tight for twenty-four hours, you allow the fumes to penetrate the grease. The ammonia breaks down the bond between the carbonized food and the iron. When you open the bag the next day-preferably outside to avoid inhaling the strong fumes-the grime usually wipes off with minimal scrubbing. This method saves hours of physical labor. It is important, however, to rinse them thoroughly and dry them completely, perhaps even placing them in a warm oven for a few minutes, to prevent rust from forming on the exposed iron. Beneath the grates lie the burner caps and heads, the actual machinery of the gas stove. If your flame is yellow instead of blue, or if the ignition clicks incessantly before lighting, the cause is almost always a clogged port. Food spills can block the tiny holes where gas escapes, disrupting the flow and air mixture. Cleaning these requires precision, not brute force. A straightened paper clip or a needle can be used to gently clear the ports, but one must be careful not to break the metal tip off inside the hole. The burner heads themselves can be soaked in warm soapy water, but the electrical igniter-the little ceramic nub that sparks-must remain dry. If this ceramic piece gets wet or coated in cleaner, the stove will not light until it has dried out completely. Reassembling the burners requires checking the alignment; a cap that sits slightly askew will result in a dangerous, uneven flame that can flare up unexpectedly. 3.Electric Stove Electric coil stoves, often seen in older apartments, are frequently neglected because they seem difficult to disassemble, but they are actually the most modular of all designs. The coils themselves rarely need cleaning because they get hot enough to burn off most residue, but the drip pans beneath them are magnets for disaster. These metal bowls catch everything that falls through the coils. When they are coated in black, carbonized grease, they become a smoke generator every time the stove is turned on. While many people wrap these in aluminum foil to avoid cleaning them, this is a dangerous practice that can trap heat and melt the wiring or cause a short circuit. Drip pans are inexpensive and should be viewed as semi-disposable. If they are rusted or hopelessly caked, replacing them is safer and more effective than scrubbing. If they are salvageable, they should be removed and boiled in a mixture of water and vinegar to loosen the charred remains. The coils themselves pull out, but one must be careful never to submerge the electrical contacts in water. 4.Control Panel and Buttons The control panel and knobs are the most touched but often the least cleaned parts of the stove. Because they are usually located above the cooking surface or on the front face, they are constantly bombarded with microscopic grease splatters. Over time, this grease works its way behind the knobs, acting as a glue that makes them difficult to turn. To clean this area effectively, the knobs must be pulled off. Simply wiping around them pushes

Make Your Stove Look New Again with These Simple Tools Read More »

laundry basket in the laundry room

Washing Clothes: 10 Mistakes You Need to Stop Making When Washing Your Clothes

The act of washing clothes is often dismissed as a mundane necessity, a background task that requires little thought beyond separating whites from colors and pressing a button. However, this perceived simplicity is deceptive. Laundry is a chemical and mechanical process that involves a delicate balance of water temperature, agitation, chemical agents, and fabric types. When this balance is disrupted by habitual errors, the consequences are expensive and frustrating. Clothes fade prematurely, fibers break down, elastic snaps, and mysterious holes appear in favorite garments. Furthermore, the appliances themselves, often significant financial investments, suffer from misuse, leading to mechanical failures and mold growth. To truly care for a wardrobe and maintain the efficiency of a household, one must unlearn the common practices that have likely been passed down through generations or assumed out of convenience. 1.First Mistake The first critical error occurs long before the start button is pressed, during the sorting phase. Most people operate under the assumption that sorting is purely a chromatic exercise-keeping red socks away from white shirts to prevent pink underwear. While preventing dye transfer is important, sorting by fabric weight and texture is arguably more critical for the physical preservation of the garments. A washing machine cleans through agitation; clothes rub against each other to dislodge soil. When you mix heavy, abrasive fabrics like denim jeans with delicate materials like silk or fine cotton, you are effectively creating a sandpaper effect. The heavy items thrash against the lighter ones, causing micro-abrasions that manifest as pilling, holes, and a general loss of softness. Furthermore, the texture of fabrics dictates their lint behavior. Washing lint-shedding items, such as heavy cotton towels, with lint-attracting fabrics, like synthetic leggings or corduroy, results in a visual disaster that makes dark clothes look permanently dirty. 2.Individual Preparation Once the piles are sorted, the preparation of individual garments is often neglected. This mechanical oversight leads to tearing and stretching. The rule for hardware is simple yet frequently confused: zippers must be closed, and buttons must be open. A zipper left unzipped is essentially a flexible saw blade loose in the drum. As it spins, the metal teeth can snag on lace, scratch the surface of other fabrics, and even chip the interior paint of the washing machine. Conversely, buttoned shirts suffer from the opposite problem. When a shirt is wet, it is heavy. If it is buttoned up, the centrifugal force of the spin cycle pulls aggressively at the threads holding the buttons, distorting the buttonholes and causing buttons to pop off. Pockets also require vigilant inspection. A stray tissue can disintegrate and cover an entire load in white confetti, while heavier objects like coins can bypass the seal and damage the drain pump. 3.Detergent The application of detergent is the area most rife with misconceptions. Decades of marketing have convinced consumers that more foam equals more cleaning power. In reality, the opposite is true for modern high-efficiency machines. These appliances use very little water, relying on friction to clean. When you use too much detergent, you generate a massive volume of suds that acts as a cushion between the clothes, preventing the necessary friction that scrubs away dirt. The clothes simply float in a bubble bath, emerging with their stains intact. Worse, the rinse cycle cannot remove this excess chemical load. The result is a layer of soap residue left on the fibers, which acts as a magnet for dirt and skin oils, creating a breeding ground for bacteria and leading to the “sour” smell often associated with old towels. 4.Fabric Softener Compound this issue with the habitual use of fabric softener, and you have a recipe for textile ruin. Fabric softener works by coating fibers with a layer of lipid-based chemicals to force them to feel slick. While this feels nice instantly, it functionally destroys the utility of absorbent fabrics. Towels coated in softener lose their ability to wick water; they simply push moisture around the skin. Athletic wear, engineered to breathe and wick sweat, becomes clogged and sealed by these waxy deposits, trapping body odors deep within the weave. A simple substitution of white vinegar in the rinse cycle can soften fabrics by stripping away detergent residue and neutralizing static without leaving a damaging coating behind. 5.Amount The physical loading of the machine also requires a specific balance. There is a tendency to stuff the drum to capacity to minimize the number of loads, but a packed machine is a useless machine. For the chemistry of the detergent to work, it must dissolve and circulate. For the mechanical action to work, clothes must have room to tumble. A solid brick of wet fabric in the center of the drum will never get clean. Conversely, washing a single heavy item is a mechanical hazard. A lone wet blanket creates a severe imbalance during the spin cycle, causing the drum to bang violently against the chassis, wearing out the suspension and bearings. 6.Water Temperature selection is another variable where habit often overrides logic. The default to cold water for everything, driven by eco-consciousness, is noble but insufficient for sanitation. While cold water is excellent for preventing shrinkage and protecting dyes, it often lacks the thermal energy required to activate the enzymes in detergents that target heavy oils. Bed sheets and towels, which are reservoirs for dead skin and dust mites, require hot water to be truly sanitized. A cold wash for these items is merely a rinse. However, using hot water indiscriminately is equally damaging, as it sets protein-based stains like blood and sweat into the fabric permanently. A nuanced understanding of temperature-hot for sanitation, warm for average soil, and cold for delicate protection-is necessary. 7.Stains When stains do occur, the immediate reaction is often the wrong one. The instinct to rub a spill vigorously is a destructive reflex. Rubbing drives the stain deeper into the yarn and abrades the surface of the fabric, often causing color loss that is more noticeable than the stain itself. The correct technique is

Washing Clothes: 10 Mistakes You Need to Stop Making When Washing Your Clothes Read More »

Paperwork Organization

Paperwork Organization: 7 Steps to Organizing Your Important Documents

Accumulation of paperwork is arguably the most stressful type of disorder found in the modern home. Unlike a sink full of dishes or a basket of dirty laundry, which represent simple, repetitive chores, a pile of paperwork represents a stack of unmade decisions. Each envelope, receipt, and flyer carries a potential obligation, a deadline, or a piece of information that might be needed in some hypothetical future. This ambiguity is what makes paper so difficult to manage. We let it accumulate on kitchen counters, dining tables, and entry consoles not because we are lazy, but because we are afraid of making the wrong choice. We fear throwing away something vital, yet we lack the immediate energy to process it. Organizing your paperwork is therefore less about tidiness and more about establishing a workflow that allows you to manage your life with confidence and efficiency. It is about moving from a state of reactive anxiety to one of proactive control. 1.Look For All The Papers To begin the process of organizing your paperwork, you must first understand the scope of the problem. You cannot organize a clutter problem in piecemeal fashion; you must attack it in its entirety. This means gathering every scrap of loose paper from every corner of your house. You must look inside junk drawers, check the bottom of work bags, clear off the refrigerator door, and empty the glove compartment of your car. Bring everything to a large, central surface, such as a dining room table. This step is often visually overwhelming, but it is necessary. Seeing the sheer volume of paper in one location breaks the illusion that you can simply “tidy up” a little bit at a time. It forces you to confront the reality of the accumulation and provides the psychological leverage needed to be ruthless in your sorting. 2.Triage Once you have your mountain of paper, the next phase is the triage. This is a rapid-fire sorting process where you make quick decisions based on the immediate nature of the document. You are not filing yet; you are simply categorizing. Create three distinct piles: Trash, Action, and Archive. The Trash pile should be the largest. It includes junk mail, expired coupons, flyers for services you will never use, and envelopes from opened mail. Be aggressive here. If the information is readily available online, you generally do not need the physical paper. As you sort, keep a shredder or a dedicated bag for shredding nearby. Any document containing personal information like your name, address, social security number, or financial details that goes into the trash must be shredded to protect against identity theft. This includes credit card offers and old bank statements. The Action pile is for documents that require you to do something. This is your “active” paperwork. It includes bills that need to be paid, forms that need a signature, invitations that require an RSVP, or documents that you need to read or review. This pile represents your current to-do list. The mistake many people make is filing these items away too quickly, where they are forgotten until a deadline is missed. Action items need to remain visible but contained. The Archive pile is for documents that require no immediate action but must be kept for future reference. These are your tax returns, medical records, insurance policies, property deeds, and vehicle registration papers. This pile will eventually move to your filing cabinet or long-term storage solution. You may also encounter a category of sentimental items-cards, letters, children’s drawings. Do not let these derail your progress. Place them in a separate box to be dealt with later. Attempting to reminisce while organizing administrative papers is the fastest way to lose momentum. 3.Desk Organizers With the sorting complete and the trash removed, you can focus on setting up the Action system. Since these papers need to be accessed frequently, they should not be hidden in a drawer. A desktop sorter, a tiered wall file, or a dedicated tray system works best. The goal is to categorize the action required. You might have sections labeled “To Pay,” “To Read,” and “To File.” The “To File” section acts as a holding area for items you have processed-the bill has been paid, the form signed-but have not yet had time to move to the permanent archive. This system prevents active papers from being scattered across flat surfaces. However, a system is only as good as the habits that support it. You must designate a specific time each week to process the Action file. During this weekly session, you pay the bills, sign the forms, and move the completed items to the “To File” section. The Archive is the backbone of your home organization. This is where your permanent records live. Whether you choose a traditional metal filing cabinet, a series of plastic file boxes, or binders, the structure of your filing system should be intuitive. Avoid over-complicating your categories. If you create a folder for every single utility provider, you will end up with a drawer full of thin, floppy files that are hard to navigate. Instead, use broad categories such as “Home,” “Auto,” “Financial,” “Medical,” and “Personal.” Inside the “Auto” category, you can keep everything related to your vehicles-repair logs, insurance, and registration. Inside “Home,” you can store mortgage documents, renovation contracts, and appliance warranties. This broad approach reduces the mental friction of deciding where a document belongs. When you are looking for something later, you simply have to ask yourself the general category it falls under. 4.Labeling Labeling is a critical component of a functional archive. Handwritten scribbles on manila folder tabs are often illegible and discouraging. Use a label maker or write in large, bold block letters. A neat, clearly labeled file is more likely to be used correctly. Furthermore, consider the physical flow of your files. Arranging them alphabetically is the most standard method, but you might prefer arranging them by frequency of use, with the most accessed files at the front.

Paperwork Organization: 7 Steps to Organizing Your Important Documents Read More »

Clear Snow Safely and Effectively

Snow Cleaning: How to Clear Snow Safely and Effectively

The serene beauty of a fresh snowfall is quickly followed by the practical necessity of snow cleaning. This essential winter chore is not just about maintaining appearances; it is a fundamental task for ensuring safety, accessibility, and the protection of property. A path left uncleared becomes a hazardous sheet of ice, a driveway blocked by a snowbank can trap a vehicle, and the sheer weight of accumulated snow can pose a structural threat. Proper snow cleaning is a proactive engagement with winter weather, requiring the right tools, a sound strategy, and a respect for the physical demands of the job. Without an effective approach to snow cleaning, the winter season can become a period of constant struggle and potential danger. Shovel The cornerstone of any manual snow cleaning operation is the shovel. Yet, the term “shovel” encompasses a range of tools designed for specific purposes, and choosing the correct one is the first step toward efficiency. The classic scoop shovel, with its deep blade, is built for lifting and throwing snow, making it suitable for clearing out tight spaces or moving deep drifts. For larger, flatter areas like driveways and long sidewalks, a snow pusher is a far superior tool. Its wide, curved blade is designed to skim along the surface, pushing a large volume of snow with each pass, which drastically reduces the need for lifting and alleviates strain on the back. Many modern shovels feature ergonomic designs, with bent shafts that encourage a more upright posture, further mitigating the risk of injury during the strenuous task of snow cleaning. The choice of blade material is also significant. Lightweight plastic blades are less likely to damage wooden decks or stone pavers, while heavy-duty metal blades, often fitted with a steel wear strip, excel at breaking through compacted snow and ice. Snow Blower For those who contend with large areas or consistently heavy snowfall, mechanical assistance in the form of a snow blower transforms the nature of snow cleaning. These machines are broadly categorized into single-stage and two-stage models. A single-stage blower employs a fast-spinning auger that makes direct contact with the pavement, scooping up snow and ejecting it through a discharge chute in a single motion. These units are relatively lightweight and easy to maneuver, making them an excellent choice for paved driveways and moderate snowfalls. In contrast, a two-stage snow blower is a more powerful and complex machine designed for heavy-duty snow cleaning. Its auger breaks up heavy, wet, or compacted snow and feeds it into a separate high-speed impeller, which then propels the snow out of the chute. This dual-action process allows two-stage blowers to handle deep snow drifts and throw the snow much farther, a crucial feature for clearing long driveways where snow placement is a key concern. This level of mechanical power makes the challenge of intensive snow cleaning far more manageable. Ice Chopper Even the most thorough snow cleaning effort can leave behind a slick surface of compacted snow or ice. This is where de-icing becomes a critical final step. An ice chopper, with its heavy steel blade, is invaluable for breaking up thick, stubborn ice that other tools cannot dislodge. After the bulk of the material has been removed, applying a de-icing agent can melt the remaining layer and prevent refreezing. Rock salt, or sodium chloride, is the most common and economical choice. It works by creating a brine solution that lowers the freezing point of water, effectively melting the ice. However, its effectiveness diminishes in very cold temperatures, and it can be corrosive to concrete and harmful to plants. Alternatives like calcium chloride and magnesium chloride work at much lower temperatures and are generally considered safer for concrete and vegetation. For households with pets, it is vital to use a specifically formulated pet-safe ice melt, as common de-icers can be toxic to animals. A comprehensive snow cleaning plan must include a strategy for ice management. Injuries The methodology behind snow cleaning is as vital as the equipment. The timing of your efforts can significantly impact the difficulty of the task. It is far less arduous to clear a few inches of snow two or three times during a major storm than it is to confront a single, deep accumulation of heavy, compacted snow afterward. Waiting too long allows the snow to settle and bond to the surface, making the job much harder. An early and frequent approach is the hallmark of an efficient snow cleaning strategy. When the time comes to shovel, proper physical technique is essential for preventing injury. The power for lifting should come from the legs, not the back. This means bending at the knees and hips while keeping the back straight and core muscles engaged. Whenever possible, push the snow rather than lifting it. If lifting is necessary, keep the shovel close to your body and avoid twisting your torso to throw the snow; instead, pivot your entire body by moving your feet. The repetitive nature of snow cleaning makes taking regular breaks essential to prevent overexertion. Garage A systematic approach to the physical layout of the job is also crucial. Before starting, identify where the cleared snow will be piled. It is imperative that these piles do not obstruct sightlines for drivers at the end of a driveway or at street corners. Piling snow against a building’s foundation can introduce moisture and lead to leaks as it melts. Furthermore, ensure that storm drains are not blocked, as this can cause significant flooding during a thaw. For those using a snow blower, working with the wind is a simple but effective tactic, preventing the discharged snow from blowing back onto cleared areas or into your face. A well-executed snow cleaning job is one that is done with foresight. Roof The responsibility of snow cleaning is not limited to ground-level surfaces. The weight of heavy snow on a roof can pose a serious structural risk. A roof rake, which is a wide blade attached to a long, telescoping

Snow Cleaning: How to Clear Snow Safely and Effectively Read More »

How to Unclog Your Shower Head: Fixing Weak Water Pressure

A shower head is more than a simple bathroom fixture; it is the source of a daily ritual, a cascade of water that can awaken the senses or wash away the stresses of the day. When it functions properly, the stream is full, consistent, and directed. Over time, however, this reliable flow can diminish into a weak, sputtering, and erratic spray. Jets that once produced a perfect stream may become completely blocked, while others shoot water at odd angles, creating a less than satisfying experience. This decline in performance is not a sign that the fixture needs to be replaced, but rather a clear indication that it is in desperate need of a thorough cleaning. The culprit behind this gradual degradation is almost always an accumulation of mineral deposits, soap scum, and biofilm that clog the tiny nozzles from the inside out. Hard Water The primary cause of this blockage is hard water, a common issue in many municipal water systems. Hard water is characterized by a high concentration of dissolved minerals, predominantly calcium and magnesium. As water passes through the shower head and the residual moisture evaporates, these minerals are left behind. They precipitate out of the solution and form a hard, chalky substance known as limescale, or calcium carbonate. This scale builds up layer by layer, slowly constricting the openings of the nozzles, much like plaque in an artery. The process is slow and often goes unnoticed until the water pressure is significantly impacted. In addition to these mineral deposits, soap scum, which is a reaction between soap and the minerals in hard water, can contribute to the blockage, creating a gummy, resilient film. Compounding this issue is the dark, damp, and warm environment inside the shower head, which is an ideal breeding ground for bacteria and other microorganisms to form a slimy layer called biofilm. This organic matter can further clog the jets and introduce a subtle but persistent hygienic concern. Fortunately, restoring a shower head to its former glory is a straightforward maintenance task that requires minimal tools and common household ingredients. The most effective and widely used method involves using the acidic properties of white distilled vinegar to dissolve the mineral buildup. Acetic acid, the active component in vinegar, reacts with the alkaline calcium carbonate deposits in a chemical process that breaks them down into water-soluble calcium acetate and carbon dioxide gas. This reaction effectively melts away the stubborn scale without the need for harsh, abrasive scrubbing that could damage the fixture’s finish. The simplest way to apply this treatment is the immersion bag method. To do this, you will need a sturdy plastic bag large enough to envelop the shower head, a rubber band or zip tie to secure it, and enough white distilled vinegar to fully submerge the face of the fixture. The process The process begins by carefully pouring the vinegar into the plastic bag. Then, lift the bag up and over the shower head, ensuring that all the nozzles and the faceplate are completely immersed in the liquid. Secure the bag tightly around the shower arm with the rubber band or zip tie, making it snug enough to hold the weight of the vinegar and prevent any leaks. The shower head should then be left to soak. For light buildup, a few hours may be sufficient, but for more heavily calcified fixtures, it is best to leave it overnight. During this time, you may even notice small bubbles forming as the acid reacts with the limescale, a visible sign that the cleaning process is working. After the soaking period is complete, carefully remove the bag and pour the used vinegar down the drain. The next step is to flush out all the loosened debris. Turn on the hot water and let it run through the shower head for a few minutes. You should immediately notice an improvement in the flow and spray pattern. To address any remaining stubborn clogs, an old toothbrush can be used to gently scrub the faceplate and nozzles. For the most persistent blockages within individual jets, a small pin, a paperclip, or even a toothpick can be used to carefully poke into the opening and dislodge the softened mineral plug. For a more comprehensive cleaning, or in cases where the bag method is not sufficient to resolve severe blockages, it may be necessary to remove the shower head completely. This allows for a deeper soak that can clean not just the nozzles, but the internal components as well, including the often-overlooked filter screen. To remove the fixture, you will typically need an adjustable wrench or a pair of pliers. It is crucial to wrap the connecting nut with a cloth or a rag before applying the tool to prevent scratching or marring the finish. Turn the nut counter-clockwise to loosen it from the shower arm. Once it is detached, you can inspect the inside for any large pieces of debris. Pay close attention to the small mesh screen, or washer, located at the connection point, as this is designed to trap sediment and can become heavily clogged, severely restricting water flow. This screen can be removed and scrubbed clean with a toothbrush. Immersion With the shower head removed, it can be fully submerged in a bowl or bucket filled with white vinegar. This ensures the vinegar penetrates all the internal chambers for a truly thorough cleaning. After soaking for several hours or overnight, use a toothbrush to scrub both the exterior nozzles and the interior threads and chambers. Once it is clean, rinse it thoroughly with fresh water. Before reattaching the fixture, it is good practice to clean the threads on the shower arm and apply new plumber’s tape, also known as Teflon tape. Wrap the tape clockwise around the threads three to four times to create a secure, watertight seal that will prevent leaks. Then, screw the shower head back onto the arm, first by hand and then giving it a final quarter-turn with the

How to Unclog Your Shower Head: Fixing Weak Water Pressure Read More »

5 Reasons Why Hiring a Cleaning Service is the Best Form of Self-Care

Why hire a specialized cleaning service? The modern home is a hub of activity, a place of work, rest, and family life. Yet, maintaining its cleanliness can feel like a relentless, never-ending task. The dust settles almost as soon as it’s wiped away, the floors seem to attract dirt, and the kitchen and bathrooms demand constant attention. For many, the weekend, which should be a time for relaxation and recharging, is instead consumed by a long list of chores. This constant cycle of cleaning can become a significant source of stress and a drain on our most valuable resource: time. It is in this gap between the desire for a clean, peaceful environment and the reality of a busy life that a residential house cleaning service finds its purpose, offering not just a service, but a solution to a pervasive modern problem. 1.Quality of Life Hiring a professional cleaning service is often viewed as a luxury, but it is more accurately described as an investment in your quality of life. Consider the hours spent each week sweeping, mopping, scrubbing, and dusting. For a moderately sized home, this can easily add up to four, five, or even more hours. A professional service reclaims those hours for you, handing them back to be spent on what truly matters. This could mean more time with family, pursuing a hobby, exercising, or simply enjoying a well-deserved rest. The cumulative effect of this reclaimed time is profound, reducing burnout and allowing for a better work-life balance. It transforms the home from a place of constant obligation into a true sanctuary, a space you can enter after a long day and immediately feel at ease, rather than being confronted with a list of tasks that need doing. 2.Quality of Cleanliness Beyond the gift of time, there is the undeniable difference in the quality of the clean itself. A professional cleaner brings a level of expertise and efficiency that is difficult for the average homeowner to replicate. They are trained in the most effective methods and understand the specific needs of different surfaces. They know which products to use on natural stone versus laminate, how to clean stainless steel without leaving streaks, and the best techniques for removing stubborn soap scum from glass shower doors. This knowledge prevents costly damage that can result from using the wrong chemical or an abrasive sponge on a delicate surface. Furthermore, professional services come equipped with commercial-grade tools and supplies that are often more powerful and effective than standard consumer products. Their high-powered vacuums with HEPA filters can capture a significantly higher percentage of dust, allergens, and pet dander, leading to improved indoor air quality. This is particularly beneficial for households with allergy sufferers, asthmatics, children, or pets. The result is not just a home that looks clean, but one that feels and is, on a microscopic level, healthier. The process of a professional clean is systematic and thorough. Cleaners typically work with a detailed checklist, ensuring that no area is overlooked. They employ methodical strategies, such as cleaning from top to bottom to ensure dust and debris fall downwards before the floors are addressed, and working from one side of a room to the other. This structured approach guarantees consistency and completeness. A standard recurring clean will typically involve a comprehensive dusting of all surfaces, including furniture, shelves, and window sills; cleaning and disinfecting kitchen countertops, sinks, and appliance exteriors; scrubbing toilets, showers, tubs, and bathroom vanities; and vacuuming carpets and mopping hard floors. This regular maintenance keeps the home at a consistent level of cleanliness, preventing the deep buildup of grime. 3.Deep Cleaning For homes that have gone some time without a thorough cleaning or for clients new to a service, a deep clean is often recommended. This is a far more intensive and detailed service that addresses the areas often missed in a regular routine. A deep clean will include all the tasks of a standard clean but will go much further. It can involve washing baseboards and trim, cleaning light fixtures and ceiling fans, wiping down doors and door frames, cleaning behind and underneath furniture and appliances, scrubbing grout lines, and cleaning the interior of windows. This is the reset button for your home, tackling the accumulated dirt and dust in every nook and cranny, and establishing a new baseline of clean that makes subsequent maintenance easier. Specialized services like move-in and move-out cleanings are another critical offering. Preparing a home for sale or ensuring a new home is pristine before you unpack is an enormous task on top of the already stressful process of moving. A move-out clean is designed to leave the property in immaculate condition for the next occupants, often a requirement for retrieving a security deposit. This is the most exhaustive clean of all, performed on an empty home. Every interior surface is addressed, including the inside of all cabinets, drawers, closets, the oven, and the refrigerator. It ensures the home is presented in its best possible light, which can be a significant factor for real estate agents and potential buyers. Conversely, a move-in clean provides immense peace of mind, sanitizing the space and ensuring you are starting your new chapter in a fresh, thoroughly cleaned environment. 4.Trust and Security One of the most significant barriers for people considering a cleaning service is the idea of trust and security. Inviting someone into your personal space requires confidence in their professionalism and integrity. This is why reputable cleaning companies place such a high emphasis on their hiring and training processes. They conduct background checks on their employees and ensure they are thoroughly vetted. Furthermore, professional services are bonded and insured. Bonding provides protection against theft, while insurance covers any accidental damage that might occur to your property during the cleaning process. This comprehensive protection offers homeowners the peace of mind that they are working with a trustworthy organization that stands behind its work and its people. The relationship with a cleaning service is

5 Reasons Why Hiring a Cleaning Service is the Best Form of Self-Care Read More »