Mental Health

How to Clean a Front-Loading Washing Machine: A Step-by-Step Guide

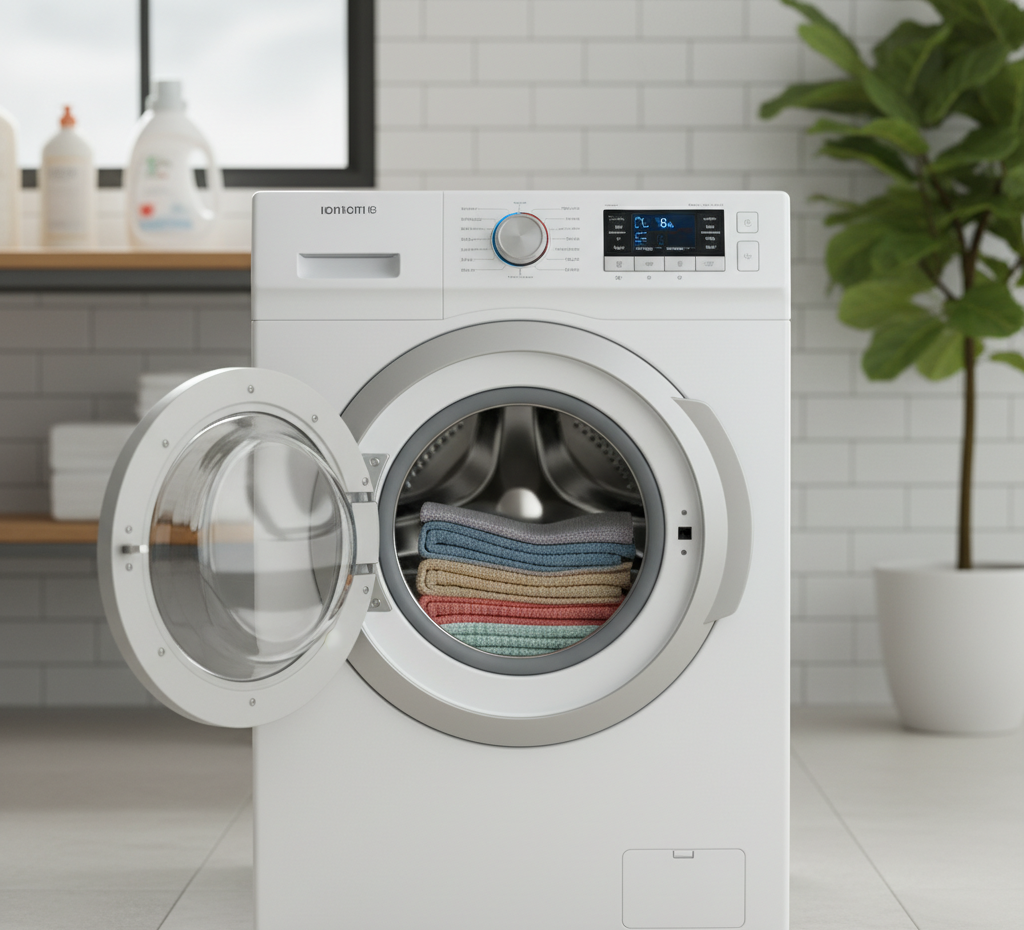
How to Clean a Front-Loading Washing Machine: A Step-by-Step Guide Front-loading washers use less water and energy than top loaders, but the sealed, efficient design comes with a catch: it traps moisture. The airtight door gasket, the hidden folds of rubber and the dark drum create exactly the kind of damp environment where mould and bacteria thrive. Left alone, the machine develops a sour, musty odor, and the buildup can even redeposit grime on clothes you thought were clean. Keeping a front loader fresh takes two habits: a deep clean every few months and a few daily practices that starve mildew of the moisture it needs. This guide walks through both, from the gasket to the drain filter. Start With the Door Gasket, the Most Critical Area The thick rubber gasket around the door is the primary source of front-loader odors. After every wash, water, soap residue, lint and hair collect in its deep folds and congeal into a slimy, often black buildup. Pull the seal back to expose the crevice between the rubber and the drum, and wipe the whole interior channel with a cloth or sponge moistened with a half-and-half mix of white vinegar and water. Expect the cloth to come away filthy. For set-in mildew spots, switch to a cloth dipped in diluted bleach (one part bleach to ten parts water) or hydrogen peroxide, which kills mold spores more aggressively. Scrub the crevices and the lip of the seal with an old toothbrush, then wipe everything completely dry, because leaving the gasket wet invites mildew right back. Strip the Drum With a Hot Vinegar Cycle The drum itself collects soap scum and hard water mineral deposits that trap bacteria and feed odors. The easiest fix is the dedicated Tub Clean or Self Clean cycle most modern machines offer; follow the manufacturer’s instructions, which may call for a special tablet or liquid. No self-cleaning cycle? Use the manual version: pour two full cups of plain white vinegar into the detergent dispenser drawer, add no laundry and no detergent, and run the longest, hottest cycle available. The hot water and mild acid strip scale from the drum and internal hoses. Disinfect With Bleach, or Use a Gentler Alternative Once the vinegar cycle has finished completely, pour two cups of chlorine bleach into the dispenser drawer and run the longest, hottest cycle again to kill lingering mold and mildew spores. Never mix vinegar and bleach in the same load, because combining them creates toxic chlorine gas; keep the two cycles fully separate. Prefer a gentler option? A half-cup of baking soda in the same hot cycle scrubs the drum and neutralizes odors. When the cycle ends, open the door and let the drum air dry completely. If you choose bleach, follow the CDC’s safe-use guidance for cleaning and disinfecting with bleach, which stresses never mixing bleach with other cleaners and preparing only what you need. Soak the Dispenser Drawer and Wipe Its Cavity The detergent drawer collects its own buildup: powdered detergent cakes into a solid mass and liquid fabric softener congeals into mold-friendly sludge. Most front-loader drawers slide out once you press the small release tab, often labelled Push, inside the softener compartment. Soak the drawer in hot, soapy water, scrub every compartment with a bottle brush or old toothbrush and rinse well. While it soaks, wipe out the empty cavity with a damp cloth, since that recess grows mold too. Let the drawer dry fully before sliding it back in. Clean the Drain Pump Filter The most overlooked maintenance task is the drain pump filter, the small trap behind a hinged door at the bottom front corner. It catches coins, buttons, hairpins and lint before they reach the pump, and when it clogs, the machine drains slowly, leaves laundry sopping wet and smells foul from stagnant trapped water. Lay a shallow pan or thick towel underneath before opening, then unscrew the filter plug counter-clockwise slowly. Once the water drains, remove the filter, rinse it under running water to clear lint and debris, and wipe out the housing with a paper towel before screwing the plug back in tightly to prevent leaks. Wipe Down the Exterior Finish with a damp microfiber cloth over the front, sides and top of the machine, including the control panel, buttons and both sides of the door glass. Daily Habits That Prevent the Musty Smell Leave the washer door slightly ajar after every cycle so air circulates and dries the drum and gasket. Wipe the gasket dry with an old towel after your last load of the day. Use high-efficiency (HE) detergent in the recommended amount; too much soap leaves sticky residue that feeds mildew. Move wet clothes to the dryer promptly instead of letting them sit in the drum. Moisture is the root cause of front-loader odors, and Health Canada’s mould prevention guidance is clear: control dampness and mould has nowhere to grow. Keeping the machine dry between washes also protects indoor air quality, since mold in the home can affect health, especially for people with allergies or asthma. Component Why It Matters How to Clean It Door gasket Traps water, soap and lint; main odor source Wipe folds with 50/50 vinegar, scrub with toothbrush, dry fully Drum Builds soap scum and mineral scale Tub Clean cycle, or hot vinegar cycle then bleach cycle Dispenser drawer Caked detergent and softener sludge Remove, soak in hot soapy water, scrub compartments Drain pump filter Clogs cause slow drains and odors Drain, remove, rinse debris, wipe housing Exterior and glass Dust and fingerprints Damp microfiber cloth wipe-down A Fresh Machine for Fresh Laundry Deep cleaning a front loader every few months, paired with the daily habit of leaving the door ajar, keeps the machine efficient, odor-free and gentle on your clothes. If your laundry room or the rest of your home needs the same thorough attention, Toronto Shine Cleaning can help with a whole-home deep clean or ongoing regular cleaning visits. Browse our pricing and

How to Clean a Front-Loading Washing Machine: A Step-by-Step Guide Read More »
screen

Screen Cleaning: A Step-by-Step Guide to Cleaning Your Laptop and TV Screens

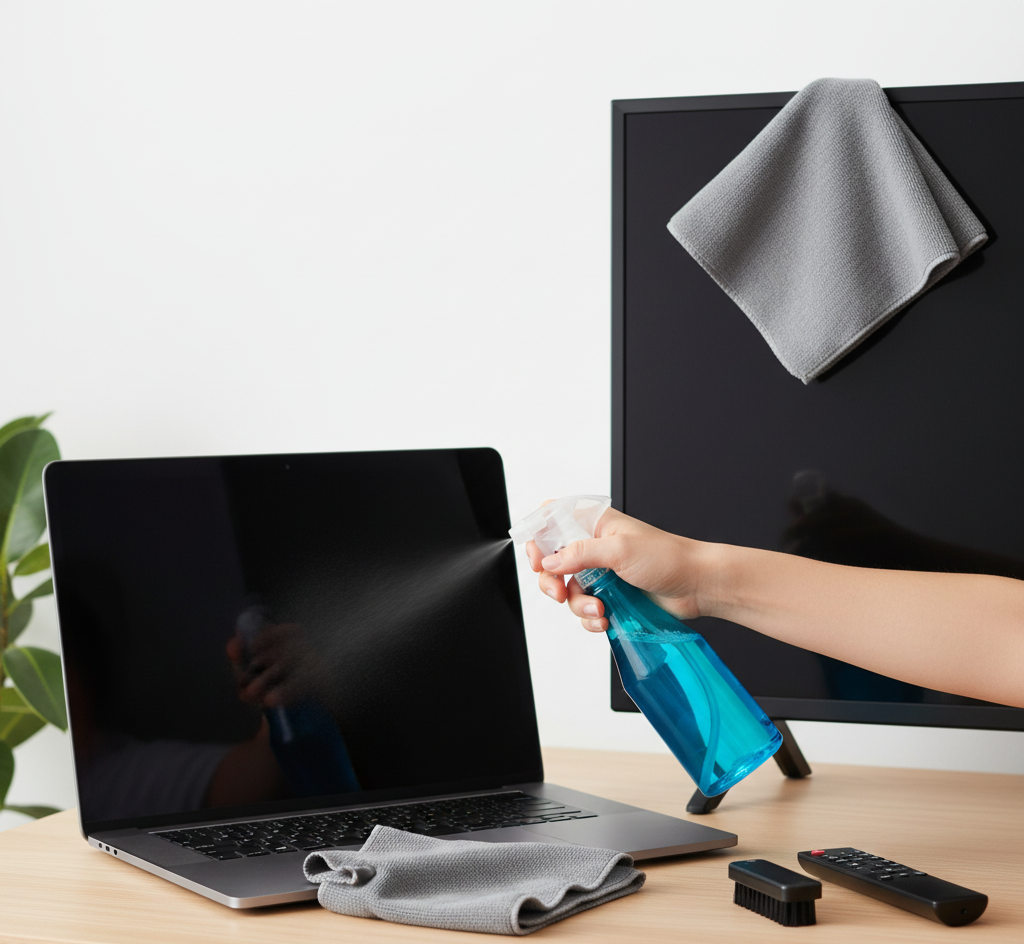
Screen Cleaning: A Step-by-Step Guide for Laptop and TV Screens Television, laptop, and monitor screens are our windows to work and entertainment, and they are magnets for dust, fingerprints, smudges, and the occasional sneeze. Keeping them clean is not just about looks: a clear display is easier on the eyes and more pleasant to use. Modern screens are delicate, often coated with anti-glare and anti-reflective layers, so the wrong tools or chemicals can cause scratches, stripped coatings, or streaks that are worse than the original smudges. This guide walks through what to avoid, the safest cleaning steps, and how to handle the frame, stand, and remote. Toronto Shine Cleaning can handle the rest of your home; call (647) 424-0355 for a deep cleaning service. What You Should Never Use on a Screen The most important lesson is what to keep away from your display. Never use cleaning solutions containing harsh chemicals such as ammonia, alcohol, acetone, or toluene. These ingredients, common in general-purpose glass cleaners, strip the delicate anti-glare and anti-reflective coatings and leave a cloudy, hazy finish. Health Canada’s household chemical safety guidance is a good reminder to read labels and use products only where they belong. Also skip paper towels, tissues, and facial tissue: their wood-pulp fibers are abrasive enough to leave fine micro-scratches, and they shed lint. Rough fabrics such as dish towels, t-shirts, and terry cloth are equally risky. Technique matters as much as tools. Never press hard on a screen, because pressure can damage the liquid crystals or pixels underneath and cause permanent dark spots. Never spray liquid directly onto a display: gravity pulls it into the bezel, where it can reach internal electronics and short out the device. Always apply moisture to the cloth first, never to the screen. Prepare the Screen Before You Clean Turn the device completely off and unplug it. This is a safety measure, and it is practical too: a black, unlit screen makes dust and smudges far easier to see than a bright display does. Let the screen cool to room temperature first, since cleaning a warm screen can cause streaking. Screen Cleaning Rules to Remember Always start dry: remove dust with a dry microfiber cloth before introducing any moisture. Work in one direction: broad, light strokes from a top corner beat scrubbing in circles every time. Never spray the screen: liquid belongs on the cloth, never on the display or its edges. Finish with a dry buff: a second, completely dry microfiber pass removes streaks and lingering moisture. Stay gentle: if a mark will not lift with light pressure, reach for a better solution, never more force. Step 1: Start With a Dry Microfiber Cloth For most cleaning sessions, a large, clean, dry microfiber cloth is all you need. Microfiber strands are far finer than a human hair, which makes them exceptionally soft, and dry fibers create a natural static charge that attracts and traps dust instead of pushing it around. Starting from a top corner, wipe the screen in broad, sweeping motions with light, even pressure; avoid scrubbing in small circles. This single step safely removes about ninety percent of the grime that builds up on a typical screen. Step 2: Add Distilled Water for Stubborn Smudges When fingerprints and oily smudges resist a dry wipe, introduce the smallest amount of moisture. The safest liquid is distilled or deionized water: tap water contains minerals such as calcium and magnesium that leave a chalky residue or streaks as they evaporate. Lightly dampen a clean microfiber cloth until it is barely moist, never wet, and repeat the same gentle sweeping motions. If you can wring drops out of the cloth, it is too wet. Step 3: Remove Greasy Marks With a Gentle Solution For greasy buildup that distilled water cannot shift, use a commercial screen cleaning spray formulated without harsh chemicals, or make your own with equal parts distilled water and plain white vinegar. The mild acetic acid cuts through the oils left by fingerprints. Apply the solution to the cloth, never to the screen, then follow immediately with a second, completely dry microfiber cloth. This final buff removes lingering moisture and prevents streaks, leaving a clear, uniform finish. The CDC’s home cleaning guidance includes electronics such as touch screens and remote controls and recommends following the manufacturer’s instructions for these delicate surfaces. Don’t Forget the Frame, Stand, and Remote Glossy plastic frames and stands respond well to the same routine: a dry microfiber cloth for dust, and a barely damp cloth with distilled water for smudges. Remote controls deserve special attention because they are among the most handled items in a home. Remove the batteries first, then wipe the whole remote with a cloth moistened in a 50/50 mix of isopropyl alcohol and water, working a cotton swab into the gaps around the buttons. Let everything dry completely before reinstalling the batteries. Screen Cleaning Cheat Sheet Surface Tool Solution Light dust on any screen Dry microfiber cloth None needed Fingerprints and smudges Barely damp microfiber cloth Distilled or deionized water Greasy marks Damp microfiber cloth plus dry buff 50/50 distilled water and white vinegar Plastic frame and stand Microfiber cloth Distilled water Remote control Cloth and cotton swabs 50/50 isopropyl alcohol and water Frequently Asked Questions Can I use Windex or glass cleaner on my TV screen? No. Glass cleaners contain ammonia and other harsh chemicals that strip the anti-reflective coating and leave a permanent haze. Stick to a dry or barely damp microfiber cloth, and use distilled water or a screen-specific cleaner for stubborn marks. Is it safe to use rubbing alcohol on screens? Not on the display itself, because alcohol can damage the coating. It is fine on the remote control and other plastic accessories when diluted to about 50 percent with water, as long as the device is unplugged and the batteries are removed. Can I use a paper towel on my laptop screen? Avoid it. Paper products contain abrasive wood fibers that cause

Screen Cleaning: A Step-by-Step Guide to Cleaning Your Laptop and TV Screens Read More »

Basic Things You Should Get Rid of at Home This Spring

Spring Declutter Checklist: 7 Basic Things You Should Get Rid of at Home This Spring

Spring Declutter Checklist: 7 Basic Things to Get Rid of This Season Spring arrives with longer days and brighter light, and that light exposes the dust, piles, and excess that winter hid. True spring cleaning cannot begin with a mop: it begins with subtraction. You cannot clean clutter, and organizing excess only shuffles it into new piles. Work through this room-by-room checklist to clear out what has served its purpose, then finish with a deep clean that leaves your home lighter, brighter, and healthier. When the scrubbing is done, Toronto Shine Cleaning can handle the details; call (647) 424-0355. Golden Rules for a Faster, Easier Declutter Work one zone at a time: finish the entryway before touching the wardrobe so every room has a clear end point. Sort into four piles: keep, toss, donate, and recycle, and move each finished pile out of the house the same day. Apply the one-year test: if you did not use it, wear it, or reach for it in the past year, it has already earned its exit. 1. Entryway: Winter Gear and Homeless Items The entryway bears the brunt of winter: thick parkas, wool scarves, heavy boots, and the salty grit tracked in from the road. Audit every coat and pair of boots before storing them. A broken zipper, cracked sole, or missing glove mate means the item should not be stored; you would only defer the decision until November. Clear the flat surfaces of flyers, loose batteries, keys to unknown locks, and dried-out lip balms so the entryway flows again. 2. Wardrobe: Clothes for a Life You No Longer Live The seasonal switch is a chance to confront what you actually wear. If a sweater stayed folded through January and February, it is unlikely to earn its place next year. Inspect spring and summer clothes as you unpack them: elastic degrades, and white fabrics yellow in storage. A sundress that does not fit or a stained t-shirt is not a virtue to keep. Culling now reduces the friction of getting dressed every morning. 3. Kitchen: Pantry, Fridge, and Container Drawer Winter cooking leaves relics: spices bought for holiday meals, specialty flour for cookies, and jars of heavy sauce. By spring, much of it is stale or forgotten. Rock-hard brown sugar, scentless dried herbs, and three-year-old sprinkles are trash, not assets. Clear the dregs from the refrigerator door for better airflow and room for fresh produce. Then tackle the container drawer: any container without a matching lid, and any lid without a container, gets recycled on the spot. 4. Bathroom: Expired Products and Old Remedies The medicine cabinet and vanity hide expired chemistry. Check dates on everything: last summer’s sunscreen has likely lost its efficacy, mascara and liquid makeup harbor bacteria, and expired medications lose potency and can become chemically unstable. Dispose of medications responsibly through a pharmacy take-back program rather than flushing them. A streamlined counter with only current products creates a calmer morning routine. 5. Living Areas: Paper Piles and Tech Graveyard Winter hibernation breeds doom piles: stacks of mail, catalogs, and school papers. Spring, often tax season, is the deadline. Most manuals, bills, and statements live digitally now, so shred the paper copies and stop feeding the dust collectors, since Health Canada notes that dust and dust mites collect in fabrics, carpets, and anywhere dust accumulates. Then recycle the cables you cannot identify, broken headphones, and remote controls for devices long gone. If you have not used a piece of tech in a year, let it go. 6. Linen Closet: Towels and Sheets You Do Not Use Scarcity thinking keeps scratchy towels and threadbare sheets in the closet “just in case,” but we reach for the same few favorites every time. An overstuffed closet also blocks air circulation and turns musty. Donate old towels to animal shelters, discard sheets with snapped elastic, and keep only linens you actually use and love. 7. Garage and Shed: Broken Tools and Winter Debris Winter turned the garage into a dumping ground. Clear broken snow shovels, empty bags of road salt, and outgrown winter sports gear before you can reach the lawnmower and bicycles. Inspect patio furniture and planters too: a cracked pot from the freeze-thaw cycle or a rusted chair will only annoy you all summer. Spring Declutter Checklist at a Glance Zone Toss or Donate If Outcome Entryway Broken zippers, cracked soles, single gloves Clear hooks and floor space Wardrobe Unworn this winter, stained, or ill-fitting Faster morning decisions Kitchen Stale spices, old condiments, lidless containers Better airflow, fresh ingredients Bathroom Expired meds, old sunscreen, used-up cosmetics Calmer, safer routine Living areas Paper piles, orphan cables, dead tech Less dust, less visual noise Linens Scratchy towels, sheets with broken elastic Fresh, breathable closet Garage and shed Broken shovels, empty salt bags, cracked planters Room for summer gear Frequently Asked Questions How do I decide what to throw away during a spring declutter? Ask whether you used the item in the past year and whether it still works or fits. If it is expired, broken beyond repair, or stored only out of guilt, let it go. When in doubt, donate items in good condition rather than keeping them “just in case.” Should I declutter before or after cleaning? Always declutter first. Moving boxes and piles reveals dust, scuffs, and grime that were hidden, so cleaning after decluttering gives you a genuinely fresh result. Decluttering is the demolition phase; cleaning is the reconstruction phase. How long should a full spring declutter take? Plan one session per zone, roughly two to three hours for the wardrobe and one hour each for the entryway, kitchen, bathroom, linens, and garage. Spread the zones across a weekend or one evening per room so the job stays manageable. What should I do with items that are too worn to donate? Recycle what you can: textiles in poor condition can go to textile recycling bins, electronics to municipal e-waste depots, and medications to pharmacy take-back programs. For anything left,

Spring Declutter Checklist: 7 Basic Things You Should Get Rid of at Home This Spring Read More »

March Checklist: 8 Safety Checks to Do When You Change the Clocks

The March Checklist: Turn Clock Change Day Into Home Safety Day March is the hinge between winter and spring: the snow exposes months of grit, yet the ground stays too wet for a full spring clean, so treat the month as a readiness drill instead. Replace what winter wore out, test the systems that kept the house safe and warm, and clear away salt, dust, and stale air. The second Sunday of March is when clocks spring forward, the perfect annual reminder for home maintenance. The old rule still holds: when you change your clocks, change your batteries. 1. Test Smoke and Carbon Monoxide Detectors Even hardwired units usually carry a battery backup, so install fresh batteries and test every alarm this month. Check the dates on the backs of the units: smoke alarms typically last about ten years, while carbon monoxide detectors often expire after roughly seven. Vacuum the units too; dust inside can trigger false alarms. Health Canada’s overview of carbon monoxide explains why the risk peaks in colder months, when fuel burning appliances run the most. 2. Reclaim the Mudroom From Salt and Gravel March is the muddiest month, and the entryway takes the beating. Scrub the boot trays outdoors or in a laundry tub to remove the crusty residue of road salt and gravel, because salt dust settles on your furniture. Rotate the footwear: clean and condition the heavy winter boots, store them, and bring out rain boots and mud shoes. Wash the floor with vinegar water to neutralize the alkaline haze tracked in salt leaves before spring humidity makes it sticky. 3. Change the Furnace Filter and Clear the Vents After months of near constant running, the furnace filter is choked with dust, pet dander, and lint. It matters in March because fluctuating temperatures make the furnace cycle often, and restricted airflow can overheat the heat exchanger. Swapping the filter cuts energy bills and improves the air you breathe. Vacuum the cold air return grilles, and lift out floor registers to pull winter dust out of the ductwork before you switch to air conditioning and blow it back into the rooms. 4. Wash Interior Glass and Dig Out Window Tracks The lower March sun shines straight into rooms that stayed dim all winter, and this truth lighting exposes the haze of candle soot, cooking grease, and condensation on the inside of the panes. Cleaning interior glass now maximizes the light that lifts the look of the home. Do not forget the tracks: condensation pools there and mixes with dust into a black sludge that can grow mold. Dig the sludge out with an old toothbrush and a vacuum crevice tool before open-window season blows mold spores inside. Health Canada’s mould guidance recommends fixing moisture problems right away and controlling humidity to keep mold from spreading. 5. Give the Refrigerator a Ten Minute Tune-Up Start with the hard working kitchen appliances. Vacuum the refrigerator coils: when those coils get blanketed in fuzz, the compressor runs longer and hotter to keep food cold, and cleaning them takes about ten minutes and can extend the life of the fridge by years. Defrost the freezer if ice has built up, and eat through the stockpile of frozen winter foods. Wipe the door gaskets with warm soapy water, because sticky spills can tear the rubber seal and let cold air escape. 6. Deodorize Sofas, Carpets, and Curtains Soft surfaces act like giant filters, trapping body oils, dust, and odors all winter. Sprinkle baking soda over carpets and fabric sofas, let it sit for an hour to absorb the oils, then vacuum slowly. Launder the heavy throw blankets, and vacuum velvet or wool curtains that caught dust from heater convection all season. Cutting that dust load eases the coming allergy season. 7. Walk the Exterior Perimeter on a Clear Day One dry afternoon is enough for a perimeter check. Look for freeze-thaw damage: loose gutters, debris blocking downspouts, and extensions that no longer point away from the foundation, because water that cannot escape the roof ends up in the basement. Inspect the foundation for cracks and confirm melted snow drains away from the walls. If you have a sump pump, test it now by pouring a pail of water into the pit until the float lifts and the pump runs, before spring rains raise the water table. 8. Audit the Pantry Before Bugs Wake Up Winter stockpiling crowds the pantry with extra cans and baking supplies. Check the expiration dates on items pushed to the back of the shelves, inspect flour and grains for pests that may have hatched in the warmth of the kitchen, and consolidate open boxes so you can see what you actually own and stop overbuying. Wipe the shelves to remove crumbs, which attract the ants that start scouting as the ground warms. March Safety Checks at a Glance Set aside thirty minutes and work through the drill in four quick zones: Safety: detector batteries, exterior perimeter, sump pump. Air: furnace filter, vents, carpets, curtains. Surfaces: window tracks, mudroom, pantry shelves. Kitchen: fridge coils, gaskets, freezer stock. Task Action Why it matters Detectors New batteries, test, vacuum dust Working alarms save lives Mudroom Scrub boot trays, wash floors Stops salt dust and sludge Furnace New filter, vacuum vents Lower bills, better air Windows Clean glass and tracks More light, no mold spores Fridge Vacuum coils, defrost Longer appliance life Soft goods Baking soda, launder, vacuum Fewer allergens Perimeter Gutters, foundation, sump test No flooded basement Pantry Check dates, wipe shelves No pests, less waste Frequently Asked Questions About the March Checklist Why do I need to change detector batteries when the clocks change? The clock change is an easy date to remember, and fresh batteries plus a test keep alarms working, since even hardwired units usually run on battery backup. Why does the furnace filter need changing in March specifically? The filter is clogged after months of winter use, and March’s fluctuating temperatures make the furnace

March Checklist: 8 Safety Checks to Do When You Change the Clocks Read More »

curtains and blinds

Cleaning of Blinds and Curtains: Removing the Dust Trapped in Your Curtains and Blinds Before Spring

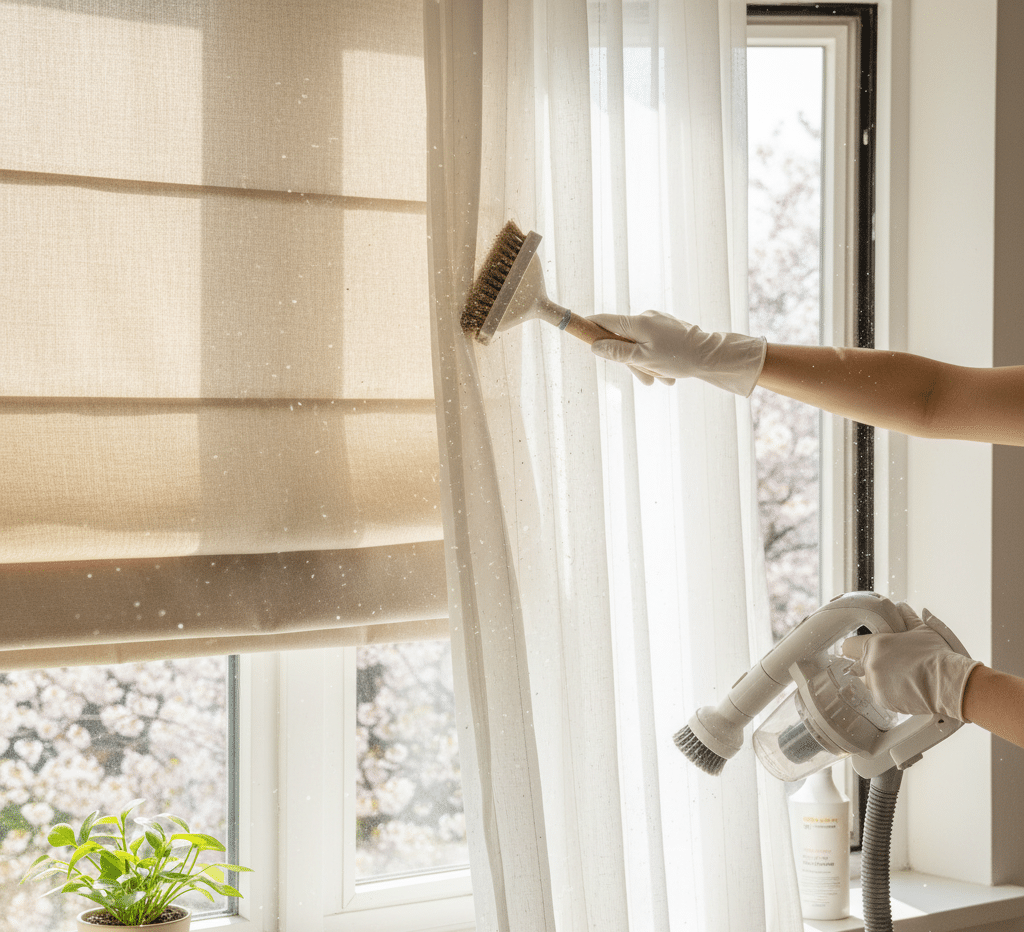
Cleaning of Blinds and Curtains: Removing the Dust Trapped in Your Curtains and Blinds Before Spring The first hint of spring in Toronto is not the thermometer; it is the light. As the sun climbs higher in late winter, its beams reach deeper into rooms that seemed dim all January, and they expose everything: the hazy film on the glass, the dust on the sills, the grey fuzz on the blinds, and the state of the tracks nobody inspected since fall. That unflattering spotlight is actually good news. It marks the perfect window of opportunity to clean the entire window assembly, inside and out of the weather, before spring arrives and steals your weekends. Why Window Treatments Hold So Much Dust Blinds and curtains are the lungs of the window. Glass is usually the coldest surface in a wall, so warm indoor air rises, cools against it, and sinks, cycling the room’s air past your curtains and blinds day and night. The fabrics trap allergens, cooking odors, and smoke like a filter; synthetic blinds generate static that actively attracts dust into a tenacious grey layer. All winter that load accumulates invisibly, and all winter you breathe the results. Health Canada’s indoor air contaminants guidance flags exactly this kind of settled dust and dander as a driver of poor air quality in sealed winter homes. Clean the glass but not the treatments, and the first time you adjust the curtains, a fresh cloud of dust lands right back on your work. The Curtain and Blind Reset Take the textiles down. Curtains go into the wash or to a dry cleaner according to their fabric labels, and they come back lighter, literally, without their winter load of dust and odors. Blinds need manual care: each slat wiped with a damp microfiber cloth or a microfiber wand, working top to bottom and flipping the wand for the back side. The dampness matters, not just the wiping, because moisture is what finally breaks the static bond that makes feather dusting so futile. It is repetitive work, but it is the single biggest air quality win in the room. Do Not Skip the Glass, Tracks, and Sills The window assembly toolkit, gathered once, covers every part of it: Vacuum with a crevice tool for loose track debris An old toothbrush for the corners and weep holes A degreasing solution of water, vinegar, and a drop of dish soap A squeegee and microfiber cloths for streak-free glass Fine sandpaper and matching paint for sill touch-ups While the treatments are down, handle the rest of the assembly. Interior glass carries a greasy film of cooking vapors, candle soot, and condensation residue that plain glass cleaner smears around; a degreasing solution of water, vinegar, and a drop of dish soap, finished with a squeegee, actually removes it. The tracks below are the real health hazard: dust, dead insects, and condensation pool there into a sludge that grows mold, dries out, and releases spores into the room with every draft. Excavate the tracks with a vacuum crevice tool, soak the crusty corners with cleaning solution, and agitate with an old toothbrush until the channels drain clear again. Then inspect the sills and casings: winter condensation softens paint and breeds mildew on wood, so scrub with a vinegar solution, sand any peeling spots, and touch up the paint before spring humidity arrives. While you are at the cords, check them for wear against Health Canada’s blind cord safety guidance, since spring sunlight often reveals frayed cords that became a hazard over winter. Part of the Window The Task How Often Curtains Launder or dry clean per fabric label Twice a year, before spring and fall Blinds Wipe each slat with a damp microfiber wand Monthly, deeper at season change Glass, interior Degreasing solution plus squeegee finish Seasonally Tracks and weep holes Vacuum, soak, and agitate out the sludge Seasonally, or when grit appears Sills and casings Scrub mildew, sand and repaint soft spots Yearly inspection Why Do It Now, Not in April There is strategy in the timing. On the first truly warm, sunny day, you will want to be on a patio, not indoors scrubbing window tracks with a toothbrush. Front-load the tedious work into the last grey weekends of winter and the payoff arrives with the season: the first window you slide open glides instead of grinding, the breeze comes in without a puff of spores, and the room gets noticeably brighter, which matters more than it sounds in a city where winter gloom weighs on everyone’s mood. Maximizing clean glass is maximizing the daylight that reaches your rooms. Blinds and Curtain FAQs Can I clean blinds without taking them down? Yes, for routine dusting: close the slats, wipe with a damp microfiber cloth, flip, and repeat. A full seasonal clean with each slat wiped on both sides while the blinds hang is slower but avoids rehanging them. Fabric and specialty blinds usually do better professionally than with water at home. How do I stop static from attracting dust right back? Static is worst in dry winter air and on dry synthetic surfaces. Wiping slats with a slightly damp cloth, rather than dusting dry, removes the charge along with the dust, which is why the dust-free period right after a proper wipe lasts so much longer. What is the black stuff in my window tracks? Usually a mix of dust, dead insects, and mold colonies fed by condensation. Treat it as a health issue rather than a cosmetic one: vacuum it out, agitate with cleaner, and keep the channels draining so it does not return. When should I call professionals for windows? When the count of windows multiplies the job, twenty windows means twenty tracks, forty sides of blinds, and a full weekend. A professional team brings steam cleaners for the tracks, high-reach tools for the blinds, and squeegee technique for a flawless finish in one visit. Let the Spring Light In Toronto Shine Cleaning handles the

Cleaning of Blinds and Curtains: Removing the Dust Trapped in Your Curtains and Blinds Before Spring Read More »

A woman is at peace while her house is clean and organized during the winter.

Winter Organization: 5 Amazing Daily Habits to Keep Your House Organized During a Snowstorm

Winter Organization: 5 Daily Habits That Keep a Snowstorm Home Tidy When the temperature drops, the way a house works changes overnight. Windows stay shut, everyone spends more hours inside, and every trip outdoors drags in parkas, boots, and slush. Winter clothing takes roughly three times the closet volume of summer gear, so a home that felt spacious in September can feel buried by January. Keeping things organized through a snowstorm is not about occasional purges; it is about small daily habits that stop the mess before it compounds. These five routines take minutes each day and turn the entryway, kitchen, and living room back into calm, usable space. Habit 1: Give Every Winter Item a Landing Zone at the Door The entryway is where the winter battle is won or lost. A standard coat closet fails in daily use because nobody wants to fight hangers while wearing gloves, which is why coats end up draped over chairs. Install a sturdy wall-mounted rack or a heavy-duty coat stand for the gear currently in rotation and keep the closet for storage pieces, separating active items from backup ones. Beneath the coats, a high-walled boot tray is not optional: it catches the melt-off from wet boots and stops salt water from puddling on your floor. Fill the tray with river stones so boots drain and dry instead of soaking in dirty water. Finally, give each family member a labeled bin for hats, mittens, scarves, and neck warmers so the frantic morning search for a matching glove pair disappears. Habit 2: Send Blankets and Cushions Back to Their Station Winter is the season of cocooning, when extra throws, pillows, and cushions pile onto every sofa to make the house feel warm. Comfortable as they are, draped blankets create instant visual chaos. Choose a designated home for soft goods, whether a large wicker basket, a storage ottoman, or a blanket ladder, and adopt the rule that leaving the room means returning the blanket to its station. The same reset applies to slippers, chargers, and books: everything keeps a place, so the living room stays cozy instead of cluttered. Habit 3: Rotate Kitchen Gear for Soup and Stew Season Cold-weather cooking changes which tools you reach for daily. The slow cooker, roasting pan, and Dutch oven take over from the salad spinner and grill tools, so rotate your storage to match: move barbecue equipment, picnic ware, and summer small appliances to high shelves or the basement, and bring the heavy pots and stew-making appliances down to waist level where you can grab them without effort. Stocking up for storms also overloads the pantry, so use tiered risers and clear bins to keep canned goods and comfort foods visible. When you can see what you own, nothing gets pushed to the back of the shelf and forgotten until it expires. Habit 4: Clear Every Flat Surface Before Bed Grey skies and short days make visual clutter feel heavier in winter. Piles of mail, scattered toys, and crowded counters raise stress levels, and unlike summer, you cannot escape them by going outside. A clean-surfaces policy counters the gloom: counters, tables, and desks get cleared every evening so the limited winter light reflects instead of being swallowed by stuff. Rooms instantly feel larger and airier, and mornings start calmer when the kitchen island and dining table are ready for breakfast rather than buried under the previous day’s debris. Habit 5: Audit the Closet and Control Humidity Daily Winter closets reward a ruthless eye. A coat not worn in two winters, or an itchy sweater that pills, is taking space from the pieces you actually wear; donate it. Vacuum-seal bags compress the off-season summer wardrobe so sundresses and beach towels store flat under the bed, freeing the rod for bulky winter layers. Humidity is the invisible half of winter organization: dry furnace air creates static that pulls dust onto walls and electronics, so run a humidifier to settle particles where the vacuum can reach them. The flip side is condensation, since warm indoor air meeting cold glass creates damp sills where mold appears quickly. As Health Canada explains, controlling humidity and fixing moisture problems are the keys to preventing mold, and the CDC adds that mold grows wherever moisture collects, so keep heavy drapes and furniture away from windows and wipe sills down whenever you spot droplets. Your 5-Minute Evening Reset A daily reset takes less time than it sounds and prevents the weekend-long catch-up: Return boots to the tray and coats to their hooks before you take yours off. Drop hats and gloves into each family member’s bin on the way in. Return throws and pillows to the basket or ladder as you leave the living room. Clear the kitchen counters and dining table of the day’s debris. Wipe the entryway floor and window sills that show salt dust or condensation. Zone Daily habit Payoff Entryway Hang coats, tray the boots, bin the accessories No puddles, no salt trails, no lost mittens Living room Return soft goods to their station Cozy without the chaos Kitchen Keep winter cookware at hand, pantry visible Faster meals, less food waste Whole house Clear surfaces and manage humidity Brighter rooms, less dust and mold risk Frequently Asked Questions How do I keep the entryway from becoming a disaster during a snowstorm? Set up a coat rack for daily-use outerwear, a boot tray with river stones for wet footwear, and a labeled bin per person for small accessories. Add a strict no-shoes-past-the-mat rule, then spend five minutes each evening returning everything to those zones. What is the best way to store winter coats and boots in a small home? Store off-season items in vacuum-seal bags under beds or on high shelves, and keep only current-season gear on the main rod. Bulky winter items in active rotation belong on an open rack, not jammed into a closet where they wrinkle and get abandoned on chairs. Should I run a humidifier in winter, and

Winter Organization: 5 Amazing Daily Habits to Keep Your House Organized During a Snowstorm Read More »

Valentine's Day and cleaning home

Valentine’s Day: 5 Essential Cleaning Tasks You Should do Before February 14th

Valentine’s Day is a holiday that carries a heavy weight of expectation. We are culturally conditioned to view February 14th as a litmus test for our relationships, a day defined by grand gestures, expensive dinners, and tangible gifts. The traditional narrative involves escaping the home-fleeing to a high-end restaurant or a boutique hotel-to find romance. However, there is a shifting trend toward “staying in.” Whether driven by a desire for privacy, the comfort of home, or simply the exhaustion of navigating crowded venues, many couples are choosing to celebrate within their own four walls. This shift changes the dynamic of the holiday entirely. When the home becomes the venue, the state of the home becomes the atmosphere. You cannot create a romantic, intimate vibe in a space that is cluttered, dusty, or chaotic. In this context, cleanliness is not just a chore; it is the foundation of romance. It is the invisible architecture that allows connection to happen without distraction. Peace of Mind To understand why a clean home is the ultimate aphrodisiac, one must look at the psychology of relaxation. It is biologically difficult to be intimate or relaxed when the brain is processing “visual noise.” Clutter, dirty dishes, and laundry piles serve as visual cues for work. They remind us of the to-do list. When you sit on the sofa to enjoy a glass of wine with your partner, but your eye catches a dust bunny rolling across the floor or a stack of bills on the coffee table, your cortisol levels spike. You are pulled out of the moment and back into the grind of daily management. A pristine home silences this noise. It creates a neutral, serene canvas where the only focus is on the person sitting next to you. It signals that the “work” of the household is paused, granting permission for the “play” of the relationship to begin. 1.Bedroom The bedroom is the sanctuary of Valentine’s Day, yet it is often the room that suffers the most from “lived-in” syndrome. We tend to let the master bedroom become a catch-all for the things we don’t want guests to see in the living room. Piles of clothes on the chair, a nightstand crowded with charging cables and water glasses, and bedding that has lost its crispness all conspire to kill the mood. Transforming this space requires a hotel-level approach to detail. It starts with the bed itself. Laundering the sheets, duvet cover, and pillowcases is non-negotiable. There is a tactile luxury to sliding into a bed that smells fresh and feels crisp. Beyond the linens, the floors need to be cleared. Vacuuming under the bed-a place where dust accumulates undisturbed for months-improves the air quality of the room, removing that subtle, stale scent that often lingers in bedrooms. Clearing the surfaces of the dresser and nightstands allows for the addition of mood lighting, such as candles or a dimmer lamp, without creating a fire hazard or looking cluttered. 2.Bathroom The bathroom creates a different set of challenges. If you are planning a romantic bath or simply want to get ready for the evening in a pleasant environment, the bathroom must be impeccable. Nothing destroys a romantic illusion faster than a ring around the tub, a toothpaste-splattered mirror, or a trash can that hasn’t been emptied. A “spa-level” clean involves scrubbing the grout to remove any mildew, polishing the chrome fixtures until they gleam, and ensuring that the towels are fluffy and fresh. It is about removing the evidence of daily biological maintenance to create a space of pampering. The sensory experience of the bathroom-the smell of soap rather than damp towels, the shine of the tiles-sets the tone for self-care and mutual appreciation. 3. Kitchen and Dining Area For those planning a romantic dinner at home, the kitchen and dining area become the stage. Cooking a meal together can be incredibly romantic, but cooking in a dirty kitchen is stressful. If the sink is full of the morning’s coffee mugs and the stove is covered in last night’s grease splatters, the cooking process becomes a battle against the mess. A pre-Valentine’s deep clean of the kitchen ensures that you have a clean slate. It involves degreasing the stovetop, wiping down the cabinet fronts, and ensuring the dishwasher is empty and ready to receive the dirty dishes as you cook. This logistical preparation allows the evening to flow smoothly. Furthermore, the dining table needs to be reclaimed. In many homes, the table serves as a desk, a mail sorting station, or a laundry folding area. Clearing it completely and polishing the surface allows you to set the table properly, perhaps with a tablecloth, candles, and the “good” china. It signals that this meal is different; it is an occasion. 4.Lighting and Scent Lighting and scent are the final touches of a romantic atmosphere, but they rely heavily on cleanliness to be effective. You cannot light a room beautifully if the light bulbs are coated in dust or if the glass shades are filmy. Dust diffuses light, making a room feel dimmer and dingier. Wiping down light fixtures and cleaning windows allows for a sparkle that mimics a high-end venue. Similarly, scent is powerful. Many people try to mask household odors with heavy perfumes or scented candles. However, the smell of “Vanilla Cupcake” layered over the smell of a full garbage bin or a musty carpet creates a cloying, unpleasant aroma. True freshness comes from removing the source of the odor first. Deep cleaning the carpets, taking out the trash, and scrubbing the sink drains ensures that the air is neutral. Once the air is clean, the subtle scent of fresh flowers or a high-quality candle can actually shine without competing with the funk of the house. Acts of Service There is also the concept of “Acts of Service” as a love language. For many people, seeing their partner scrubbing the floor or taking the initiative to deep clean the bathroom is a profound expression of

Valentine’s Day: 5 Essential Cleaning Tasks You Should do Before February 14th Read More »

Fabric Softener vs. Vinegar: Which is Better for Your Laundry?

Fabric Softener vs. Vinegar: Which Is Better for Your Laundry? Fabric softener has been sold to us as the final step of clean laundry: the silky feel, the lingering scent, the static-free pull from the dryer. But softener is not a cleaning agent at all. It is a conditioning product that coats every fiber in a thin chemical layer, and that coating has consequences for towels, athletic wear, your washing machine, and sensitive skin. White vinegar, the old-fashioned alternative, takes a completely different approach. Comparing how each one works on your specific loads is the only way to decide which belongs in your laundry routine. How Fabric Softener Works: Softness Comes from a Coating Softeners rely on cationic surfactants, positively charged molecules that cling to the negatively charged surface of wet fabric and leave behind a lubricating film of fatty acids or silicones. Think of it as a thin wax layer that survives the rinse cycle. That film delivers the obvious benefits: cotton and linen feel plush again instead of stiff, the coating conducts away the static that builds up in dry winter air, fragrance is trapped in microscopic capsules that burst as you move, and wrinkles relax enough to cut down on ironing. The trade-off starts when you consider what else that layer touches. The Hidden Costs: Towels, Sportswear, and Kids’ Sleepwear The waxy residue that makes a towel feel soft also makes it repel water. Softener on bath towels waterproofs the terry loops, so the fabric pushes water around your skin instead of absorbing it, and the only fix is stripping the buildup with vinegar and hot water. Athletic wear suffers even more: performance fabrics wick sweat through engineered micropores, and softener residue fills those pores, trapping sweat and bacteria inside the weave. The garment stops wicking, and the trapped bacteria create a musty perma-stink that detergent cannot reach in later washes, which is why sportswear makers universally warn against softeners. There is also a safety angle most people miss: children’s flame-resistant sleepwear loses some of its fire resistance when coated in softener residue, which is why the bottles carry warning labels about sleepwear and flame-resistant fabrics. Microfiber cleaning cloths lose their electrostatic grab and stop picking up dust, and the buildup eventually dulls bright colors and leaves whites looking grey or yellow while attracting extra lint. What Softener Does to Your Washing Machine The washer pays a hidden price. In the cool damp environment of the machine, softener fats and silicones congeal into a sludge that repair technicians call scrud, which coats the outer tub and drain lines and becomes a breeding ground for mold and mildew. It can confuse sensors, restrict the drain pump, and leave black flakes on your next load, and front-loading machines are the most vulnerable. If your laundry room smells sour no matter what you wash, softener buildup is a prime suspect. Using softener means committing to a much more rigorous machine-cleaning schedule to keep that biology in check. Sensitive Skin and the Environment Softener fragrances and preservatives are among the leading triggers of contact dermatitis, and for people with eczema, the residue left on clothing can mean itching and rashes on the very garments meant to feel luxurious. Environmentally, many formulas rely on quaternary ammonium compounds that break down slowly and can harm aquatic life once they reach waterways, while single-use dryer sheets add non-recyclable polyester waste to landfills. Whatever you choose for your laundry, follow label directions and keep products stored safely out of reach, since the Government of Canada stresses that household chemical products need careful handling and storage. What Vinegar Does in the Rinse Cycle White distilled vinegar is the opposite philosophy. Its mild acidity strips away detergent residue and the mineral deposits left by hard water, relaxing fibers back to their natural softness without adding any coating. Towels rinsed with vinegar stay thirsty, sportswear keeps its wicking pores open, and the acetic acid smell evaporates completely as clothes dry, so nothing lingers on the fabric. Vinegar will not deliver the slippery plushness or perfume of commercial softener, but it restores fabric the way the manufacturer intended. In the dryer, wool dryer balls complete the natural routine: the felted balls bounce between garments, physically softening fibers and separating loads for better airflow, which shortens drying time and cuts static with no chemicals at all, and they last for years. Which Load Gets What: A Simple Laundry Strategy The smartest approach is to stop treating softener as an every-load default and match the product to the fabric: Never use softener on towels, microfiber cloths, or any performance or athletic wear. Skip it on children’s sleepwear and anything labeled flame-resistant. Use vinegar in the rinse cycle for towels, sportswear, and everyday cottons. Reserve softener for occasional loads of sheets, blankets, or casual clothing where you value the feel and scent. Laundry load Best choice Why Bath towels Vinegar rinse Keeps terry loops absorbent Athletic and performance wear Vinegar rinse Keeps wicking pores open, prevents perma-stink Microfiber cleaning cloths Vinegar rinse or nothing Preserves electrostatic dust pickup Kids’ sleepwear No softener ever Protects flame resistance Cotton sheets and casual clothes Softener occasionally Softness and scent, low functional cost As Health Canada’s household products guidance explains, even everyday laundry items deserve a look at their risks, so read your softener and detergent labels and match each product to the load. Frequently Asked Questions Does vinegar really make clothes soft? Yes, in a different way than softener. The mild acid strips detergent and mineral buildup that makes fibers stiff, so fabric returns to its natural texture. It will not feel as slippery as a softener-coated garment, but towels stay absorbent and the vinegar smell disappears once the load is dry. Why does my washing machine smell even though I use softener? Softener residue congeals in the tub and drain lines into a sludge called scrud, which breeds mold and mildew, especially in front-loaders. Switch to vinegar rinses for most loads, and run

Fabric Softener vs. Vinegar: Which is Better for Your Laundry? Read More »

tidying the bedroom in 5 minutes

How to Clean Your Room in 5 Minutes: A Step-by-Step Routine for Busy Mornings

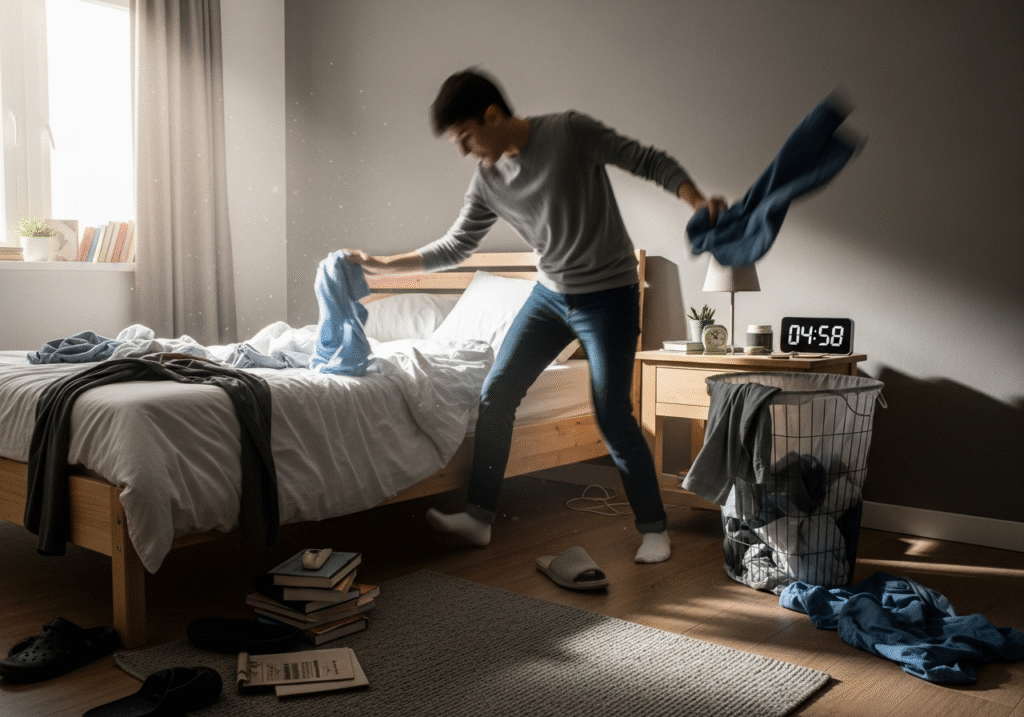
Why a Five-Minute Room Clean Works Better Than You Think A messy bedroom is often the first casualty of a busy week. When deadlines pile up and energy runs low, clothes cover the chair, mugs crowd the nightstand, and the bed stays tangled. That visual clutter keeps the brain in work mode, so the room meant for rest starts to feel like unfinished business. Most people assume fixing it demands an entire afternoon of sorting and scrubbing, so they postpone the job until the mess looks impossible. In reality, a focused five-minute reset can turn the room around. It is not a deep clean; it is a quick rescue that clears the floor, calms the surfaces, and restores a feeling of control before you rush out the door. What You Need Before the Timer Starts Speed depends on preparation. Decide in advance where every type of clutter will go so you never pause to make decisions mid-clean. This is not the moment for perfect organization; it is a rescue mission with three simple tools: A large trash bag for wrappers, receipts, empty bottles, and anything broken. A laundry hamper, emptied before you begin, for every piece of clothing sitting on the floor. A relocation basket, any bin or box, for objects that belong in other rooms. Keep the three vessels within reach. The instant you leave the room to return a mug to the kitchen, the plan falls apart: the dishwasher, the television, or a buzzing phone will pull you off course. The Five-Minute Routine, Minute by Minute Follow the order below and resist the urge to skip ahead. Each step prepares the next, and the room looks dramatically different by the end. Minute Task Goal 1 Collect trash Remove everything that signals neglect 2-3 Clear floor textiles into the hamper Expose the floor completely 4 Make the bed Anchor the room in order 5 Tidy surfaces, then open the curtains Leave only essentials in view Minute 1: Trash Only Garbage is the easiest category because nothing sentimental is attached to it. Scan for snack wrappers, used tissues, price tags, empty water bottles, and receipts, and break down stray cardboard boxes on the spot. Sixty seconds of ruthless discarding instantly lifts the room’s hygiene and removes the items that suggest neglect. Minutes 2-3: Attack the Floordrobe The mound of half-worn clothes on the rug is the biggest visual offender in any bedroom. There is no time to sniff shirts and judge freshness; anything resting on the floor goes into the hamper, no exceptions. Seeing the carpet again makes the space feel larger and clears the obstacle course underfoot. If a pile of clean clothes is waiting to be put away, fold it once and set it neatly on the chair or the foot of the bed. A tidy stack reads as deliberate, while a sprawled pile reads as chaos. Minute 4: Smooth the Bed The bed is the focal point of the room, and a made bed signals that everything else is under control. You do not need hospital corners: pull the duvet up over the pillows, smooth out the wrinkles, and prop the pillows upright. In about forty-five seconds you create a large, calm surface that balances the busyness around it. Minute 5: Surface Triage and Fresh Air Nightstands, dressers, and desks attract wandering clutter: coffee mugs that drifted in from the kitchen, mail that never made it out of the hallway, tools that wandered in from the garage. Sweep every foreign object into the relocation basket and set it outside the door to be sorted later. Leave only the essentials: a lamp, a book, a clock. Finish by opening the curtains or blinds; natural light and moving air make a room feel cleaner than any spray can. Why Short Resets Beat Weekend Marathons Brief, frequent resets outperform occasional marathons because they stop the buildup before it starts. A daily sweep keeps the bedroom liveable, lowers the stress of sleeping beside a to-do list, and frees your weekend for the jobs that truly matter. It is the same logic behind our regular maid service: steady upkeep beats heroic catch-up sessions. When the whole home needs attention, our team covers everything from bathrooms to baseboards. Frequently Asked Questions How do I clean my room in 5 minutes when it is very messy? Work in the fixed order: trash first, then floor clothes, then the bed, then surfaces. Do not reorganize, do not leave the room, and do not aim for perfect decisions. Speed and visible results are the only goals. What should I do with clothes that are not dirty? Anything that sat on the floor goes in the hamper to keep the room honest. Clean clothes still waiting for a home can be folded once and stacked on a chair or the foot of the bed until you have time to hang them. Can a 5-minute clean replace a deep clean? No. The quick reset handles visible clutter, while a deep clean removes dust, allergens, and grime from carpets, mattresses, and hidden surfaces. The CDC notes that regular cleaning with soap or detergent removes most germs from surfaces, while disinfection is only needed when someone in the home is sick. How often should I reset my room? Daily is best, ideally first thing in the morning or just before bed. A one-minute nightly sweep of surfaces and floors keeps the room from ever reaching the point where five minutes cannot fix it. When Five Minutes Is Not Enough The five-minute reset has honest limits. It will not lift the dust from a ceiling fan, pull allergens out of a mattress, or refresh window tracks; those jobs take time and proper tools. Damp, poorly aired rooms also invite dust mites and mould, which Health Canada links to moisture problems, so periodic vacuuming, washing, and airing still matter. When the grime has settled in and a quick tidy no longer feels like enough, book a deep cleaning service from Toronto

How to Clean Your Room in 5 Minutes: A Step-by-Step Routine for Busy Mornings Read More »

organizing a kitchen pantry

Cleaning The Pantry: 5 Expensive Mistakes You Are Making with Pantry Storage

The pantry is the engine room of the kitchen. It is the repository of potential meals, the fuel station for the family, and, all too often, the most chaotic space in the entire home. A disorganized pantry is not merely an aesthetic annoyance; it is a source of daily friction that wastes money, time, and mental energy. When you cannot see what you have, you inevitably buy duplicates, leading to a cycle of waste where expired cans of beans and stale crackers accumulate in the dark corners of deep shelves. Cooking becomes a chore because locating the necessary ingredients requires an excavation process. Furthermore, a cluttered pantry is a haven for pests, from pantry moths to ants, which thrive in the undisturbed debris of open packages. Transforming this space from a graveyard of good intentions into a streamlined, functional asset requires more than just buying a few plastic bins; it requires a systematic approach to inventory management and spatial planning. 1.Evacuation The process of organizing a pantry must begin with a total evacuation. There is no halfway measure here. Attempting to organize shelf by shelf results in simply shuffling the clutter from one side to the other. You must remove every single item-every spice jar, every cereal box, and every bag of flour-and place them on the kitchen table or counters. This reveals the true volume of your inventory and, more importantly, exposes the physical state of the pantry itself. Once the shelves are bare, you will likely find rings of sticky syrup, scattered grains of rice, and layers of dust. This is the moment to perform a deep clean. Vacuum the corners to remove any cobwebs or insect larvae. Wash the shelves with warm soapy water or a vinegar solution to cut through any grease or sticky residues. If you have wire shelving, pay attention to the undersides of the wires where grime collects. The space must be pristine before anything returns to it; you cannot build a system of order on a foundation of dirt. With the inventory exposed on your counters, the auditing phase begins. This is often the most painful part of the process because it forces you to confront waste. You must be ruthless. Check every expiration date. Spices that have been sitting since the last decade have lost their potency and should be discarded. The half-empty bag of stale chips, the hardened brown sugar, and the tea bags you bought on a whim and never drank must go. This purge is essential to create the negative space required for a functional system. If you find unexpired food that you know realistically you will not eat, donate it to a food bank immediately. Do not put it back in the pantry out of guilt; it will simply expire there later. 2.Categorization Once you have reduced the volume of items, the next step is categorization. Think of your pantry like a grocery store. Stores are navigated by zones-baking, breakfast, dinner, snacks, beverages. You must replicate this logic. Group all baking ingredients together: flour, sugar, baking powder, vanilla, chocolate chips. Group the breakfast items: oats, cereal, syrup, pancake mix. Group the dinner staples: pasta, rice, jarred sauces, canned vegetables. By creating these zones, you reduce the cognitive load of cooking. When you are making a cake, you only need to look at the baking zone. You are not hunting for vanilla extract behind a box of crackers. The most controversial but effective step in pantry organization is decanting. This involves removing food from its original commercial packaging and placing it into matching, airtight containers. Many people view this as an unnecessary aesthetic choice, but it is functionally superior for several reasons. First, commercial packaging is designed to sell the product, not to store it efficiently. Boxes are often half-empty, taking up unnecessary space. Bags are difficult to seal, leading to staleness and spills. Second, uniform containers stack and fit together like a puzzle, maximizing every inch of shelf space. Square or rectangular containers are mathematically more efficient than round ones, which leave gaps of “dead space” between them. Third, clear containers provide an instant visual inventory. You can see exactly how much rice or pasta you have left without opening a box, which simplifies grocery shopping. Finally, airtight containers are the only true defense against pantry moths and weevils, which can chew through cardboard and thin plastic. 3.Identification When selecting containers, consistency is key. Investing in a modular system where the lids are interchangeable and the bases stack securely prevents the “avalanche” effect common in messy pantries. For heavy items like flour and sugar, ensure the containers have wide openings so you can scoop directly out of them with a measuring cup. Labeling is non-negotiable. While you might think you can tell the difference between all-purpose flour and bread flour by sight, you will eventually make a mistake. Use a label maker, a chalk marker, or simple masking tape to identify the contents and, crucially, to note the expiration date on the bottom or back of the container. If you have cooking instructions-like the water-to-grain ratio for quinoa-cut that part of the box out and tape it to the back of the container. The architecture of your shelves dictates where items should live. The prime real estate is the area between your waist and your eye level. This is where your high-use items should go-the daily cereals, the dinner staples, and the snacks. Items that are heavy, like bulk bags of rice, cases of water, or large appliances, should go on the floor or the bottom shelf to prevent injury when lifting. Light items, like paper towels or extra napkins, and rarely used items, like the turkey roaster or holiday-specific sprinkles, should go on the highest shelves. If you have young children, place their approved snacks on a low shelf they can reach independently. This empowers them and keeps them from climbing the shelving units. 4.Facilitators Deep pantries present a specific challenge: things get lost in

Cleaning The Pantry: 5 Expensive Mistakes You Are Making with Pantry Storage Read More »