Mental Health

woman preparing the house for Halloween

Halloween Cleaning: The Secret to a Stress-Free Halloween? A Pre-Holiday Clean.

Why a Pre-Halloween Clean Makes the Holiday Easier Halloween planning usually centers on costumes, candy, pumpkins, and decorations, but the step that makes everything else work is a pre-holiday clean. A targeted cleaning session that moves from the outside of your home inward prepares your walkway, entryway, and main rooms for trick-or-treaters, guests, and decorations. It is not just about tidiness: clearing wet leaves and clutter prevents slips, a wiped-down kitchen makes treat prep safer, and a dust-free living room shows off your spooky decor instead of hiding it. Start Outside: Walkway, Porch, and Front Door The exterior is where the Halloween experience begins, so it deserves the first pass. The walkway, porch, and front door form the stage for the whole evening and the first point of contact for every visitor. Clear the Walkway and Porch In October, the path to your door is often covered with fallen leaves, twigs, and mud. Damp leaves make the path genuinely slippery, a real risk for small children in bulky costumes moving around in the dark. Sweep the entire walkway from the sidewalk to the front steps, then spray it with a garden hose to wash away residual grime. On the porch, remove leftover summer items such as empty planters, garden tools, and worn-out mats, then sweep the whole surface, paying attention to corners where dust and spiderwebs collect. Real webs usually just look neglected, so clear them away to make room for the fake ones. Wipe Down the Door, Windows, and Lights The front door is the centerpiece of the evening. Wipe it down with a damp cloth and warm water with a few drops of dish soap to remove fingerprints and summer dust, and clean the door handle and hardware while you are at it. Windows beside the entry deserve the same attention, since clean glass makes silhouettes, clings, and lighting effects pop; a half-and-half spray of white vinegar and water, wiped with a microfiber cloth or squeegee, does the job. Wipe railings and handrails too, because parents and kids will grip them in the dark. Finally, dust the exterior light fixtures, where built-up dirt and dead insects can dim the glow, and replace any burned-out bulbs so the path and your best decorations stay visible. Sweep leaves and debris from the whole walkway. Clear summer planters, tools, and worn mats from the porch. Wash the front door, handle, windows, and railings. Dust light fixtures and check every bulb. Clean the doormat and the floor beneath it. Inside: Entryway and Main Living Areas Inside, start with the entryway, which faces a constant parade of opening doors on Halloween night. Clear clutter like shoes, bags, and mail so there is a wide, safe path for groups of excited children. Take the doormat outside and scrub it with soap and water if it is a durable outdoor style, or vacuum it well if it is an indoor mat, and clean the floor underneath, which traps surprising amounts of grit. This is also the moment to place a boot tray by the door for wet footwear in the months ahead. From there, move to the living areas visible from the front door: dust the mantel, bookshelves, and tables where candy bowls will sit, then vacuum floors and upholstery. Removing dust and allergens now means better indoor air quality once the decorations go up and the windows stay closed for winter. Kitchen and Bathroom Prep for Guests and Treats The kitchen becomes the command center for Halloween treats, so clear the countertops and wipe them down with a sanitizing cleaner before any baking or candy prep begins. The CDC’s food safety basics start with keeping hands and surfaces clean, and its cleaning and disinfecting guidance explains when to go beyond a simple wipe. Take the chance to sort through the refrigerator, discarding old leftovers to make room for party platters and drinks. The guest bathroom deserves a quick seasonal refresh: shine the mirror, scrub the sink and toilet, wipe the countertop, and put out fresh hand towels with a full supply of soap and toilet paper. Clean the Decorations and Their Storage Space Before carrying bins up from the basement or garage, sweep the floor and wipe the shelves where they were stored so you do not track old dust into clean rooms. As you unpack, give each item a quick wipe: plastic pumpkins, ceramic figures, and other hard decorations gather a layer of dust in storage, and fabric pieces such as throws and wall hangings freshen up in the dryer on a no-heat air cycle. Area Pre-Halloween focus Why it matters Walkway and porch Sweep leaves, hose off grime Prevents slips in the dark Front door and windows Wipe surfaces, clean glass Clean backdrop for decor Entryway Declutter, clean doormat Safe path, less dirt tracked in Living areas Dust and vacuum Better air quality before winter Kitchen and bathroom Sanitize counters, stock supplies Safe treat prep, happy guests Frequently Asked Questions About Halloween Cleaning How early should I clean before Halloween? Aim for the weekend before, so the house is ready for decorating, costume try-ons, and any early parties, with a quick touch-up on the day itself. Is cleaning the walkway really necessary? Yes. Wet leaves and debris are a slipping hazard for children in bulky costumes moving in the dark, and a clear path also makes your home look inviting. What if I am not hosting a party? The essentials stay the same: safe walkways, a clean entry for trick-or-treaters, a tidy kitchen for candy, and a stocked bathroom. Skip only the extra party prep. How do I clean decorations that sat in storage? Wipe hard items such as plastic pumpkins and ceramic figures with a damp cloth, and freshen fabric pieces in the dryer on an air-only cycle to remove dust. Should I clean before or after decorating? Clean first, then decorate. A dust-free base makes the decorations look better and keeps you from wiping around fragile pieces later. Get

Halloween Cleaning: The Secret to a Stress-Free Halloween? A Pre-Holiday Clean. Read More »

Hot Tub Cleaning: Get Perfectly Balanced Hot Tub Water Every Time

The hot tub is a unique and cherished feature of a home, a vessel of relaxation and hydrotherapy that promises to melt away the stresses of the day. It is a place of quiet solitude under the stars or a centerpiece for social gatherings with friends and family. But this luxury comes with a non-negotiable responsibility. A hot tub is not a “set it and forget it” appliance like a refrigerator or a dishwasher. It is a small, self-contained, and highly active body of water, a delicate ecosystem that requires consistent, diligent maintenance to remain a source of pleasure and not become a source of murky, unsanitary, and potentially hazardous problems. The Chemistry of Water To own a hot tub is to become a part-time water chemist. The warm, bubbling environment that is so inviting to us is also the perfect breeding ground for bacteria, algae, and other microorganisms. The key to a clean, safe, and enjoyable hot tub experience is not about performing a massive, hours-long cleaning session once a year. It is about a regular, simple, and consistent routine of testing, balancing, and sanitizing. Understanding the fundamentals of this routine is the most important aspect of hot tub ownership. The foundation of hot tub care is water chemistry, and the three most important pillars of that chemistry are alkalinity, pH, and the sanitizer level. These three elements are interconnected, and a problem with one will inevitably affect the others. The first step for any hot tub owner is to get comfortable with testing the water, which should be done at least two or three times a week, or more often with heavy use. The most common method is with test strips, which are simple, color-coded strips of paper that you dip into the water for a few seconds. The first level you should check and adjust is the total alkalinity. Alkalinity is the water’s ability to resist changes in pH. It acts as a buffer, a stabilizing force that prevents the pH level from swinging wildly. The ideal range for total alkalinity in a hot tub is typically between 80 and 120 parts per million (ppm). If your alkalinity is too low, the pH will be unstable and can drop suddenly, making the water corrosive. If it is too high, it can cause the pH to drift upward, leading to cloudy water and scale formation. You can raise the alkalinity with a product often called “Alkalinity Increaser” (sodium bicarbonate) and lower it with a pH decreaser (sodium bisulfate). Always adjust the alkalinity first, before you address the pH. Alkalinity Once your alkalinity is in the correct range, you can adjust the pH. The pH is the measure of how acidic or basic your water is, on a scale of 0 to 14. A pH of 7 is neutral. The ideal range for a hot tub is between 7.4 and 7.6. This is not an arbitrary number; it is slightly alkaline to match the natural pH of the human eye, which is why it is the most comfortable for bathers. If the pH is too low (acidic), the water can be corrosive to the hot tub’s components, like the heater and the pump seals, and it can be irritating to the skin. If the pH is too high (basic), it will cause the sanitizer to become sluggish and ineffective, lead to cloudy water, and promote the formation of scale on the shell and in the plumbing. You can raise the pH with a “pH Increaser” (sodium carbonate) and lower it with a “pH Decreaser” (sodium bisulfate). Only after both the alkalinity and pH are properly balanced can you effectively manage the sanitizer. The sanitizer is the chemical that actively kills bacteria and other harmful microorganisms in the water. The two most common types of sanitizer are chlorine and bromine. Chlorine is fast-acting and a powerful oxidizer, but it can have a stronger chemical smell and is less stable in the hot, high-pH environment of a spa. Bromine is more stable at higher temperatures and has a less noticeable odor, making it a very popular choice for hot tubs. It also has the unique ability to be reactivated by “shocking” the water. The ideal level for chlorine is between 1 and 3 ppm, and for bromine, it is between 3 and 5 ppm. You must maintain these levels at all times to ensure the water is safe for bathing. Hot Tub Filters Even with a perfectly maintained sanitizer level, the water will accumulate other unwanted waste products over time. Soaps, lotions, deodorants, and organic matter from bathers build up in the water, creating a food source for bacteria and making the water cloudy and unpleasant. To combat this, you need to “shock” your hot tub on a regular basis, typically once a week. Shocking is the practice of adding a large dose of an oxidizer to the water. This does several things: it breaks down all the organic waste, it kills any resistant bacteria, and in a bromine spa, it reactivates the used bromine ions, turning them back into effective sanitizer. Always shock the spa with the cover off and the jets running to allow it to circulate properly and to let the gasses vent. Beyond the daily and weekly chemical maintenance, the hot tub has other physical components that require regular attention. The most important of these is the filter. The filter is the kidney of your hot tub, constantly working to remove small particles, hair, and debris from the water. A dirty, clogged filter cannot do its job, which will result in cloudy water and will put a strain on your pump. The filter cartridges should be removed and rinsed with a garden hose at least once a week. The goal is to spray the debris out from between the pleats of the filter. Every few months, the filter needs a deep clean. This involves soaking it overnight in a specialized filter cleaning solution to break down

Hot Tub Cleaning: Get Perfectly Balanced Hot Tub Water Every Time Read More »

Bathroom Cabinet

How to Organize Your Bathroom Cabinet: A Step-by-Step Guide

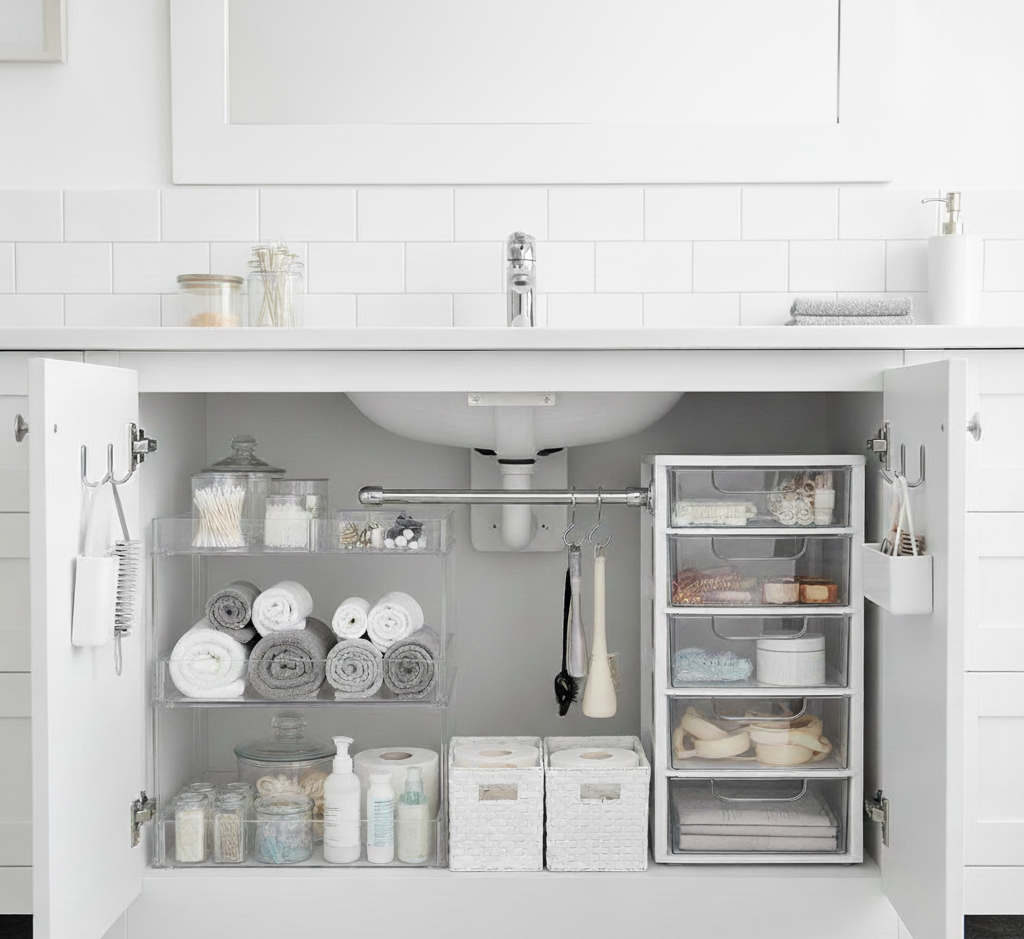
Why Your Bathroom Cabinet Needs a System, Not Just a Tidy Your bathroom cabinet holds the first tools you reach for in the morning and the last ones at night, yet in many homes it is the most chaotic corner of the house. Half-empty toothpaste tubes, expired medications, stray hair ties, and sticky drips from bottles that leaked months ago all pile up until a quick search for a bandage turns into a five-minute dig. That friction is small, but you feel it twice a day. Organizing this space is not merely tidying up; it is a full system reset that turns a frustrating cupboard into a calm, efficient part of your routine. The project needs more than ten spare minutes and good intentions. It demands a methodical approach, a dose of honesty, and a clear vision for how the cabinet should function day to day. Step 1: Gather Supplies and Empty the Cabinet Completely Start with preparation, not with the shelves themselves. Diving in without a plan usually creates a bigger mess than the one you started with, so gather everything you need first: A trash bag for the items you will discard. A box for products that belong in another room. An all-purpose cleaner and a few microfiber cloths. Small clear bins, drawer dividers, or a turntable. At least one hour of unhurried time. Then remove every single item, with no exceptions. Lay everything out on a towel on the floor or a nearby counter so you see the full inventory in one glance. This blank slate forces a conscious decision about each object that wants to return, and it is the only way to clean the cabinet itself properly. Step 2: Sort Into Keep, Toss, and Relocate Work through the pile and sort every item into one of three groups: keep, throw away, or relocate. Be ruthless, because the trash pile is usually the largest. Expired medications can be ineffective or even dangerous, so check the date on every bottle, and take old prescriptions to a pharmacy take-back program instead of flushing them; Health Canada explains safe disposal of prescription drugs. Expired cosmetics and skincare can harbor bacteria and irritate your skin, so toss them along with rusty razors, stretched-out hair ties, crusted nail polish, and sunscreen from two summers ago. Products in good condition that you rarely touch, such as bulk cotton balls or a large first aid kit, belong in the relocate pile: move them to a linen closet or return them to the family member who owns them. Only the items you genuinely use on a regular basis earn a place back in the cabinet. Step 3: Deep Clean the Empty Cabinet With the cabinet bare, spray the shelves, back wall, and door interior with your all-purpose cleaner and wipe every surface with a clean microfiber cloth. Give sticky rings left by bottles and dried toothpaste drips extra attention, since this is your one chance to get the interior truly pristine. Let everything dry completely before you add anything back. If cleaning products live in this cabinet or under the sink, store them the way Health Canada recommends for household chemical safety: labeled, sealed, and out of reach of children. Step 4: Group Like Items and Claim Prime Real Estate Before anything goes back, organize the keep pile into categories: all dental care together, all skincare together, all hair products together. Grouping first is the foundation of the new system. Small clear acrylic bins give each category a home and let you see everything at a glance instead of rummaging through opaque containers. In a deep cabinet, a turntable or Lazy Susan keeps less frequent items such as face masks and weekly treatments reachable with a spin, so nothing is forgotten in the dark back corners. The most important rule is prime real estate: the items you reach for every morning and night, your toothbrush, toothpaste, face wash, and daily moisturizer, belong at eye level near the front. Travel sizes and special occasion makeup go on higher shelves or toward the back. Use the inside of the door as well: small magnetic strips hold bobby pins, tweezers, and nail clippers, while stick-on acrylic pods keep cotton swabs and hair ties within easy reach. On tall shelves, a freestanding shelf riser creates a second level for small items. Cabinet Zones at a Glance Zone What Goes There Best Container Daily dental care Toothbrush, toothpaste, floss Small clear bin at eye level Everyday skincare Face wash, moisturizer, daily sunscreen Front of the prime shelf Hair and styling Brushes, ties, light styling products Door pods or drawer divider Weekly treatments Face masks, exfoliators Turntable toward the back Travel and backup Toiletries, extra soap High shelf or linen closet Step 5: Maintain the System With Two Simple Habits An organized cabinet is not a one-time achievement; it is a system that needs a small amount of upkeep. Put each product back in its designated home immediately after use, which takes only seconds. Follow the one-in, one-out rule: when a new bottle of face wash arrives, the old one should already be finished and discarded, so half-empty bottles never accumulate again. Then schedule a quick five-minute reset once a month to straighten anything that has strayed and wipe down spills before they become sticky rings. Frequently Asked Questions How often should I reorganize my bathroom cabinet? Do a full empty-and-sort twice a year, such as when the clocks change, plus a five-minute monthly tidy. Seasonal reviews catch expired sunscreen and old medications before they pile up. Can I throw expired medication in the garbage? The safest option is a pharmacy take-back program, which accepts unused and expired drugs any day of the year. Never flush medicines down the toilet or sink, and if no take-back option exists, contact your pharmacy or municipality for guidance. How do I stop products from leaking and making a mess? Wipe bottle necks and threads before returning them, store liquids upright inside bins,

How to Organize Your Bathroom Cabinet: A Step-by-Step Guide Read More »

 Professional vs. The DIY Reality duct cleaning

Professional vs. DIY Duct Cleaning: What You Need to Know Before You Start

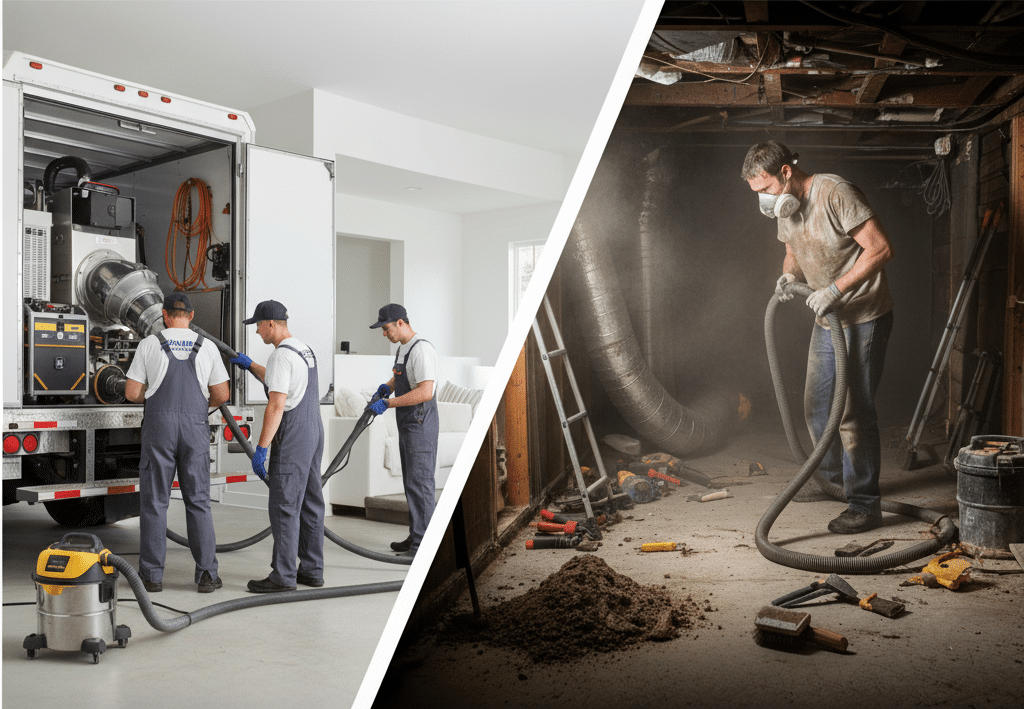
The topic of duct cleaning exists in a strange and often misunderstood corner of home maintenance. It is a service that promises cleaner air, a healthier home, and improved HVAC efficiency. It is also a task that, when you see the dust and debris that can accumulate around your floor and wall registers, seems like it should be a straightforward cleaning job. The temptation to tackle it yourself is strong. After all, how hard can it be to stick a vacuum hose down a vent? This is where a crucial distinction must be made. There is professional air duct cleaning, and then there is DIY duct cleaning. They are not the same thing. They do not use the same tools, they do not achieve the same results, and they do not have the same goals. A professional service is a whole-system decontamination. A DIY job is a surface-level dust removal. Understanding this difference is the most important step in deciding whether to attempt this project yourself. It is a task that can be done, but it must be approached with a healthy dose of realism, a clear understanding of the risks, and the right set of tools.  Professional vs. The DIY Reality Professional duct cleaning is a heavy-duty industrial process that takes place inside your home. The core of the service is the use of a massive, powerful vacuum system that connects directly to your home’s main duct lines near the furnace. This system creates a powerful negative pressure, essentially turning your entire ductwork system into a giant vacuum cleaner. While this vacuum is running, the technicians use long, flexible tools, high-pressure air whips and rotating brushes, that are inserted deep into the ductwork from each register. These tools agitate and dislodge all the caked-on dust and debris from the interior surfaces of the ducts. The negative pressure ensures that all this loosened debris is immediately sucked out of the system and into the collection unit, without being released into your home. The DIY reality is a scaled-down, simplified version of this. You do not have access to a vacuum that can create negative pressure throughout the entire system. Your primary tools will be a standard shop-vac and a long, flexible brush. This means you can only clean what you can physically reach, which is typically the first several feet of the ductwork branching off from each register. You are not cleaning the entire system; you are cleaning the endpoints. The goal is to remove the visible dust and debris that accumulates in the most accessible parts of the ducts. The Risks and Rewards of a DIY Approach Before you begin, it is essential to weigh the potential benefits against the very real risks. The Potential Rewards: Improved Airflow: By removing the clumps of dust and debris that can accumulate near the registers, you can improve the flow of air into your rooms. Reduced Visible Dust: It will certainly clean the registers themselves and the visible portion of the duct, reducing the amount of dust that gets blown out into the immediate vicinity. Cost Savings: The most obvious benefit is avoiding the cost of a professional service. The Significant Risks: Making the Problem Worse: Without the negative pressure of a professional system, there is a risk that you will simply dislodge debris that is deeper in the system and push it further down into the main trunk lines, potentially creating a blockage or simply leaving it to be blown out later. Damaging Your Ductwork: This is a major concern, especially in homes with flexible ductwork (the silver, accordion-style hoses). A spinning brush or even a sharp vacuum attachment can easily tear or puncture these ducts. If this happens inside a wall or ceiling, you have created a significant problem that will require a costly professional repair. Health Hazards: Your ducts can contain more than just dust. They can harbor mold, mildew, bacteria, and other allergens. Agitating these contaminants without a proper containment system can release them into your home’s air, potentially triggering allergic reactions or respiratory issues. Limited Effectiveness: After hours of work, you may find that you have only made a small dent in the overall dust level of the system, leading to a frustrating and unsatisfying result. DIY Duct Cleaning Toolkit If you have weighed the risks and decided to proceed, you will need more than just your household vacuum. A Powerful Shop-Vac: This is non-negotiable. A standard vacuum cleaner is not designed for this type of debris. You will need a shop-vac with a long, flexible hose. Ideally, it should be equipped with a HEPA filter to trap the fine dust particles and prevent them from being exhausted back into your air. A Dryer Vent Cleaning Kit: This is the secret weapon for a DIY job. These kits, designed for cleaning out dryer ducts, consist of a flexible, rotating brush head and a series of connectable rods that can be attached to a power drill. This is what you will use to agitate the dust inside the ducts. A Screwdriver or Power Drill: For removing the register covers (grilles). Microfiber Cloths and a Bucket of Soapy Water: For cleaning the register grilles themselves. Painter’s Tape or Cardboard: For temporarily sealing off registers. A New Furnace Filter: You must replace your filter at the end of this process. Safety Gear: This is absolutely essential. Wear a high-quality dust mask (an N95 or better is recommended) and safety glasses at all times. The Step-by-Step Guide to a Surface-Level Duct Clean This process is methodical and should be done with care and patience. Plan to dedicate several hours to the job. Preparation is Key: Go to your thermostat and turn off your HVAC system completely. This is a critical safety step to ensure the system does not kick on while you are working. Have your brand-new furnace filter ready to be installed at the very end. Seal Your Registers: To minimize the amount of dust that blows back into your home, you need to seal the registers you are not currently working on. Go to

Professional vs. DIY Duct Cleaning: What You Need to Know Before You Start Read More »

clean and sanitized house because of lysol

Lysol 101: A Guide to a Truly Hygienic Home

Lysol 101: Clean First, Disinfect Second, Every Time For more than a century, Lysol has been the name most people associate with killing germs, and its sharp scent is, for many, the very smell of a disinfected home. But the product performs only as well as the person using it understands. Lysol is not an all-purpose cleaner in the traditional sense; its primary job is not to lift dirt but to eradicate the bacteria, viruses, and fungi that live on surfaces. The difference between wiping a counter and truly disinfecting it comes down to a few rules: clean before you disinfect, respect dwell time, and save disinfection for the situations where it matters. This guide walks through the science and the correct technique. What Makes Lysol Work Most Lysol disinfectant formulas, especially the sprays, rely on a class of chemicals called quaternary ammonium compounds, commonly known as quats, with Alkyl Dimethyl Benzyl Ammonium Chloride among the most common. Picture a quat molecule as a tiny positively charged soldier. Bacteria and viruses carry a negatively charged cell wall or envelope, so the quats are drawn to them, lock on, and rupture the wall until the cell’s essential contents leak out and the microorganism dies. Many aerosol formulas also contain ethanol, an alcohol that disinfects by denaturing germ proteins. This combined attack is why the products are effective against a broad spectrum of pathogens, from cold viruses and influenza to E. coli and staphylococcus. Cleaning vs. Sanitizing vs. Disinfecting These three words are used interchangeably, but in professional cleaning they mean different things. Cleaning physically removes visible dirt and debris using soap or detergent, water, and some agitation; it lowers germ numbers but does not necessarily kill them. Sanitizing reduces bacteria on a surface to a level considered safe by public health standards, which lowers infection risk without necessarily killing all viruses and fungi. Disinfecting kills or inactivates nearly 100% of the pathogens named on the product label, and that is the primary purpose of Lysol. The rule that follows is non-negotiable: always clean before you disinfect, because a disinfectant sprayed over a layer of grime cannot reach the germs hiding underneath. The CDC’s home cleaning and disinfecting guidance treats cleaning as the essential first step in any hygiene routine. Dwell Time: The Rule That Decides Whether Disinfection Works Dwell time is the amount of time a disinfectant must stay visibly wet on a surface to kill the pathogens it claims to kill. Spray a countertop and wipe it dry immediately and you have done almost nothing; the chemistry needs minutes to rupture cell walls. The required time is printed on the label and varies by target. Common viruses and bacteria on the label require Lysol Disinfectant Spray to keep the surface wet for 3 minutes, while tougher fungi such as mold and mildew can demand up to 10 minutes. Spray until the surface is thoroughly wet, leave it alone for the full dwell time, and let it air dry completely. How to Use Common Lysol Products Correctly Hard surfaces: wipe away visible dirt first, hold the can 6-8 inches away, spray until the surface is wet rather than misted, honor the dwell time, and air dry. Rinse any food-contact surface with potable water afterward. Soft surfaces: test a small hidden area for colorfastness first, then mist the fabric lightly until it is damp rather than soaked, and let it air dry completely. Disinfecting wipes: pre-clean visibly dirty spots, use a fresh wipe, and keep the surface glistening wet for the stated time, often around 4 minutes for wipes. Use one wipe per surface area to avoid carrying germs from a doorknob to a countertop. All-purpose cleaners: for disinfection these need two passes, one to clean away visible soil and a second to wet the surface for the label’s dwell time. Where Lysol Does Not Belong Unfinished or porous wood can be discolored and damaged by the chemicals and alcohol. Natural stone such as marble, granite, or travertine can develop etching, a permanent dulling of the polished surface, so use a pH-neutral cleaner made for stone instead. Never spray disinfectant on food or directly onto electronics: spray a cloth first, wring it out, then wipe keyboards, phones, and remotes gently. Handle every product with the respect the label demands. Health Canada’s household chemical safety guidance covers safe storage, ventilation, and the rule against mixing cleaning products, which can release toxic gas. Lysol Product Quick Reference Product Best For Non-Negotiable Steps Disinfectant spray Doorknobs, switches, faucets, and fabrics Pre-clean, spray 6-8 inches away, keep wet 3-10 minutes, air dry Disinfecting wipes Quick touch-ups on hard surfaces Fresh wipe per area, keep wet about 4 minutes, air dry All-purpose cleaner Daily cleaning plus disinfection Clean first, then reapply and respect dwell time When Is Disinfecting Actually Necessary? In a healthy household, routine cleaning with soap and water is perfectly sufficient for most daily messes, since it physically removes germs from surfaces. Disinfecting everything every day is unnecessary and may contribute to chemical-resistant bacteria. Save it for the situations where it earns its keep: Frequently touched points such as door handles, light switches, tap handles, remotes, and fridge doors. When someone in the home is sick with a cold, the flu, or another contagious illness. Kitchen and bathroom surfaces prone to contamination from raw meat and bodily fluids, always after cleaning first. Handwashing remains the first line of defense, and the CDC’s handwashing guidance notes that keeping hands clean is one of the main ways to keep germs from spreading in the home. Frequently Asked Questions Can I wipe Lysol off right after spraying? No. Wiping early removes the product before the dwell time is complete, so the disinfection never happens. Spray until the surface is wet, wait the time stated on the label, and let it air dry. Do I need to disinfect my whole house every week? No. Regular cleaning with soap and water handles routine messes. Reserve disinfection for high-touch hotspots,

Lysol 101: A Guide to a Truly Hygienic Home Read More »

woman giving her friend a cleaning gift card

Cleaning Gift: The Most Thoughtful Thanksgiving Gift You Can Give

Thanksgiving is a holiday centered on the beautiful, simple act of gathering. It’s about the warmth of a crowded table, gifts, the familiar comfort of shared recipes, and the expression of gratitude for the people in our lives. We plan menus, we brine turkeys, and we coordinate who will bring which dessert. But beneath this joyful preparation lies a silent, often stressful, and monumental task that almost always falls on the host: the pre-Thanksgiving deep clean. We have all felt it. The week before the guests arrive is a frantic race against the clock. It is a period of scrubbing, dusting, and mopping, driven by the quiet but intense pressure to present a home that is not just tidy, but impeccably clean. It is a labor of love, but it is labor nonetheless. It is hours spent on hands and knees, wiping baseboards and scrubbing floors, when that time could be spent perfecting a pie crust or simply taking a moment to breathe before the happy chaos begins. This year, consider a different kind of contribution. Instead of offering to bring another side dish that will crowd the refrigerator, think about giving a gift that truly serves the person you are thankful for. Consider giving the gift of a clean home. It may sound unconventional, but a pre-Thanksgiving cleaning, whether performed by you or a professional service, is one of the most thoughtful, practical, and profoundly impactful gifts you can possibly give a friend who is hosting. It is a gesture that transcends a simple present; it is a gift of time, of peace of mind, and of genuine, functional support. The Gift of Time In our busy lives, time is the most precious and non-renewable resource we have. During the holiday season, this becomes acutely apparent. The host of a Thanksgiving dinner is not just cooking a single meal; they are orchestrating a major event. Their to-do list is a marathon of planning, shopping, chopping, and baking. The last thing they have is a surplus of free hours. Let’s be honest about what a true guest-ready clean entails. It is not a quick wipe of the counters. It is a comprehensive, top-to-bottom effort. The Dusting: This means getting not just the coffee table, but the tops of the door frames, the ceiling fan blades, the baseboards, and the window sills. It is a detailed, meticulous job that can easily take an hour or more. The Kitchen Deep Clean: The kitchen is the heart of Thanksgiving, and it needs the most intensive work. This involves scrubbing the stovetop, wiping down the fronts of all appliances, cleaning the microwave, disinfecting the countertops, and making sure the sink is sparkling. This is a solid hour of focused work, at minimum. The Bathroom Scrub: The guest bathroom needs to be pristine. This means scrubbing the toilet, cleaning the sink and faucet, wiping down the mirror until it is streak-free, and washing the floor. The Floors: Every hard-surface floor in the main living areas needs to be thoroughly swept and mopped. Every carpet needs to be vacuumed, including moving furniture to get the dust bunnies hiding underneath. This can easily consume another hour or two, depending on the size of the home. The Final Touches: Cleaning entryway glass, tidying up clutter, and giving everything a final polish. When you add it all up, a proper pre-hosting deep clean can easily take five to eight hours of hard, physical work. By giving the gift of a cleaning, you are handing your friend an entire day of their life back. That is a day they can now use to finalize their menu, to bake a dessert without rushing, to spend time with their children who are excited for the holiday, or, most importantly, to simply sit down with a cup of tea and mentally prepare for the joy of hosting, rather than the stress of it. You are not just saving them a chore; you are giving them the space to enjoy the process. The Gift of Peace of Mind The physical labor of cleaning is only half the battle. For any host, the mental load can be even more exhausting. The pressure to have a “perfect” home is a real and often unspoken source of anxiety. Every dust bunny in the corner, every smudge on the window, and every crumb under the dining table can feel like a personal failing when you are about to welcome people into your home. This “hosting anxiety” creates a mental checklist that runs on a constant loop in a host’s mind. Did I remember to dust the lampshades? Is the guest bathroom clean enough? Does the house smell fresh? This internal monologue is a significant source of stress that detracts from the true spirit of the holiday. When you give the gift of a clean home, you are silencing that nagging voice. You are taking a huge, stressful item off their mental checklist and completely erasing it. Imagine the profound sense of relief your friend will feel, walking into their home a day or two before Thanksgiving to find that it is already done. The floors are gleaming. The kitchen is sanitized and ready for the culinary marathon. The bathroom is sparkling. This gift allows your friend to transition their focus from the presentation of their home to the purpose of the gathering. They can channel all their energy into what truly matters: the food, the conversation, and the connection with their loved ones. They can be a present, relaxed, and joyful host, not a frazzled, exhausted one who is secretly worrying about whether a guest noticed the dust on the baseboards. You are not just cleaning their house; you are clearing their mind. A Foundation for the Entire Holiday Season Thanksgiving in many ways is the official kick-off to the entire winter holiday season. The festivities of November flow directly into the preparations for December. A deep clean for Thanksgiving is therefore not just a gift for a single day; it is a foundational gift that keeps on

Cleaning Gift: The Most Thoughtful Thanksgiving Gift You Can Give Read More »

kitchen trash can cleaning

Trash Can Cleaning: What’s Really Lurking at the Bottom of Your Trash Can?

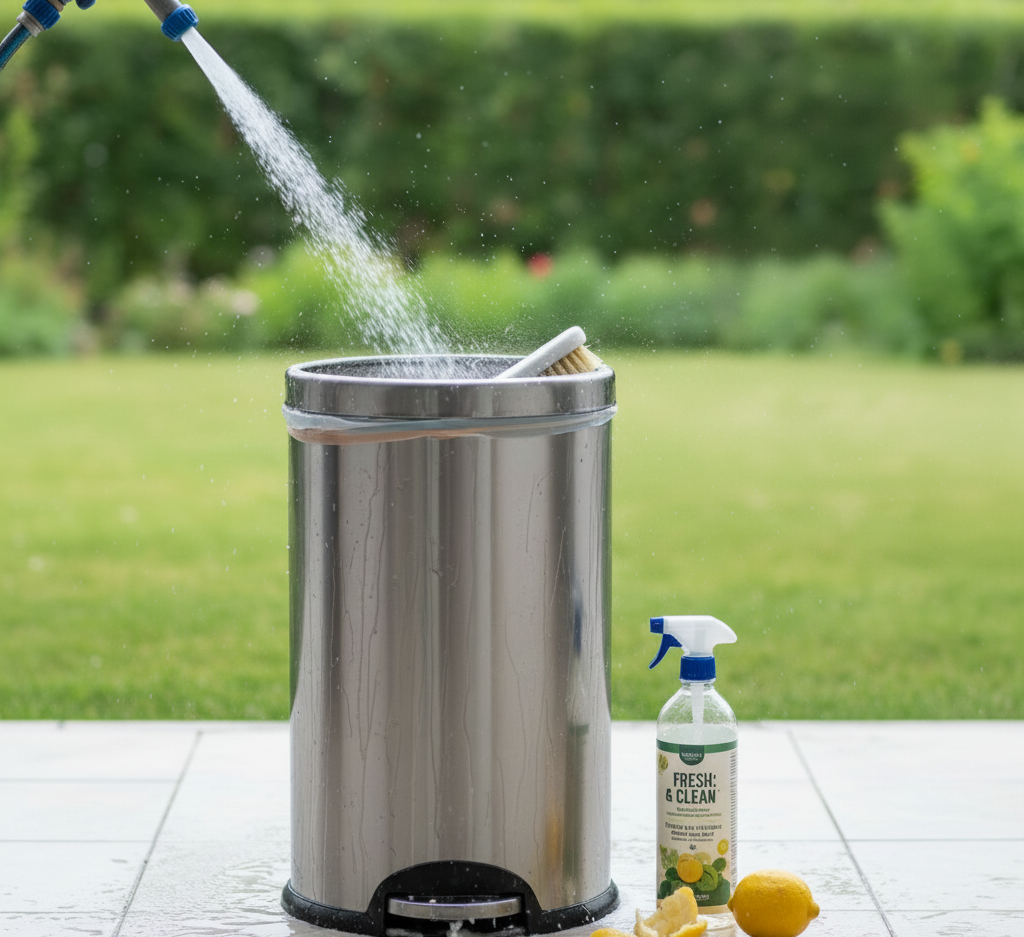
The trash can is the most thankless and hardworking fixture in any home. It is a vessel of necessity, the silent recipient of our daily waste, and the frontline in the constant battle against dirt, decay, and disorder. It is a tool so fundamental to household hygiene that it is often completely overlooked, left to its own devices in a corner of the kitchen or at the side of the house until the moment its presence becomes unavoidable, usually through a foul odor or an unpleasant discovery. Cleaning a garbage bin is not a glamorous task. There is no satisfying “before and after” reveal that you will be eager to show off. Yet, the proper maintenance and regular, thorough cleaning of your bins are among the most critical routines for a healthy, pest-free, and pleasant-smelling home. To neglect the bin is to invite problems that are far more difficult and disgusting to solve than the cleaning task itself. 1.Why so Dirty? To understand how to clean a trash can effectively, you must first understand why it gets so profoundly dirty. The problem is a combination of three factors: organic matter, moisture, and time. Every scrap of food, every used paper towel soaked in meat juice, and every discarded vegetable peeling is organic matter. Once inside the dark, contained environment of a garbage bag, this matter begins to decompose. This process is driven by bacteria, which break down the food waste and, in doing so, release a cocktail of volatile organic compounds. These compounds are what we perceive as the smell of garbage, gases like hydrogen sulfide (rotten eggs) and methane. Moisture is the accelerator for this entire process. A dry environment slows bacterial growth significantly. However, garbage is rarely dry. Leaky food containers, wet food scraps, and condensation create the perfect humid breeding ground for bacteria to thrive and multiply exponentially. This is why a small tear or leak in a garbage bag is so catastrophic. The liquid that seeps out, a substance often referred to as “leachate” or “garbage juice,” is a highly concentrated bacterial soup. It soaks into the bottom of the can, and even after the bag is removed, that residue remains, providing the seed for the next cycle of odor and grime. 2.Pests Time simply allows these processes to fester. The longer the organic matter and moisture are left to interact, the more intense the decomposition, the stronger the smell, and the more stubborn the resulting grime will be. This sticky, foul-smelling film that coats the bottom and sides of a neglected bin is a biofilm-a complex community of microorganisms that have attached themselves to the surface and to each other. It is not just dirt; it is a living, stinking ecosystem. This environment is also the perfect nursery for pests. Flies are drawn to the smell of decay to lay their eggs. In the warm, protected, and nutrient-rich environment of a garbage bin, these eggs hatch into maggots in as little as eight hours. Rodents and other scavengers are also attracted by the scent, and a can without a secure lid is an open invitation for a nightly buffet. Cleaning a trash can is a heavy-duty job that requires more than a simple sponge and some soap. You need to be prepared for a wet, messy, and smelly process. Assembling the right tools beforehand will make the job faster, more effective, and more tolerable. 3.Protection You will need protective gear. This is non-negotiable. Wear heavy-duty rubber gloves to protect your hands from bacteria and harsh cleaning agents. Safety glasses are also highly recommended to protect your eyes from splashes of dirty water and chemicals. A hose with a high-pressure nozzle is a significant advantage. The ability to spray down the bin from a distance will help dislodge caked-on grime and rinse the can effectively. If you don’t have a hose, a few large buckets of hot water will work, but it will require more effort. A long-handled, stiff-bristled brush is your primary scrubbing tool. A long handle is crucial, as it allows you to reach the bottom of the can without having to stick your head and shoulders inside. A deck brush or a toilet brush reserved exclusively for this purpose works perfectly. The sticky, greasy nature of the biofilm requires a strong degreaser. A quality dish soap is designed to cut through grease and is an excellent first-line cleaner. After cleaning, you need to sanitize. There are several options. A diluted bleach solution (about one cup of bleach per gallon of water) is highly effective at killing bacteria, mold, and viruses. For a less harsh alternative, a solution of equal parts white vinegar and water can be used. Vinegar is a natural disinfectant and deodorizer. Finally, baking soda is an excellent deodorizer and a mild abrasive that can help with scrubbing. The best place to perform this task is outdoors, on a lawn or a patch of gravel where the dirty water can drain away without staining a driveway. 4. Let’s Get to Work First, empty the trash can completely. Make sure there is no loose debris left inside. Using your hose, give the entire interior of the bin a thorough spray-down. Use the highest pressure setting to blast off as much of the loose dirt and grime as possible. Pour out the dirty water. Next, pour a generous amount of dish soap into the bottom of the can and add a few inches of the hottest water you can safely handle. Take your long-handled brush and begin scrubbing. Start with the bottom and work your way up the sides. Apply firm pressure and focus on the corners and any visible patches of caked-on grime. Don’t be afraid to put some effort into it; you are physically breaking apart that stubborn biofilm. Once you have scrubbed the entire interior, pour out the soapy, dirty water. Now it is time to sanitize and deodorize. If you are using bleach, mix your solution and pour

Trash Can Cleaning: What’s Really Lurking at the Bottom of Your Trash Can? Read More »

robot vacuum cleaner

Are Robotic Vacuums Worth It? A Deep Dive into Modern Floor Care

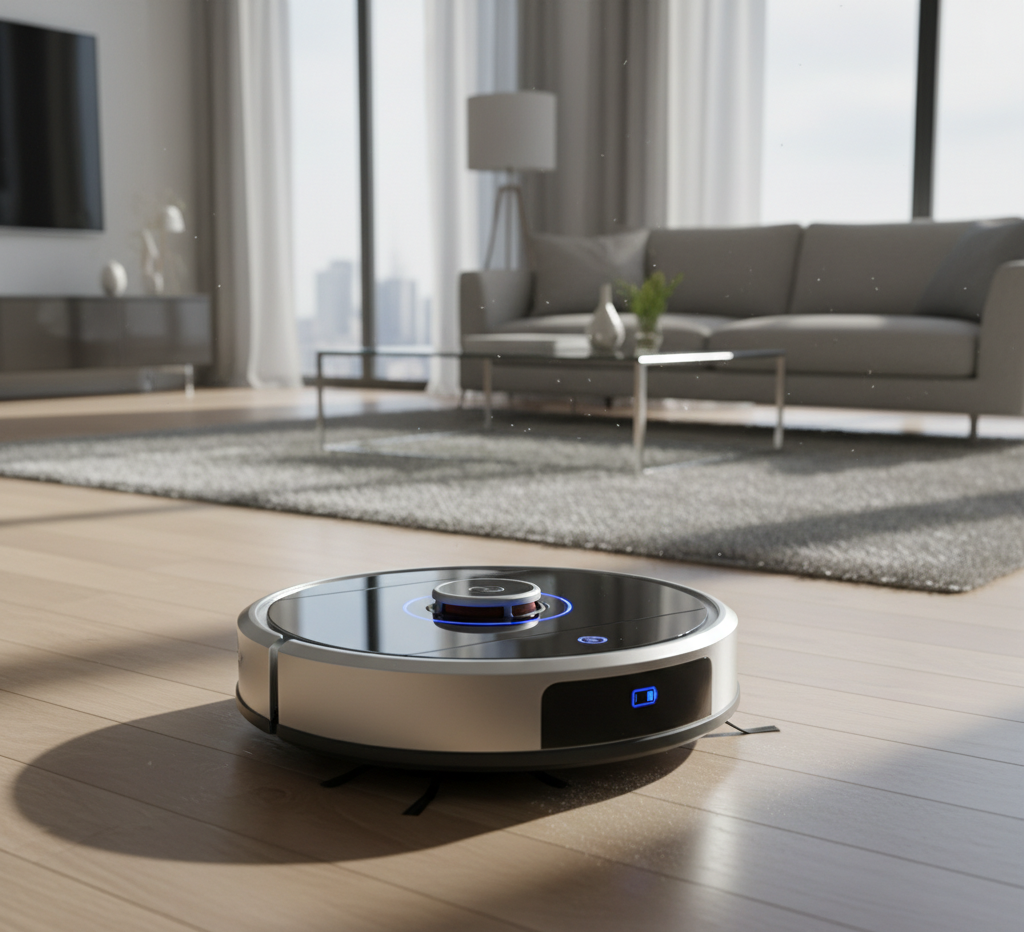
Are Robotic Vacuums Worth the Money in 2026? The first robot vacuums were, kindly put, comical: pinball navigation, wedged under sofas, entire room sections skipped. They were hobbyist gadgets, not cleaning tools. That picture is now almost unrecognizable. Advances in navigation, artificial intelligence, and hardware have turned the robot vacuum into a capable, dependable partner that maps your home, follows methodical paths, dodges obstacles, and on premium models mops and washes its own pads. Whether one deserves your floor space depends on what the technology actually does today. Four Generations of Navigation Navigation is the biggest leap and what separates a frustrating toy from a reliable cleaner. Navigation type How it works Strengths and limits Bump-and-go (random) Drives straight until it hits something, then turns randomly. Covers a simple square room eventually, but slowly and with gaps. Found only on budget models. Gyroscopic A gyroscope and sensors steer deliberate parallel lines. Systematic coverage, but no persistent map, so being picked up or stuck disorients it. LiDAR A spinning laser turret measures distances and builds a highly accurate real-time map, the same core technology behind self-driving cars. The gold standard: precise rows, graceful furniture handling, room-by-room app commands, flawless operation in total darkness. vSLAM (visual) A camera maps landmarks like walls, doorways, and furniture, then compares what it sees against that map. Systematic navigation, and AI versions recognize objects like shoes and power cords, but it needs reasonable light. Supporting sensors round out the system: cliff sensors stop it at stair edges, wall sensors let it hug baseboards without constant bumping, and dirt-detect sensors spot heavy debris and send the robot back for extra passes. The Features That Matter Day to Day Interactive smart maps. Name rooms from the companion app, draw no-go zones around pet bowls and delicate furniture, and target a clean zone at a fresh spill. Suction power. Measured in Pascals, entry models run around 1,500 Pa while high-end machines exceed 4,000 Pa. Strong suction matters most on carpet, where dirt and pet hair hide deep in fibers, and automatic carpet boost raises power the moment the robot rolls onto rug. Recharge and resume. For big homes this beats raw battery size: a low robot returns to its dock, recharges just enough, then finishes exactly where it stopped. AI object avoidance. Premium front cameras identify and route around socks, toys, and the dreaded pet waste. For pet owners that alone can justify the price. Self-emptying docks. The base vacuums the robot’s tiny bin into a sealed bag or canister. Instead of emptying the robot every one or two runs, you touch the dock bag once every 30 to 60 days: a daily chore becomes a monthly one. Mopping Robots: Four Levels of Effectiveness Many hybrids mop, but capability varies wildly. Basic systems drag a damp microfiber cloth, a light dust wipe that does nothing for real spills or grime. Vibrating or sonic pads scrub hundreds or thousands of times per minute and genuinely break up dried-on messes. The most effective design spins two round pads under downward pressure, mimicking a floor polisher for a deep clean. At the top, all-in-one stations self-empty the bin, self-wash and self-dry the pads, and even refill the water tank: the closest thing yet to truly hands-off floor cleaning. In practical terms, a simple dragging cloth is closer to a dust mop between washes, while the sonic and dual-spinning-pad systems are the ones that can actually erase a dried-on spill from hard floors. What a Robot Vacuum Cannot Do Three honest caveats decide whether you will love one. First, treat it as upkeep, not a substitute for a proper deep clean. Robots keep floors constantly fresh by stopping dust, crumbs, and hair before they accumulate, but they cannot replace a powerful upright or canister vacuum for periodic carpet deep cleans, stairs, and tight crevices. Scheduled help from a deep cleaning service or a regular maid service covers what the robot never touches, from baseboards to ceiling fans. Second, your home must be robot-ready. These machines thrive on clear floors: a quick scan for charging cables, shoes, and pet toys before each run beats any obstacle-avoidance camera. Third, maintenance is non-negotiable. Wipe the sensors, clean the filter, and cut wrapped hair off the main and side brushes. A few minutes every week or two keeps the machine efficient for years. The Verdict: Worth It for Most Households For many homes the answer is a resounding yes. Pet owners get a transformative weapon against fur; busy professionals and families buy back hours; people with mobility issues gain automated assistance that can be life-changing. Constant floor upkeep also helps anyone limiting exposure to indoor air contaminants like fine particulate matter and dust, and the CDC recommends cleaning surfaces regularly as the first defense against household germs. A robot makes regularity effortless. If you value consistently clean floors and fewer manual sessions, a modern LiDAR or AI model is one of the best home investments available. The sci-fi dream quietly became an appliance. Robot Vacuum FAQ Is a robot vacuum worth it for pet hair? Yes, arguably its best use. Strong suction above 4,000 Pa with automatic carpet boost pulls hair from fibers daily, and AI avoidance routes around accidents. Pair it with weekly brushing of pets for the best results. Can a robot vacuum replace my regular vacuum? No. It is designed for frequent maintenance cleaning. Keep your full-sized machine for periodic deep carpet passes, stairs, and crevices a disc-shaped robot cannot reach. Do LiDAR models need light to work? No. Unlike camera-based vSLAM robots, the laser turret measures distance directly, so LiDAR models map and clean in complete darkness. How often do I empty a self-emptying dock? Most sealed bags or canisters last 30 to 60 days between changes, versus a standard robot dustbin that needs emptying after one or two runs. Will a robot vacuum damage my baseboards and furniture? Modern units navigate gracefully around obstacles: LiDAR models measure distances instead of crashing,

Are Robotic Vacuums Worth It? A Deep Dive into Modern Floor Care Read More »

child with a sense of responsibility and organizing the house

Discover Why Involving Your Child In Daily Cleaning Is More Important Than You Think

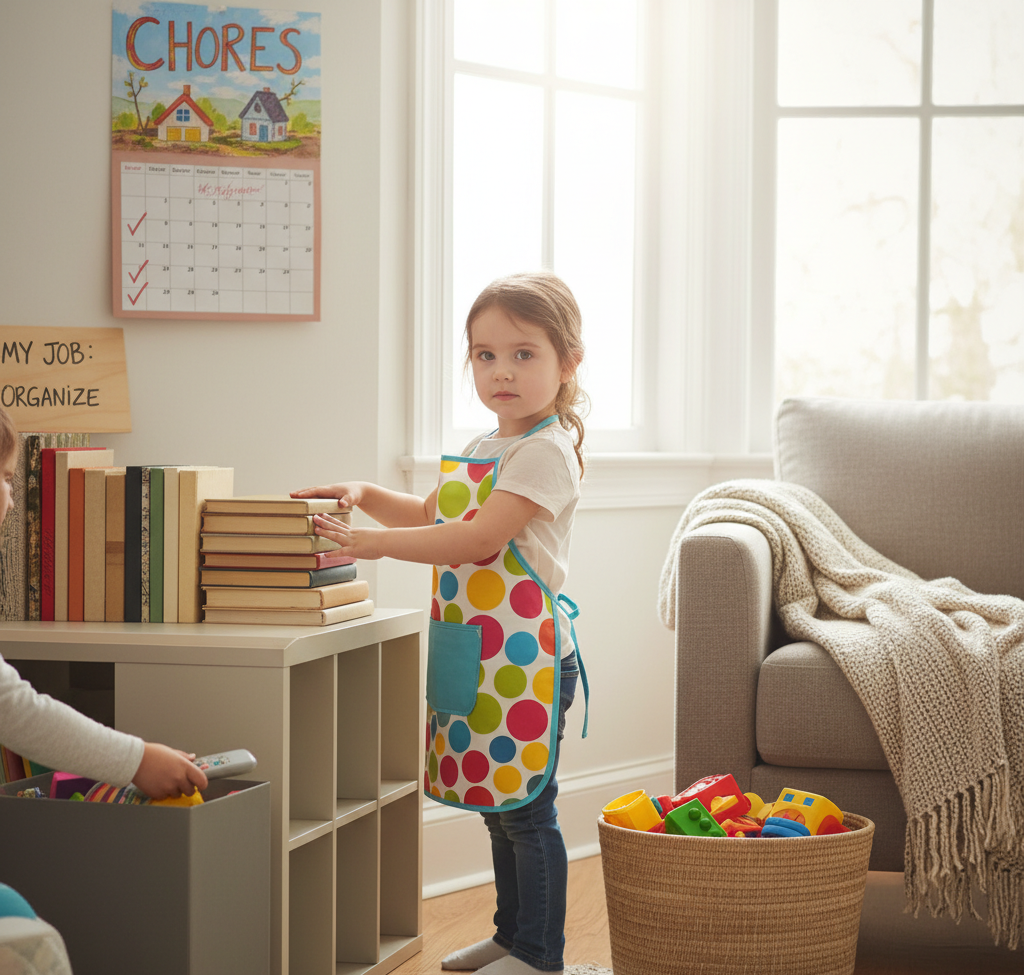
The question many parents have is how do I teach my child to be more responsible? In the bustling rhythm of modern family life, the daily upkeep of a home can often feel like a relentless and overwhelming task, a never-ending cycle of tidying, wiping, and washing that falls heavily on the shoulders of the parents. In this constant battle against clutter and mess, one of the most powerful yet frequently underutilized resources is sitting right at the dinner table: the children. Involving children in daily cleaning is not about offloading parental responsibility or achieving a flawlessly pristine home. It is a profound and deliberate act of teaching, a foundational lesson in responsibility, respect, life skills, and the intrinsic value of contributing to a shared environment. Building Character Transforming chores from a dreaded obligation into a natural and expected part of the daily routine is a process that builds character and strengthens family bonds. It shifts the household dynamic from one where parents are the service providers and children are the consumers, to one of a collaborative team working towards a common goal. When a child learns to wipe up their own spills, put away their own toys, or help set the table, they are internalizing a powerful message: “I am a capable and valuable member of this family. My actions matter, and I have a role to play in the well-being of our home.” This sense of belonging and competence is a cornerstone of healthy self-esteem. The benefits of integrating children into daily cleaning routines extend far beyond the immediate advantage of having an extra pair of hands. Cultivating Responsibility and Accountability: Consistently performing a chore, no matter how small, teaches a child to be responsible for their own space and their own belongings. It instills a sense of ownership and accountability. They learn that a clean room or a tidy living area is not something that magically happens, but is the result of conscious effort. This understanding of cause and effect is a critical life lesson that translates into academic, social, and eventually, professional success. Developing Essential Life Skills: The ability to maintain a clean and organized living space is a fundamental life skill that many young adults find themselves lacking when they first leave home. By teaching children how to properly sweep a floor, load a dishwasher, or do a load of laundry, you are equipping them with the practical knowledge they will need to live independently. These are not just chores; they are lessons in self-sufficiency. Fostering Respect for Property and People: When children are actively involved in the effort it takes to clean and maintain a home, they develop a greater appreciation for it. A child who has just spent time vacuuming the living room carpet is far less likely to carelessly track mud across it. They begin to understand the work that goes into creating a pleasant environment and, by extension, develop more respect for the efforts of others. Building a Strong Work Ethic: The discipline of completing a task, even when it’s not particularly fun, is the foundation of a strong work ethic. Learning to see a job through to completion and taking pride in the result is a value that will serve a child throughout their entire life. Enhancing Motor Skills and Coordination: For younger children, many cleaning tasks are excellent for developing both fine and gross motor skills. Scrubbing a surface, using a spray bottle, sorting laundry, or sweeping with a small broom all help to improve coordination, strength, and dexterity. Strengthening Family Bonds: Working together on household tasks can be a valuable opportunity for connection. It’s a time to talk, to teach, and to work side-by-side. Turning on some music and tackling the after-dinner cleanup as a family can transform a mundane chore into a positive, shared experience. It reinforces the idea that the family is a team. The key to successfully involving children in cleaning is to start early and to make the tasks age-appropriate. The goal is not perfection, but participation and learning. Toddlers (Ages 2-3) At this age, children are naturally inclined to imitate their parents and are often enthusiastic about “helping.” The focus should be on simple, game-like tasks that are within their physical capabilities. Putting Toys Away: This is the most fundamental chore. Make it a game by singing a “clean-up song” or timing how quickly they can fill the toy box. Clear, labeled bins with pictures can help them learn where everything goes. Wiping Up Spills: Keep a small, designated cloth or sponge accessible for them. When a small spill occurs, encourage them to wipe it up themselves. It won’t be a perfect job, but it teaches immediate responsibility. Placing Clothes in the Hamper: This simple task teaches them where dirty clothes belong. “Dusting” with a Cloth: Give them a small microfiber cloth and let them wipe down low, safe surfaces like baseboards or the legs of a coffee table while you do the real dusting. Preschoolers (Ages 4-5) Preschoolers can handle more complex, multi-step tasks. They are developing more coordination and can follow simple instructions. Setting the Table: They can be responsible for putting out napkins, placemats, and silverware. Clearing Their Own Plate: Teach them to carry their own plate to the sink or countertop after a meal. Making Their Bed: It won’t be hotel-perfect, but they can learn to pull up the duvet or comforter. Keep bedding simple to make this task easier for them. Feeding Pets: Filling a pet’s food or water bowl (with supervision) is an excellent way to teach responsibility and empathy for another living being. Helping with Groceries: They can help unload groceries, putting away non-breakable items in low cupboards. Early Elementary (Ages 6-8) At this age, children can take on more responsibility and begin to perform chores independently. Sweeping or Using a Small Handheld Vacuum: They can be responsible for sweeping the kitchen floor after meals or vacuuming up small messes. Loading and Unloading the Dishwasher: They can learn how to place dishes in the dishwasher (with guidance on sharp items) and can

Discover Why Involving Your Child In Daily Cleaning Is More Important Than You Think Read More »

Back to School and Home Clean

Back to School: 7 Effective Ways to Keep Your Home From Turning Into Chaos

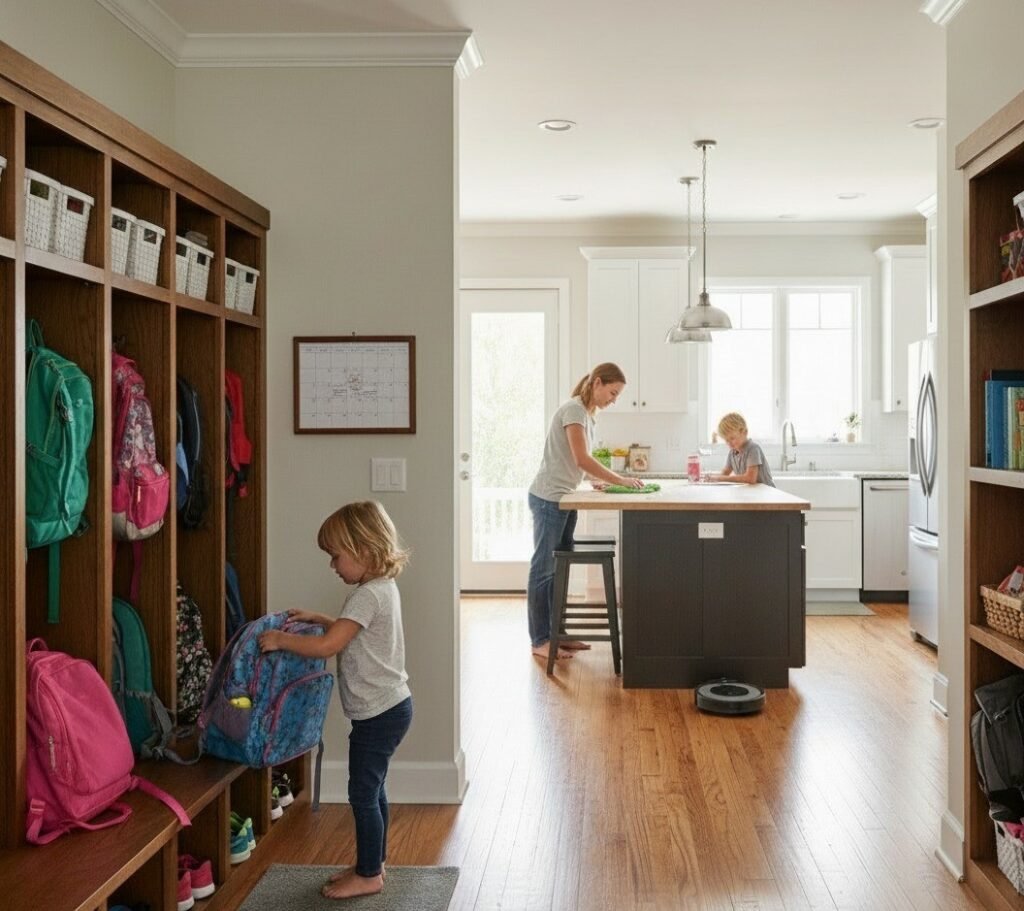
September in Canada is a vibrant month of energy and back to school time. The leaves begin to change color, the air grows crisp, and the country prepares for the autumn season. At the heart of every home, the most significant transition is the much-anticipated Back to School period. Mornings become more hurried, evenings are filled with homework and extracurricular activities, and the constant flow of backpacks, lunchboxes, and outdoor shoes can quickly transform an organized house into chaos. For Canadian families, this Back to School period demands more than just buying school supplies; it requires an adaptation of household routines, especially in cleaning and organizing, to ensure that the home remains a sanctuary of peace and order amidst the bustle of the new Back to School season. A well-managed home during this time is not only more pleasant to live in but also a fundamental pillar for the well-being and productivity of all its members. The Chaos of the Back to School Period The end of summer and the start of the academic year bring with them a host of new challenges for home organization and hygiene. Suddenly, the spaces that once housed summer play now need to accommodate school uniforms, books, art supplies, and gear for countless after-school activities. The increased traffic of children and teenagers entering and leaving the house means more dirt, more germs, and often, more clutter. Backpacks dropped by the entrance, papers scattered across the kitchen table, damp gym clothes on the bedroom floor, these are familiar scenarios for many Canadian families as the Back to School rush begins in September. Furthermore, the school environment is a fertile ground for the spread of germs. Children bring home not only new knowledge but also the viruses and bacteria circulating in classrooms, elevating the importance of cleaning focused on disinfection. Adapting cleaning strategies to face this new rhythm is essential for maintaining health and sanity at home during the Back to School transition. 1.Key Areas of Focus for Back to School Clean-up To combat the chaos of the Back to School season, it’s crucial to concentrate cleaning and organizing efforts in areas most impacted by the school routine: Entrances and Mudrooms: These are the first lines of defense against outdoor dirt. In many Canadian homes, the mudroom or entry area quickly becomes a repository for dirty shoes, coats, backpacks, and lunchboxes as everyone rushes for Back to School. To prevent dirt from spreading throughout the house and to maintain order: Create Designated Zones: Install hooks for coats and backpacks, and trays or shelves for shoes. This prevents items from piling up on the floor. Daily Cleaning: Sweep or vacuum this area daily. In Calgary and other Canadian cities, shoes track in a lot of dirt, especially as the weather begins to change. Regular Disinfection: Wipe down doorknobs and surfaces that hands frequently touch with a disinfectant, vital during Back to School germ season. The Kitchen: The kitchen shifts from a place of relaxed summer meals to a headquarters for lunchbox prep and quick meals, a core part of the Back to School routine. Lunchbox Organization: Dedicate a cupboard or shelf for lunchboxes and water bottles. Wash them immediately after use and allow them to dry. Countertop Cleaning: Wipe and disinfect countertops after each food and snack preparation. Crumbs and spills are inevitable. Refrigerator Organization: With more food being prepared and stored, keep the refrigerator organized and clean up spills immediately. Spotless Sink: Encourage immediate washing of dishes or loading the dishwasher to prevent accumulation. Study Areas and Desks: With homework in full swing, these areas can quickly become disorganized as part of the Back to School workload. Keep It Simple: Encourage a clean and minimalist study space to reduce distractions. Material Storage: Use desk organizers, drawers, and shelves to store pens, papers, books, and school supplies. Regular Cleaning: Dust and wipe down desk surfaces regularly. Encourage children to put away their materials after each study session. Bedrooms: Bedrooms can easily become clutter zones with clothes and personal items, especially with the morning Back to School rush. Make the Bed: The habit of making the bed every day creates a foundation of order for the room. Laundry Hampers: Ensure each bedroom has a laundry hamper to prevent clothes from ending up on the floor. Quick Tidy-Up Routine: Teach children to spend 5-10 minutes before bedtime tidying their rooms, putting away clothes and toys. Bathrooms: With increased exposure to germs at school, bathrooms need extra attention during the Back to School period. Daily Wipe-Down: Quickly wipe down the sink and toilet to remove visible dirt. Frequent Disinfection: Use a disinfectant on doorknobs, faucets, toilets, and light switches several times a week. Clean Towels: Encourage the use of clean face and hand towels daily or every other day. 2.Implementing New Routines The secret to maintaining order during the Back to School season is establishing routines that become habits: Daily Power Clean (15-20 Minutes): At the end of the day, just before the family settles down, do a collective 15-20 minute “power clean.” Each family member can have a task: one tidies the living room, another puts away dishes, another wipes kitchen countertops. This ensures you wake up to a relatively organized home, setting a positive tone for the next day as the Back to School routine begins again. Weekly Zone Cleaning: Instead of trying to clean the entire house in one day, divide the house into “zones” and dedicate one day of the week to each. This approach is highly effective for managing cleaning tasks alongside Back to School schedules. Envolve the Children: Cleaning should not solely be the parents’ responsibility. Assign age-appropriate chores to children. Making cleaning a family effort not only distributes the load but also teaches responsibility and the value of a clean environment, crucial lessons during the Back to School transition. 3.Fighting Back-to-School Germs With increased social interaction at schools, disease prevention becomes a priority. High-Touch Surfaces: Focus on regularly disinfecting doorknobs, light switches, remote controls, cell phones, and other frequently touched surfaces, especially important as children bring home germs during Back to School. Hand Hygiene: Reinforce the habit of frequent handwashing, especially upon returning home from school, before meals, and after using the bathroom. Keep hand sanitizer available in strategic areas. Lunchboxes and Water Bottles: Wash lunchboxes and water

Back to School: 7 Effective Ways to Keep Your Home From Turning Into Chaos Read More »