Home Disinfecting

boot tray idea

Boot Tray Cleaning: 4 Surprising Uses for a Boot Tray Beyond the Entryway

Boot Tray Cleaning and the Quiet Hero of the Entryway The entryway is where the controlled comfort of your home meets the elemental chaos outside, and in a region of wet springs, muddy autumns, and salt-laden Toronto winters, that threshold is under constant siege. Everyone who walks in carries water, grit, chemical de-icers, and organic decay on their soles. Untreated, that debris migrates onto rugs, scratches hardwood, and embeds allergens in carpet. The single most effective line of defense is the most overlooked piece of equipment in the house: the boot tray. What a Boot Tray Actually Fights Winter slush is not just melted snow. It is a brine of calcium chloride or sodium chloride from the roads, plus sand, oil residues from asphalt, and dirt, and the mixture is highly corrosive. Allowed to drip on hardwood, the water seeps between boards and causes cupping and warping; as it evaporates, the salt crystallizes into a white alkaline crust that eats polyurethane finishes and degrades the sealant on stone and tile grout. A boot tray acts as a moat, physically isolating that corrosive slurry from everything you want to keep. Choosing a Tray That Survives the Season The market is full of flimsy, low-walled plastic mats that crack under heavy winter boots or warp when temperatures swing. A functional tray needs rigidity and depth, with walls at least an inch high so meltwater does not spill over the first time the tray gets nudged. Heavy-duty rubber is the gold standard for utility: it grips the floor instead of sliding and shrugs off abrasive boot grit. For a formal foyer, metal trays in galvanized steel, copper, or antique brass deliver the same containment with better looks, and copper develops a living patina that turns muddy shoes into a design statement. The trade-offs with metal are clanking noise and corrosion unless the finish is sealed against salt. The River Rock Hack for Soggy Soles A persistent flaw of the standard tray is the puddle problem: snow melts off boots, pools in the bottom, and the footwear then sits in dirty water. The leather or fabric cannot dry properly, wet socks follow the next morning if the boots are not waterproof, and mold or mildew can start growing on the footwear itself, one of the damp conditions the CDC guidance on mold tells us to eliminate. The fix is a drainage layer. Fill the tray with smooth river rocks so the boots rest elevated above the base, meltwater trickles through the gaps and pools out of contact with the soles, and circulating air speeds drying. Visually, the stones add an organic, spa-like texture and hide the dirty water beneath, turning an ugly necessity into a feature. Boot Tray Cleaning: The Monthly Habit A boot tray is not a set-it-and-forget-it item. As water evaporates, the salt concentration left behind keeps climbing until the tray holds a coating of gritty sludge, which dries into airborne dust, overflows as concentrated brine, and turns the entryway into a source of odors and humidity. Put the tray in the monthly cleaning rotation during winter, and do not plan on paper towels for the job. Carry the tray carefully to a utility sink, a bathtub, or outdoors if the weather allows. Empty it completely, then scrub with warm water and dish soap. Dissolve heavy white salt crust with a solution of white vinegar and warm water. If you run the river rock setup, rinse the stones periodically to clear the slime and silt that collect on them. Wipe the floor underneath while the tray is out, since trapped moisture can haze the finish below. 4 Surprising Uses for a Boot Tray Beyond the Entryway The raised-edge architecture of a boot tray is really a spill containment system, which makes it useful far past the front door. Use Where it goes Why the tray wins Pet feeding station Kitchen corner Catches splashes and kibble scatter; far easier to wash a tray than scrub dried dog food from grout Plant care hub Windowsill or shelf Doubles as a humidity tray and watering station so overflow never ruins furniture Car trunk liner Back of the vehicle A waterproof pen for groceries, muddy sports gear, and leaking nursery pots; hose it clean outside Cleaning supply caddy Under the sink Contains a leaking bottle of bleach or detergent inside the rim instead of into the cabinetry wood That under-sink use has a hygiene footnote: whenever you handle concentrated cleaners, follow label directions and the CDC’s guidance on cleaning and disinfecting with bleach, and store every bottle contained, capped, and upright. Placement and the Psychology of a Shoe Boundary A tray three feet from the door is useless, because feet cross unprotected floor to reach it; set it immediately adjacent to the door swing as a landing pad. Capacity is the other silent failure: a standard tray holds roughly three pairs of adult boots, so in a four-person house or a home that hosts guests, one tray guarantees overflow onto the floor. Run a zone instead, with multiple trays or extra-long runners, and enforce a strict no-shoes-past-the-tray rule. There is a psychological layer too. A clearly defined spot for shoes signals that the home is cared for and prompts people to unlace without being asked, while a pile of random footwear creates visual noise the moment you walk in. A tray aligns the shoes, confines the mess to one rectangle, and eases the transition from outdoor stress to indoor calm. When Containment Is Not Enough Even the best tray loses some salt dust to the air and some grit to the corners. Toronto Shine Cleaning provides the reinforcements: industrial extraction for rugs, expertise at neutralizing salt haze on hardwood without lifting the finish, and a deep seasonal reset of the whole entryway and beyond, described on our deep cleaning service page, with ongoing upkeep from our regular maid team and coverage listed for every location we serve. Call (647) 424-0355 and step into a cleaner

Boot Tray Cleaning: 4 Surprising Uses for a Boot Tray Beyond the Entryway Read More »
Shower Cleaning Products: The Ultimate Guide to removing Hard Water Stains from Glass Shower Doors

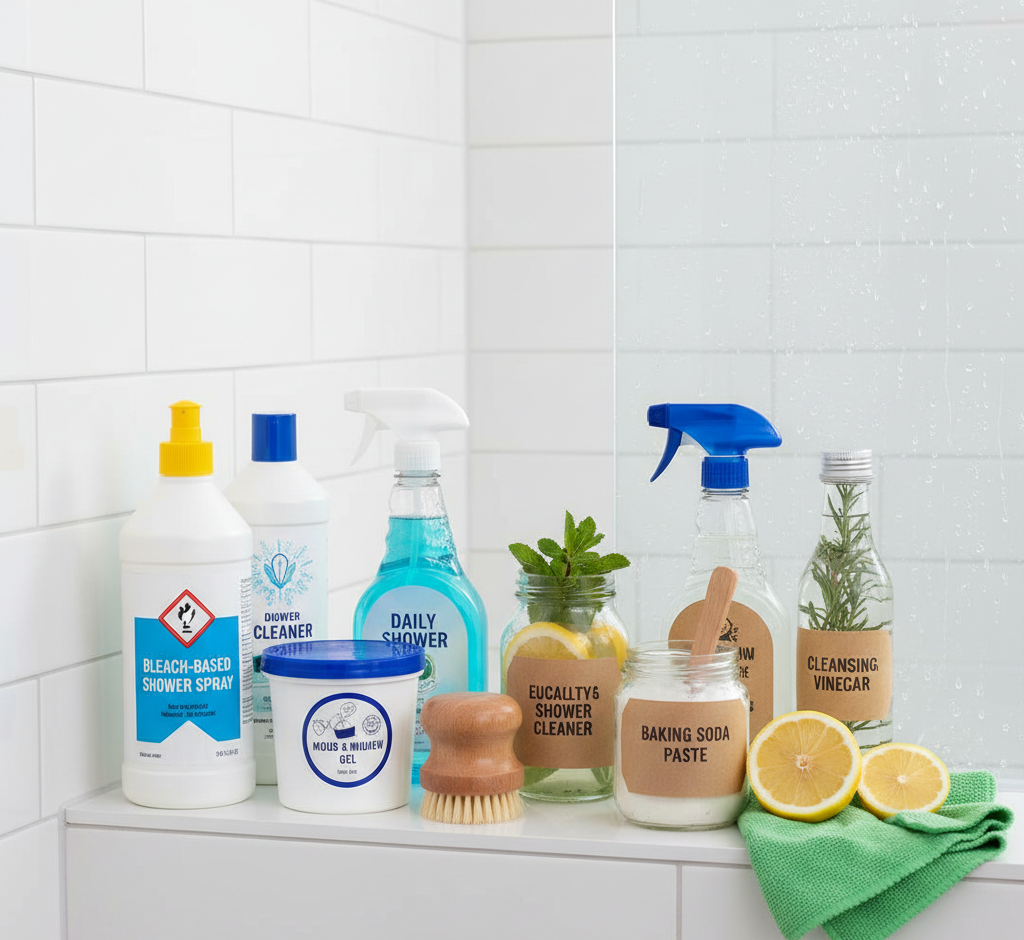
Shower Cleaning Products: How to Beat Hard Water Stains on Glass Doors The shower may look easy to clean, yet it collects some of the toughest grime in the house: steam, skin oils, soap residue, and hard-water mineral film build stubborn layers on glass doors, tile, and fixtures. Soap scum, limescale, pink bacterial film, and dark mold each need different chemistry, so the right shower cleaning products match the formula to your enemy and your surfaces without etching tile or harming your health. Know Your Enemy: Soap Scum, Limescale, Pink Slime, and Mold Two very different deposits create the white haze common in North American showers. Soap scum is a waxy salt called calcium stearate, formed when fatty acids in bar soap bind with the calcium and magnesium ions in hard water. Limescale is strictly mineral: the calcium carbonate that remains once water evaporates. Both are alkaline, so acids dissolve their mineral bonds, the core rule of shower chemistry. Biological threats differ, since the pink or orange slick near the drain is usually Serratia marcescens bacteria while black spotting on caulk and grout is mold. Acidic Descalers: The Workhorses for Glass, Tile, and Chrome Acidic descalers are the first choice for glass doors, ceramic tile, and chrome. Typical formulas rely on citric or lactic acid, while heavy-duty commercial versions use phosphoric or hydrochloric acid. Sprayed on a cloudy door, the acid turns the alkaline minerals into soluble salts that rinse away; the fizzing you see on grout is that reaction at work. The catch: acid eats natural stone. Marble, travertine, limestone, and slate etch into dull, rough patches no polish can reverse, so stone showers need neutral cleaners made for them. Bleach Products: Disinfecting Mold Without Cleaning the Scum Bleach sprays rely on sodium hypochlorite, which oxidizes the cell walls of mold and bacteria and whitens stained grout. They will not dissolve soap scum or limescale: sprayed over a thick waxy layer, the mold underneath survives, and because bleach cannot penetrate porous grout, deeper roots simply regrow within weeks. Use bleach as step two: descale with an acid cleaner, rinse thoroughly, then disinfect. As the CDC explains, properly diluted bleach kills germs on hard surfaces, and it must never be mixed with other cleaning products, since the reaction can release dangerous fumes. Abrasives, Enzymes, and Daily Sprays Three more product families round out a well-stocked shower caddy: Abrasive cleansers: creams and powders with fine particles such as feldspar or silica that grind away buildup. They excel on textured fiberglass or acrylic floors, metal marks on porcelain, and rings around the drain, though coarse grit dulls high-gloss finishes over time. Enzymatic cleaners: biological enzymes that digest body oils, skin cells, and soap residue, ideal for drains and for keeping odors away. They work slowly and need dwell time, but they are gentler on users and safe for plumbing and septic systems. Daily shower sprays: preventive formulas with surfactants and chelating agents that bind minerals so water sheets off walls and glass before it evaporates. They cannot rescue a neglected shower, but used right after every rinse they stretch the time between deep scrubs. Quick Comparison: Which Product for Which Surface Surface Best product type Key caution Glass shower doors Acidic descaler, then rinse Never use coarse abrasives that scratch glass Ceramic tile and grout Acid for scale, bleach for mold, grout brush for scrubbing Clean and rinse before disinfecting so bleach reaches the mold Marble, travertine, slate Stone-safe neutral cleaners only Standard acid products etch natural stone permanently Fiberglass and acrylic pans Mild abrasive cream on textured floors Skip powder grit that dulls glossy finishes Chrome and metal fixtures Acidic descaler for water spots Rinse well so acid does not sit on the metal Dwell Time, Ventilation, and the Never-Mix Rule Chemistry needs minutes, not seconds. Acidic and bleach products should sit for five to ten minutes so they can break molecular bonds; spray and wipe immediately and the product never works. In a small enclosed stall, fumes concentrate quickly, so run the exhaust fan and crack a window. Never mixing products is the bathroom’s deadliest rule: bleach with an ammonia-based cleaner forms chloramine gas, and bleach with vinegar or any acid forms chlorine gas, both of which can be fatal. Rinse the shower fully between products, then check the Government of Canada guidance on using household chemicals safely before you start. Do Natural Cleaners Like Vinegar and Baking Soda Measure Up? White vinegar is genuinely useful as acetic acid on mild limescale, and baking soda works as a gentle abrasive. Their limits matter: vinegar is not a registered disinfectant and will not reliably kill bacteria such as Staph, its acidity can degrade rubber seals over time, and baking soda needs heavy rinsing. For a shower neglected for months, commercial chemistry is usually needed to break bonded scale first. After that, vinegar, baking soda, and a daily squeegee habit maintain the clean, since pulling water off the glass after every use denies limescale a place to form and mold the moisture it needs. Frequently Asked Questions What is the best product for hard water stains on glass shower doors? An acidic descaler containing citric or lactic acid dissolves the calcium carbonate film that hard water stains actually are. Spray it on dry glass, let it sit for five to ten minutes, scrub gently with a non-scratch sponge, and rinse. A squeegee after every shower keeps the film from returning. Can I use the same cleaner on tile, glass, and natural stone? No. Acidic cleaners are safe for glass, ceramic tile, and chrome, but they permanently etch marble, travertine, limestone, and slate. Keep a stone-safe neutral cleaner for natural stone and read the label before spraying anything in a stone shower. Why does black mold keep coming back on my grout and caulk? Bleach whitens surface mold but cannot penetrate porous grout, so the roots survive and regrow quickly. Remove soap scum first so the bleach reaches the mold, then disinfect

Shower Cleaning Products: The Ultimate Guide to removing Hard Water Stains from Glass Shower Doors Read More »

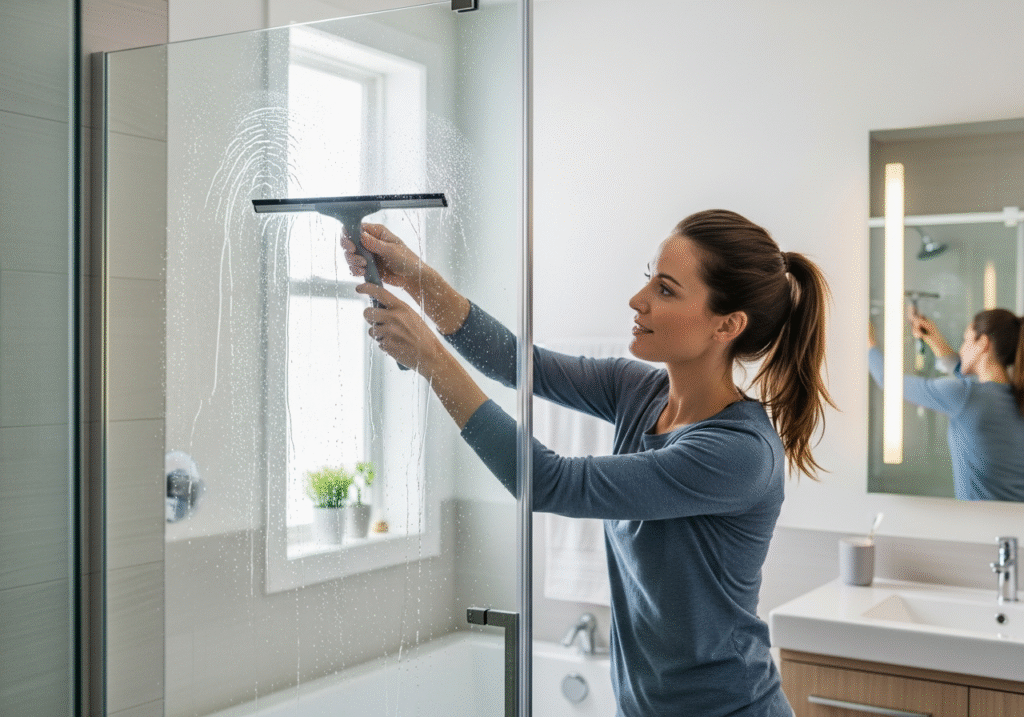
Woman using a squeegee in the bathroom to prevent mold.

Preventing Shower Mold: Daily Habits You Should Adopt to Fight Fungi

Why Shower Mold Keeps Coming Back, and What Actually Stops It The bathroom is meant to be the cleanest room in the house, yet it is the one place fungus fights you around the clock. Warm steam, low light, and a steady supply of soap scum, dead skin cells, and body oils create perfect conditions for shower mold to take root in grout and caulk. Dark fuzzy spots on tile lines are not just cosmetic: mold is a living organism that spreads, feeds on surface residue, and can eventually reach the drywall and insulation behind the tile, where damage costs thousands to repair. The good news is that shower mold is predictable. Once you understand what it needs, a handful of daily habits can starve it out before it ever appears. Know Your Enemy: What Shower Mold Actually Is Shower mold is a fungus that reproduces by releasing microscopic spores, which float through the air until they find a hospitable surface. Your bathroom offers everything a colony needs: steam-driven moisture, dim light, and a constant buffet of organic residue. The pinkish-orange slime around drains and shampoo bottles is often mistaken for mold, but it is a bacterium called Serratia marcescens that thrives in the same damp conditions yet is far easier to wipe away. True shower mold is black, dark green, or brown, with root structures called hyphae that dig into grout and silicone caulk. That is why a scrubbed spot returns in the exact same place three days later: you removed the visible bloom and left the roots alive underneath. Why Bleach Makes Grout Mold Worse Reaching for chlorine bleach is the standard reflex, but on porous surfaces it is a trap. Bleach kills surface mold on non-porous materials like glass and glazed tile. On grout and caulk, its chemical structure stops it from soaking in deep enough to reach the hyphae: it bleaches out the pigment so the stain disappears, while the water in the solution soaks into the cement and feeds the roots left behind. The colony regenerates, often stronger and more resistant than before. And never mix vinegar and bleach; the reaction releases toxic chlorine gas, a far deadlier hazard than anything living on your tiles. Cleaners That Kill Mold at the Root A deep kill on porous surfaces takes chemistry that penetrates. White distilled vinegar is a mild acid that seeps into microscopic pores, attacks fungal cell membranes, and ruptures them. Spray it undiluted, let it dwell for at least an hour, then scrub with a baking soda paste to lift the dead growth. Hydrogen peroxide is a scent-free alternative that oxidizes mold and helps whiten stains. Remedy Works best on How to use it White distilled vinegar, undiluted Porous grout and caulk Spray and let sit for at least one hour, then scrub Baking soda paste Dead mold lodged in pores Apply after the vinegar soak and agitate Hydrogen peroxide, 3 percent Surfaces and stubborn stains Spray directly; fizzes as it oxidizes and whitens Chlorine bleach Glass and glazed tile only Do not rely on it for grout or caulk; it cannot reach the roots The Caulk Problem and the Safety Basics The hardest battleground is the silicone caulk sealing the tub-to-wall joint and shower corners. As adhesion fails over time, microscopic pockets trap water and mold grows from the back side. If black spots sit inside the caulk itself, no scrubbing or soaking can reach them: cut the infected bead out completely with a razor knife, sterilize and dry the channel, and apply fresh mold-resistant silicone. Compromised caulk also lets water leak toward wall studs and invites rot alongside the fungus. When disturbing dry mold, wear gloves and preferably an N95 respirator, because scrubbing releases thousands of spores into a small enclosed room. High spore concentrations can trigger asthma and respiratory inflammation, a risk documented in CDC mold and health resources. Run the exhaust fan and open a window so spores and fumes leave the house. Daily Habits That Starve Mold Out Mold requires moisture, so depriving it of water is the most effective control strategy. A five-minute routine after every shower does more than any bottle of remover: Squeegee walls and glass after each shower so standing water cannot evaporate into hours of high humidity. Run the exhaust fan during the shower and for at least 30 minutes afterward; in a fanless bathroom a dehumidifier is mandatory, holding relative humidity below 50 percent, the level at which mold struggles to reproduce. Store bottles, razors, and loofahs on a hanging caddy or wire rack so water drains instead of pooling underneath. Wash the plastic curtain liner in hot water with towels for scrubbing action, or replace it; a moldy hem re-contaminates clean tiles. Switch from bar soap, which leaves talc and fatty-acid scum, to liquid body wash, which leaves less residue. Wipe weekly with a pH-neutral cleaner so body oils and skin cells never accumulate into a food supply. Keeping humidity down is the goal of Health Canada’s guidance on reducing moisture and mould. When to Call the Professionals If a colony spreads to the ceiling, the grout is deeply stained, or the affected area exceeds about ten square feet, a threshold at which the EPA suggests professional remediation, stop scrubbing. Toronto Shine Cleaning brings industrial steamers and enzymatic cleaners that outperform consumer products, plus experience with Canadian winters, when homes sealed in winter turn bathrooms into humidity traps. Book a deep clean starting at $270.38 for a studio or one-bedroom before HST and pair it with a recurring regular cleaning plan so mold never gets a second foothold. For the full room-by-room reset, our deep cleaning service covers the bathroom thoroughly. Shower Mold FAQ How can I stop shower mold from growing between cleanings? Remove its two requirements: water and food. Squeegee after every shower, run the fan 30 minutes afterward, and wipe walls weekly with a pH-neutral cleaner so soap scum never builds up. Does vinegar kill mold better than

Preventing Shower Mold: Daily Habits You Should Adopt to Fight Fungi Read More »

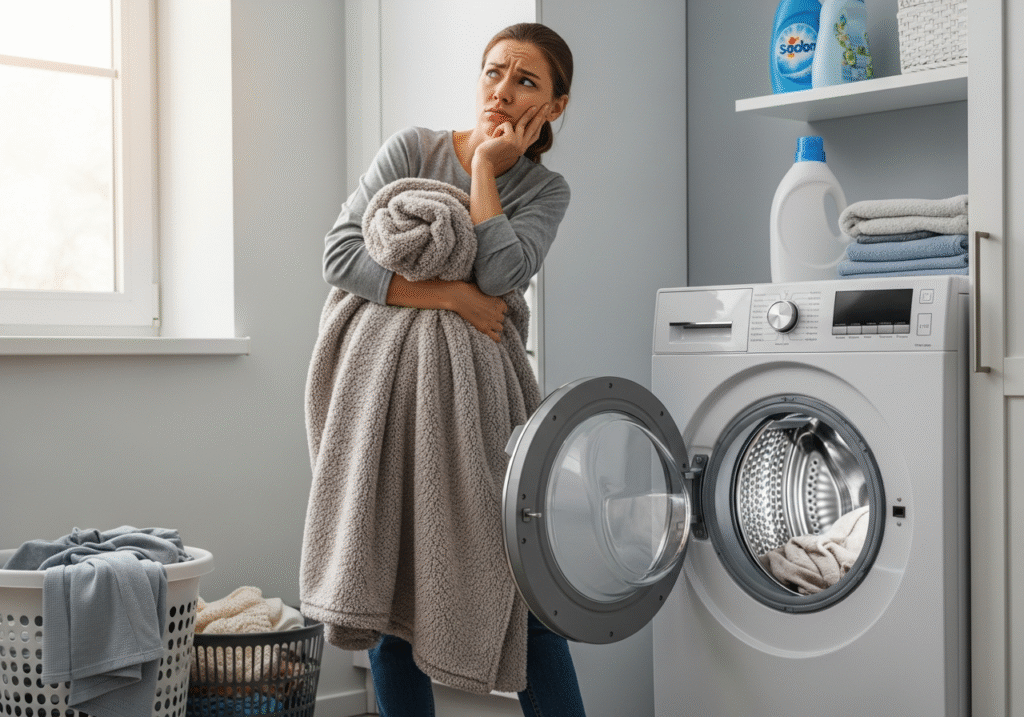
Woman unsure whether to put a blanket in the washing machine.

Blankets Washing: 9 Laundry Mistakes That Destroy Blanket Fibers

Why Blanket Care Deserves More Than a Quick Spin Blankets are the most personal textiles in the house: we sleep under them, drag them to the sofa, and share them with pets. Sheets get washed weekly, yet blankets drift into neglect, collecting dead skin, body oils, dust mites, and pet dander. That buildup mats the fibers, flattens the loft, and cuts warmth. Restoring softness takes a method matched to the material, because treating a wool heirloom like a fleece throw is a recipe for ruin. The 9 Laundry Mistakes That Destroy Blanket Fibers Drying fleece on high heat, which melts the plastic fiber tips into a rough, scratchy texture. Adding fabric softener to fleece, which coats the fibers in waxy buildup that traps dirt. Washing wool with heat and agitation, which felts the fiber scales and shrinks the blanket. Wringing or hanging wet wool, which breaks the fibers or stretches the shape. Drying down without dryer balls, leaving wet clumps that mildew inside the fill. Washing a heavy weighted blanket in a standard machine, risking motor damage. Dry cleaning electric blankets, since solvents can dissolve the wire insulation. Blasting cotton on high heat, which can shrink a king-size blanket to queen size. Storing any blanket damp or sealed in plastic, an open invitation to mould. Fleece and Microfiber: Cold Water, No Softener, No High Heat Most everyday throws are synthetic fleece or microfiber: durable and warm, but magnets for hair, lint, and static. The two classic mistakes are heat and fabric softener. Fleece is essentially plastic; a hot dryer slightly melts and fuses the fiber tips, leaving a rough feel that never recovers. Fabric softener lays a waxy film over the fibers that traps soil and reduces breathability. Wash in cold water with a mild detergent and run an extra rinse so no soap residue remains. Wool and Down: Respect the Fill Wool is a protein fiber, and its surface carries tiny overlapping scales, much like human hair. It shrugs off odours naturally, so it needs fewer washes, but heat, moisture, and churning lock those scales together in a process called felting. One cycle can turn a draping blanket into a stiff mat. Use the wool cycle or hand wash in a tub with a lanolin-based detergent. Never wring: press out the water, roll the blanket in heavy towels, and lay it flat to dry, since hanging wet wool stretches it out of shape. Down comforters and duvet inserts fail for the opposite reason: too little agitation while drying. Wet down collapses into dense clumps, and if the blanket is not tumbled thoroughly it develops mildew inside the fill. Use a down detergent, then dry with tennis balls or wool dryer balls so the clumps get pounded apart. Skipping that step leaves hard lumps and a flat, cold blanket. Weighted and Electric Blankets: Respect the Hardware Weighted blankets are filled with glass beads or plastic pellets stitched into pockets, and a typical adult version weighs fifteen to twenty pounds. Running one through a standard residential washer can throw the drum off balance or strain the motor, so anything over twenty pounds belongs in a commercial laundromat machine. Plastic pellets survive washing but melt in a hot dryer, so air dry instead. If the inner lining rips, escaping beads can damage the machine. Electric blankets are washable on most modern models once the control cord is detached, because the wiring is insulated against water but not against the twisting of a spin cycle. Use the gentlest cycle and warm water, and never dry clean them: the solvents can dissolve the insulation and create a fire hazard. Dry on low, finish by air drying, and confirm the blanket is fully dry before plugging it in. Cotton, Stains, and Storage: The Quiet Killers Cotton blankets and quilts seem low maintenance until they shrink. Wet cotton fibers swell, and high-heat drying locks in the contraction, which is how a king-size blanket becomes a queen-size one. Wash cotton in cool or warm water, dry on low until slightly damp, and air dry the rest of the way. A soaked quilt is heavy, so support its weight when lifting it from the washer. For stains, blot instead of rubbing, since a spill on a thick blanket soaks in rather than passing through. An enzyme cleaner handles organic stains like sweat by digesting the proteins ordinary soap cannot. Storage is where many blankets die: fold them only when bone dry, use breathable cotton bags rather than airtight plastic, and skip mothballs in favour of cedar blocks or lavender sachets. The CDC explains that mould grows on fabric wherever moisture lingers, and Health Canada points to uncontrolled humidity as the main driver of mould and dust mites in the home. Quick Reference Card by Blanket Material Material Wash Dry Key warning Fleece Cold water Low heat only Heat fuses tips; skip softener Wool Cold, wool cycle Lay flat, never wrung Heat and churning felt the blanket Down Warm water Tumble with dryer balls Damp clumps mildew inside the fill Cotton Cool or warm Low, finish air dried Hot drying shrinks king to queen Weighted Cold, if the machine fits Air dry only Over 20 lb needs a commercial washer Frequently Asked Questions About Washing Blankets How often should I wash my blankets? A top sheet protects the bed blanket from skin contact, so it can go several months between washes. Living room throws touch skin, hair, and pets directly, so wash those monthly. Can I put a weighted blanket in my washing machine? Only if the blanket’s weight fits the machine’s rated capacity, usually fifteen to twenty pounds or less at home. Heavier blankets need commercial machines, and the fill must be air dried. Why does my fleece blanket feel rough after drying? High heat fused the synthetic fiber tips. The damage is permanent, so switch to low or no heat and wash in cold water with an extra rinse from now on. Do wool blankets really

Blankets Washing: 9 Laundry Mistakes That Destroy Blanket Fibers Read More »

How to Clean a Yoga Mat: The Ultimate Guide for PVC, Rubber, and Cork

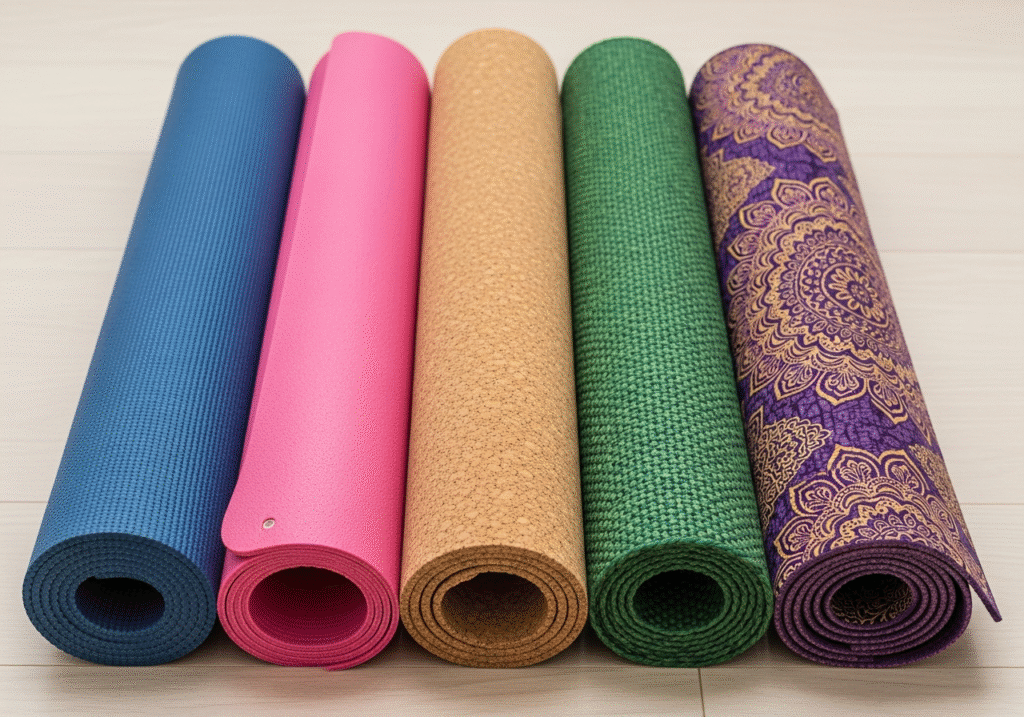
Why Your Yoga Mat Needs a Real Cleaning Routine A yoga mat is a sanctuary of grip and stability, but it is also a sponge for sweat, dead skin cells, oils, and whatever dust the floor offers. Every class presses your hands, feet, and face into a surface soaked with the previous sessions’ biology, and warm, humid conditions turn that foam into a breeding ground for bacteria and fungi. Cleaning a mat is not cosmetics: it is hygiene that prevents skin infections, neutralizes odours, and extends the life of the mat. The CDC warns that germs like MRSA can spread in athletic settings through contaminated surfaces and shared items, which is why mats used in studios deserve attention between every class. Fortunately, the right routine is simple once you know your material. PVC, Rubber, and Cork: Know Your Mat’s Structure Mats divide into two camps. Open-cell mats are porous: they absorb sweat so they stay grippy when wet, but that also pulls bacteria deep into the core. Closed-cell mats are impermeable: sweat pools on top, they wipe down easily, but they feel slipperier in a hot class. PVC and TPE mats are usually closed-cell, while natural rubber is open-cell and thirsty; cork mats pair a textured cork surface with a rubber or TPE base and respond best to gentle, low-moisture care. Identify yours before choosing a cleaner, because soaking an open-cell mat improperly can waterlog it until it rots from the inside. Material Cell structure Best cleaning approach PVC or TPE Closed-cell Daily spray wipe; occasional tub soak Natural rubber Open-cell, absorbent Mild soap or enzyme cleaner; short soak only Cork surface Natural top layer Damp cloth wipe; avoid long soaks How to Clean a Yoga Mat After Every Session After each practice, remove surface bacteria and oils before they dry into a sticky film. The most effective daily solution is simple: mix three parts distilled water with one part white vinegar in a spray bottle. The mild acid dissolves grease and kills odours without damaging the polymer structure of most mats. Essential oils such as tea tree or lavender can be added, but only sparingly: oils are slippery, and too much residue turns the next session into a sliding hazard. Spritz lightly over the mat and wipe it with a damp microfiber cloth; the friction dislodges the debris. When and How to Deep Clean a Yoga Mat A light spray stops working once grime builds up. These signs mean it is time for a deeper wash: A persistent smell that reappears the moment you unroll the mat. Visible darkening where your hands and feet land. A slippery or sticky film that wiping does not remove. For closed-cell PVC and TPE mats, the bathtub method is thorough and safe. Fill the tub with warm water and a single teaspoon of mild dish soap; too much soap is the most common mistake, because residue hides inside foam and reactivates mid-class as a slip hazard. Submerge the mat for fifteen to twenty minutes, then squeeze it gently or step on it with bare feet to work the suds through the texture. Drain and rinse repeatedly, refilling with fresh water until squeezing produces no bubbles at all. Dry Your Mat the Right Way Drying is where most mats are ruined. A saturated mat can take twenty-four to forty-eight hours to dry, and using it damp invites mildew. The burrito method speeds things up: lay the wet mat flat on a large dry towel, roll both together tightly, and kneel or step on the roll to press water from the mat into the towel. Repeat with a second towel if needed, then hang the mat in a cool, well-ventilated room. Never dry a mat in direct sunlight: ultraviolet rays break down rubber and plastic bonds until the surface turns brittle and flaky. Never roll a damp mat for storage: the dark, moist interior is where mould thrives. Health Canada recommends controlling indoor humidity and drying damp items promptly to keep mould and dust mites at bay. Extra Care for Natural Rubber and Cork Mats Natural rubber asks for a gentler protocol. Vinegar, which suits many synthetics, can slowly dry out and degrade rubber over time, so reach for a heavily diluted gentle soap, or an enzymatic cleaner built to break down the proteins in sweat rather than dissolving them chemically. Rubber also drinks water readily: keep soaks brief, because a waterlogged mat can tear under its own weight when lifted. Machine washing is rarely worth the risk, even when a manufacturer calls a thin travel mat washable: agitation can stretch, tear, or delaminate the foam, a soaked mat can knock the washer off balance, and a tumble dryer will melt or warp it instantly. Prevention: Keep the Mat Cleaner Between Washes Personal hygiene does most of the work. Practicing with clean hands and bare feet cuts the oil and dirt that reach the surface, and covering the mat with a microfiber yoga towel absorbs sweat before it touches the foam. Towels go straight into the laundry after class, which turns deep cleaning from a monthly chore into a seasonal one. If a mat still smells after washing, bacteria have reached deep into the foam; a vinegar soak or a night in the freezer helps only temporarily. When the surface pits, flakes, or keeps its smell after a deep clean, the material has degraded past the point of sanitation and replacement is the only option. Frequently Asked Questions About Cleaning Yoga Mats How often should I clean my yoga mat? Wipe it down after every session with the spray, and deep clean it in the tub about once a month. Studio mats used several times a week deserve it even more often. Can I put a yoga mat in the washing machine? It is risky. Agitation can stretch, tear, or delaminate the foam, and a soaked mat is heavy enough to damage the washer during the spin cycle. Hand washing and air drying are

How to Clean a Yoga Mat: The Ultimate Guide for PVC, Rubber, and Cork Read More »

organizing a kitchen pantry

Cleaning the Pantry: 5 Expensive Mistakes You Are Making with Pantry Storage

Your Pantry Is Costing You Money The pantry is the fuel station of a household, and when it runs on chaos the bill shows up every week. Half-used bags hide behind intact ones, duplicate cans accumulate in the dark, expired staples surface only mid-recipe, and undisturbed crumbs quietly host pantry moths and ants. Fixing the space is not about buying cute bins; it is a sequence of steps, and most homes skip the first one, which is why the order collapses within a fortnight. Here is the process, plus the mistakes that make people repeat it every year. Mistake one: organizing over a dirty foundation Start with a total evacuation. Every jar, box, and bag comes out onto the table or counters; shelf-by-shelf tidying is just re-shuffling the same mess. Stripped bare, the pantry usually reveals sticky syrup rings, spilled grains, dust, cobwebs, and in bad cases insect larvae in the corners. Vacuum first, then scrub the bare shelves with hot soapy water, or a vinegar mix, to cut the grease, and remember the undersides of wire shelving where grime accumulates. Food safety starts with clean surfaces, and the CDC cleaning and disinfecting guidance is a sensible reminder to clean away the dirt before any sanitizing step can work. Nothing built on a dirty shelf lasts. Mistake two: putting everything back While the shelves dry, audit the pile honestly. Spices from the last decade have no flavour left, the open chips are stale, the impulse tea is undrunk, and the hardened brown sugar is gone. Toss expired items without ceremony. Unexpired food you know you will not realistically eat goes to a food bank the same day, because guilt is not a storage plan and it will simply expire later. This purge is what creates the negative space every functional system needs. Mistake three: no zones, no labels, no logic Shop your pantry the way a grocery store shops you. Group by purpose, not by size: baking together, breakfast together, dinner staples together, snacks together, and so on. When you are making a cake, the vanilla should live where the flour lives, not behind a cracker box. Then commit to the two habits that make zones stick: Decant dry goods into matching airtight containers. Commercial packaging sells product; it does not store it. Uniform square containers stack with no dead space, clear walls give you an instant visual inventory for the grocery list, and airtight is the only real defense against pantry moths and weevils, which chew through cardboard and thin plastic. Wide openings let you scoop flour without a mess. Label everything, including the expiry date on the base or back, and tape the cooking ratios you actually use, like water for quinoa, to the container. You cannot reliably tell bread flour from all-purpose flour by eye, and one batch of gummy pancakes will teach you that. Mistake four: ignoring the architecture of your shelves Store by frequency and weight. Waist-to-eye level is prime real estate for the daily items: cereal, dinner staples, snacks. Heavy things such as bulk rice, water cases, and small appliances live low, where lifting cannot injure anyone. Light, rare items, from paper towels to holiday sprinkles, go high. Give young kids a low shelf of approved snacks so they feed themselves without climbing the racking. In deep shelves, treat the boards like drawers: pull-out bins for chip bags and sauce pouches stop old items being shoved into the abyss, a turntable rescues oils and nut butters from the back corner, and tiered risers keep every can label visible. Keep the floor clear for sweeping and pest checks; anything stored there belongs in rolling crates. Mistake five: refilling instead of maintaining Organization decays without rules. Adopt first in, first out: new pasta goes behind the open box, and never top off a flour canister on top of old flour, since the ancient layer at the bottom is the one you eventually bake with. Wash containers between refills. Resist bulk buying you have no designated space for, because five gallons of olive oil that turns rancid is not a bargain. Match the inventory to how you actually eat; when a diet ends, its specialty flours move to the freezer or the donation box. Make handwashing part of the routine too; the CDC guidance on when to wash covers food handling, and a five-minute monthly scan keeps the whole system honest. The shelf map at a glance Zone What belongs here Why Eye to waist Daily cereals, dinner staples, snacks Zero-effort access keeps the system used, not admired Bottom shelf or floor Bulk rice, water, appliances Heavy lifts stay safe and low Highest shelf Paper goods, roasting pan, seasonal decor Light, rare items stay out of the way Bins and turntables Loose pouches, oils, jars Nothing disappears into a deep shelf again Ventilated basket Onions, potatoes, alliums Airflow prevents rot and fruit flies Why the clean comes before the order Every step above dies in a grimy room: you cannot sort a pantry while fighting sticky shelves and cobwebs, and most households stall exactly there. If the scrub-down is the wall, outsource it. Toronto Shine Cleaning’s whole-kitchen deep clean gets into the corners behind the toe kicks and strips years of grease from the kitchen, and our regular maid service keeps the reset from eroding between shopping trips. We cover kitchens across the city, listed on our locations page. Call (647) 424-0355 and start your organization project from spotless shelves. Frequently asked questions How often should a pantry be deep cleaned? Once or twice a year, ideally aligned with a full audit of the shelves. Between those, a vacuum wipe-down of crumbs and a quick spill check monthly keeps pests from establishing the food source that starts an infestation. Are airtight containers really necessary, or just Instagram? Functional, not decorative. Sealed containers slow staleness, stack efficiently, show you stock at a glance, and block pantry moths and weevils, which chew through paper bags and thin plastic

Cleaning the Pantry: 5 Expensive Mistakes You Are Making with Pantry Storage Read More »

toilet cleaning brush

Toilet Cleaning Brush: 6 Signs It’s Time to Throw Away Your Toilet Cleaning Brush

The Most Neglected Tool in Your Bathroom The toilet brush lives behind the porcelain pedestal or inside a decorative canister, tolerated as a necessary evil and avoided as a subject. That aversion is the problem. A neglected brush is not a cleaning tool but a biological hazard, and choosing the wrong design, or using the right one badly, can spread more bacteria than it removes. The brush decides how clean the highest-risk fixture in the house actually gets, so it deserves a moment of serious attention. Nylon versus silicone: two different jobs Traditional nylon bristles exist for friction. Stiff synthetic fibers scour the calcium deposits and organic ring at the waterline better than anything else. The hygiene trade-off is severe, though: dense bristle clusters act as a net, trapping paper, hair, and waste deep in the head where rinse water cannot reach, so the brush returns to its holder carrying damp cargo. The stiff fibers also flick droplets of bowl water onto the seat, floor, and your clothing with every stroke. Silicone brushes, usually made of thermoplastic rubber, invert the equation. Widely spaced rubbery nubbins trap nothing, the hydrophobic surface beads water off instantly so there is no drip walk back to the holder, and a quick rinse leaves it far cleaner than nylon. The weakness is abrasion: soft rubber glides over hardened mineral scale instead of cutting it. Daily and weekly maintenance belongs to silicone; an overdue scrub of a neglected bowl still belongs to nylon. Shape and handle matter more than the price tag The ubiquitous dome head is largely wasted effort, because the critical zone is the underside of the rim where the siphon jets flush water from. That dark, damp crevice hosts mold, the pink biofilm known as Serratia marcescens, and mineral buildup that weakens the flush, and a round dome merely bumps it. Buy a brush with an angled under-rim tuft or a bendable head, or you are cleaning the bowl cosmetically while leaving the odour source untouched. On handles, longer is safer: a short one puts your face in the splash zone, while length gives leverage and distance. Choose solid non-porous plastic or stainless, ideally a seamless one-piece mould with no joints for mold to colonise, and skip wooden handles, which swell, crack, and harbour bacteria in a humid bathroom. The holder is a petri dish The worst habit in domestic hygiene is plunging a soaking-wet brush straight into a sealed canister. The water pools below into a dark, room-temperature blend of bowl water and chemical residue, an ideal incubator, and every use dips the brush back into that soup. Open-air holders are uglier precisely because they let evaporation do what bacteria hate. If you want a closed canister for looks, use a suspended design where the brush hangs above a drip tray instead of sitting in it. Rinse the head in fresh bowl water after every scrub so debris falls back into the toilet, not into storage. Disinfect with the hour-long bleach soak weekly rather than once a season. Always let the brush dry fully before it returns to its holder; capping it wet restarts the cycle. Wipe out the canister itself each time you sanitize the brush. Wash the brush itself, too; contact with soap does not make it self-cleaning. After scrubbing, flush clean water into the bowl, add about a cup of bleach or a strong disinfectant, and soak the head for an hour, following the dilution and ventilation basics in the CDC guide to using bleach safely. Then rest the handle across the toilet seat so the head dangles into the bowl and drip-dries completely before returning to storage. This simple sandwich technique keeps standing water out of the holder entirely. Give the chemistry time to work Disgust makes people rush: squirt, ten seconds of swirling, flush, escape. Bowl cleaners rely on dwell time. Products with hydrochloric acid for descaling or bleach for disinfecting need minutes on the porcelain to break the bond of what is stuck, consistent with the CDC principle that surfaces should be properly cleaned before disinfection. The correct routine is: apply, spread and agitate with the brush, walk away for ten minutes, then return for a final scrub and flush. Six signs your brush has become the problem Sign What it means Action Nylon bristles flattened or matted Loss of scrubbing contact Replace the brush Bristles stained orange or brown Embedded soil no rinse removes Retire it today Cracks in a silicone head Fissures sheltering bacteria Replace the brush Ring or puddle in the holder Pathogen incubator in use Switch to a suspended or open holder Odour when you lift the lid The tool itself has gone Replace and disinfect the holder Rust streaks from a steel canister Cheap metal failing in humidity Move to a plastic holder There is no universal expiry date, but a reasonable baseline is a fresh brush every six to twelve months depending on use. It is an inexpensive tool, and keeping a degraded one out of frugality is a hygiene error. Disposable systems, with a permanent handle and ejected single-use pads scrubbed with detergent, are the gold standard for never storing anything wet, and suit low-traffic guest bathrooms, though flimsy pads cannot restore a scaled main bowl, and the waste and ongoing cost add up. The brush is small; the bathroom is not Function must precede form everywhere waste lives, which is why sleek stainless accessories so often leave orange rings on your tile while plain plastic endures bleach and moisture without complaint. If your bowl has scale a silicone head cannot shift, or the hidden corners behind the toilet have simply accumulated beyond what a Saturday scrub fixes, the professional answer is a proper bathroom deep clean from Toronto Shine Cleaning, and weekly upkeep with a regular maid service keeps the protocol from collapsing again. We serve washrooms across Toronto, listed on our locations page. Call (647) 424-0355 and make the brush the least of your bathroom worries.

Toilet Cleaning Brush: 6 Signs It’s Time to Throw Away Your Toilet Cleaning Brush Read More »

woman needing to organize the house for holiday guests

5 Ways to Organize Your Home to Accommodate Extra Guests

Five Ways to Organize Your Home Before Guests Arrive Around the holidays, a house stops being a private space built around daily routines and turns semi-public, arranged for hospitality and celebration. The change creates real logistical problems: occupancy can double or triple, familiar pathways become choke points, and the ordinary visual noise of family life needs to disappear so the home reads as welcoming. Hosting successfully requires structural reorganization, plus the empathy to walk each room the way a guest will. The Five Zones at a Glance Entryway: clear the funnel every coat, bag, and pair of boots passes through. Guest room: take the space back from its overflow-storage role. Bathroom: stock it so nothing has to be hunted for. Kitchen: zone the traffic and reset the refrigerator. Living area: rearrange for conversation, lighting, and fragile-proofing. 1. Clear the Bottleneck: The Entryway Every guest enters through one narrow, high-traffic point. Winter visitors arrive layered in bulky coats, wet boots, scarves, and bags, and the classic error is letting the host family’s own gear fill the rack before anyone arrives. Purge the front closet a week out, moving household cold-weather items to a garage, basement, or bedroom closet so primary storage stands empty for visitors. Swap flimsy wire hangers for sturdy ones, and borrow a garment rack for large groups. A standard mat cannot absorb a party’s worth of snow, mud, and salt, so add generous rubber boot trays to corral slush. Clear the entry table so a guest can set down a purse or gift. 2. Turn the Storage Room Back Into a Guest Room For eleven months, guest rooms quietly mutate into overflow storage for decorations, off-season clothes, and old exercise bikes. That debris must leave entirely before visitors land, not simply be shoved to one corner. Clear the closet fully and empty two dresser drawers plus a section of hanging space; nobody should spend a week in a suitcase. Then stage the bedside: check the outlet behind the nightstand and add a power strip at reachable height. Launder all bedding beforehand, including duvet covers and mattress protectors, because linens stored for a year carry a musty staleness the moment they are unpacked. 3. Make the Bathroom Intuitive Guests cannot casually explore a bathroom the way they breeze through a hallway, so this room must be intuitive and spotless. Stock toilet paper generously so running out never triggers a search. Provide ample towels in a distinct color, ending guesswork about whose is whose. Stash your own toiletries in drawers or the cabinet so the counter offers clear real estate for a visitor’s products, and clear the tub edge of old bottles. Tidiness here reads as hospitality, and it starts with real cleanliness: the CDC’s checklist for when and how to clean and disinfect your home is a handy pre-guest reference for high-touch surfaces. 4. Zone the Kitchen Around Traffic The kitchen becomes the social hub, and guests naturally congregate there, blocking the cook’s triangle between stove, sink, and refrigerator. Head it off with a self-service station far from the work zones: a drinks table with glassware, ice, and beverages on a sideboard, plus a snack zone on the island or in the living area. Then maximize the workspace itself. Clear every counter of appliances not needed for the menu, because counter space becomes the scarcest resource during prep. Treat the refrigerator as a logistics problem: declutter condiment graveyards, old leftovers, and expired items to open voids for the turkey and sides, raise or remove shelves for tall bottles and platters, and group similar items in clear bins so guests serve themselves without excavating the back shelves. 5. Reshape the Living Area for Conversation Most living rooms face a television; a hosting living room should face itself, with seating rearranged into conversational clusters. Then remove the fragile and the superfluous: with small children visiting, lift delicate collectibles and heirlooms to higher shelves, and clear the coffee table of decor so cups and plates have room. Lighting is an organizing tool too: check every lamp for a working bulb and favor soft, layered light rather than harsh overheads that feel clinical. And if the hauling and rearranging feels like a workout, it counts as one: the CDC’s overview of the benefits of physical activity is good permission to move boxes guilt-free. The Organization Table: Room, Fix, Timing Room Core fix Best timing Entryway Empty the closet, add boot trays, clear surfaces Week before arrival Guest room Remove stored items, clear drawers, check outlets Laundry early, staging the day before Bathroom Guest towel color, visible paper, bare counters Scrub mid-week, restock day-of Kitchen Self-serve stations, appliance eviction, fridge reset Reset 48 hours before cooking Living area Conversation layout, valuables high, coasters out Same day as arrival Why a Deep Clean Comes Before the Decor None of these strategies works in a dirty house, because tidying a grimy space is just rearranging clutter. Washing guest-room walls, scrubbing bathrooms, and degreasing the kitchen creates the fresh canvas that makes organization visible, and that labor exceeds the hours most hosts can spare. The fix is dividing the work: Toronto Shine Cleaning provides the professional deep cleaning before the event, and you keep the hosting. Typical deep cleaning rates before HST start from $270.38 for a studio or one-bedroom and $393.75 for a two-bedroom, rising to $441 for three bedrooms and $527.63 for four, itemized on our pricing page. Follow the reset with a recurring regular housekeeping visit so the home settles back into rhythm, or call (647) 424-0355 for a quote sized to your rooms. Frequently Asked Questions How far ahead should guest prep start? Two weeks out: purge the entry closet, empty the guest room, and launder bedding. One week out: the deep clean and kitchen appliance eviction. The last day or two: bathroom restocking, the fridge reset, and seating. What if I have no guest room? Apply the same logic to whatever you have. A cleared bedroom corner or a pull-out sofa

5 Ways to Organize Your Home to Accommodate Extra Guests Read More »

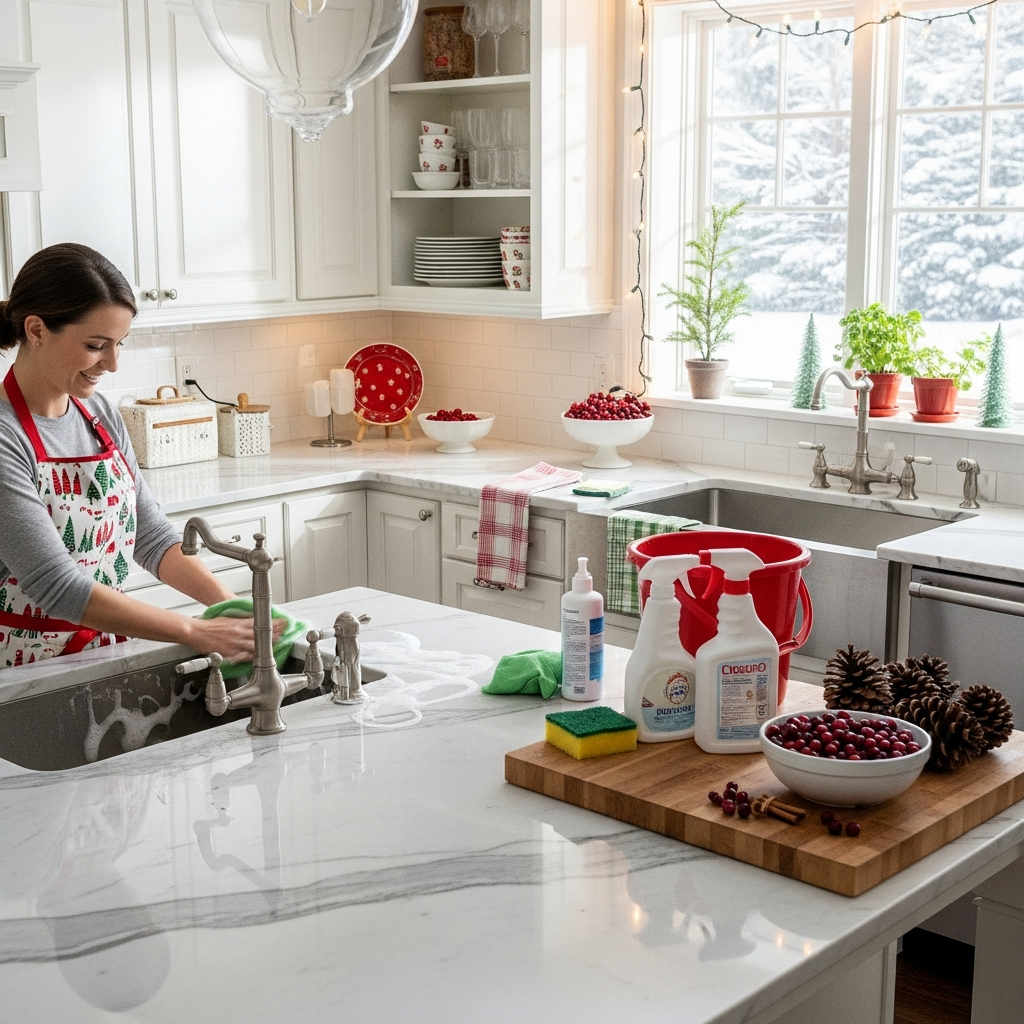
A family cleaning the kitchen for the end-of-year holidays.

Kitchen To-Do List Before The Holidays: 9 Essential Tips For a Worry-Free End of The Year

Kitchen To-Do List Before the Holidays: Get Ready for a Worry-Free Season The kitchen is the command center of the holiday season, running at full tilt in December: the oven on for hours, the fridge packed, the dishwasher cycling all day. If that equipment fails mid-meal, the whole celebration stalls. These nine tasks will have your kitchen set before the big day. 1. Purge and Sanitize the Refrigerator Start with the refrigerator about two weeks before guests arrive. A packed fridge cannot move cold air: blocked vents freeze the back while the door stays too warm for milk and eggs. Toss expired items and wash shelves and drawers in hot soapy water, since meat juice and sticky spills feed bacteria like Listeria even in the cold. 2. Clean the Oven by Hand, Skip the Self-Clean Cycle The oven does the heaviest work of the holiday, and a grimy one is a real risk. Skip the self-clean cycle in the days before Christmas: it pushes the appliance past 900 degrees Fahrenheit, and that blast of heat can trip fuses, kill electronic controls, or burn out the heating element. Clean it by hand with a commercial degreaser or a baking soda and water paste to dissolve carbonized grease on the walls and floor. Wipe the glass door and scrub the racks too. 3. Refresh the Range Hood Filters The range hood keeps the kitchen breathable, but filters caked with months of grease stop the fan from pulling smoke out, so it recirculates indoors or drips oily residue onto the stove. Remove the metal mesh and soak it in boiling water with a heavy-duty degreaser or baking soda, and a surprising amount of grease lifts off. 4. Prep the Dishwasher The dishwasher saves you from hours at the sink, but a clogged one will not clean your plates. A filter basket beneath the lower spray arm catches bones, seeds, and scraps. Remove it and scrub beneath hot running water with a stiff brush, then check the spray jets for blockages. Run an empty cycle with dishwasher cleaner or vinegar to clear scale. 5. Declutter the Counters and Build Prep Zones Counter space is prime real estate once holiday cooking begins. Clear the counters in the weeks ahead and put away anything you will not use for the big meal, then set up zones: one for chopping, one for mixing, one for plating. Scrub the corner where the backsplash meets the counter, which collects crumbs and dust, and wipe the underside of upper cabinets so greasy film cannot drip later. 6. Service the Small Appliances The supporting cast needs a once-over too. Steam a bowl of water with lemon in the microwave to loosen baked-on splatter, then wipe it down. Empty the toaster and toaster oven crumb trays, since loose crumbs can ignite during heavy use, and descale the coffee maker so mineral buildup does not slow brewing. 7. Protect the Sink and Drains A backed-up sink can derail the big meal. Pour a cup of baking soda and a cup of vinegar down the disposal and the main drain, then flush with a kettle of boiling water to clear soap scum and grease. Scrub under the black rubber splash guard, which traps food slime and odors, then grind ice cubes to hone the disposal blades. Keep grease, eggshells, and potato peels out of the sink all season. 8. Brighten the Lighting Bright, even lighting makes cooking safer and the kitchen look cleaner. Dust fixtures and bulbs, since greasy film dims them fast, and make sure recessed bulbs all match the same color temperature. 9. Deep Clean the Kitchen Floor Finish with the floor, which takes the heaviest traffic of the season. Clean grout lines and baseboards before the party so spills stay easy to wipe up. A kitchen prepped this way removes the stress points of hosting: no smoking oven, no slow drain, no overflowing fridge. Your Pre-Holiday Kitchen Checklist Purge and sanitize the fridge two weeks out. Clean the oven by hand; never self-clean right before guests arrive. Soak the range hood filters in boiling water and degreaser. Scrub the dishwasher filter and spray arm jets. Clear counters and set up chopping, mixing, and plating zones. Steam-clean the microwave, empty toaster trays, descale the coffee maker. Flush drains with baking soda, vinegar, and boiling water. Ban grease, eggshells, and potato peels from the sink. Dust bulbs and deep clean the floor, grout, and baseboards. Kitchen Prep Quick Reference Area Task Why It Matters Refrigerator Purge expired food, wash shelves hot and soapy Airflow keeps temperatures safe for meat and dairy Oven Manual clean with degreaser or baking soda paste Self-clean heat can damage electronics and elements Range hood Soak mesh filters in boiling water and degreaser Clogged filters recirculate smoke and drip grease Dishwasher Scrub filter basket, clear spray jets, run empty cycle Clogs leave gritty water on your dishes Counters Declutter and wipe backsplash corners Clear zones speed up meal assembly Small appliances Lemon-steam microwave, empty crumb tray, descale Old residue drops into fresh food; crumbs are a fire risk Sink and drains Baking soda, vinegar, boiling water flush Prevents holiday grease clogs Lighting Dust bulbs and fixtures Brighter light means safer food prep Floor Clean grout and baseboards Pristine floors make spot cleaning easy Frequently Asked Questions Why should I avoid the oven self-clean cycle before the holidays? The cycle exceeds 900 degrees Fahrenheit, and the thermal shock can blow fuses, damage control boards, or burn out the heating element right when you need the oven most. Clean by hand instead. When should I clean out the refrigerator before the holidays? About two weeks ahead: purge expired items, wash shelves and drawers in hot soapy water, and keep vents clear for safe temperatures once the roast goes in. What should never go down the kitchen drain during the holidays? Grease, eggshells, and potato peels top the list of holiday plumbing emergencies. Collect them in a slop bowl or compost

Kitchen To-Do List Before The Holidays: 9 Essential Tips For a Worry-Free End of The Year Read More »

cleaning an air fryer

5 Signs Your Air Fryer Needs a Deep Clean Immediately

Your Air Fryer Needs a Deep Clean More Often Than You Think The air fryer promised deep-fried crunch on a fraction of the oil, and it delivers. But the mechanism that makes it work, high-speed circulation of superheated air, is also what coats the walls, fan blades, and heating element with a film of grease, crumbs, and spices. That debris polymerizes into a sticky, tar-like coating that smokes, ruins the flavor of your food, and can become a fire hazard. Most owners rinse the basket and stop, while the heart of the machine slowly suffocates. Here are the signs and the clean that fixes them. Five Signs Your Air Fryer Needs a Deep Clean Now Smoke from the vents means old residue burning off. An acrid smell at startup means the element is cooking last week’s dinner again. Food that tastes like its predecessors means airborne grease is redepositing. Visible brown spots or greasy film on the heating coil, which sits inches from the food and bakes fat almost instantly. A drawer that sticks or will not close fully, usually from crumbs packed in the basket channel. Left alone, the buildup insulates the element, forces the fan motor to work harder, and sets off fire alarms. Here is how to clean it safely. Part Method Never Basket and pan Hot water and grease-fighting soap, 20 minute soak, non-abrasive sponge Steel wool or green scouring pads on the coating Heating element Damp brush with baking soda paste on tough patches Spraying water or cleaner toward the motor cavity Fan blades Long-handled brush or cotton swabs for surface grease Disassembling the unit, which voids the warranty Interior walls Microfiber cloth dampened with vinegar and water Leaving a soapy film that burns on the next cook Step One: The Basket and Pan Unplug the machine and let it cool completely. Most baskets are dishwasher safe, but the harsh detergents and high heat degrade the fragile non-stick coating over time. Wash by hand: fill the basket with hot water and grease-fighting dish soap and soak for 20 minutes. Never use a green scouring pad or steel wool, which destroy the coating in seconds. Use a non-abrasive sponge or soft-bristled brush, and for stubborn spots apply a paste of baking soda and water, a mild alkali that dissolves grease with only gentle abrasion. Step Two: The Heating Element and Fan Remove the basket, lay the unit on its back, and look up at the cavity where the spiral heating element and fan are likely coated in dark, baked-on grease. Never spray water or cleaner into this area, which runs directly toward the motor and electronics. Dip a soft toothbrush or bottle brush in warm soapy water, shake it out until just damp, and gently scrub the coil. Bending the element can ruin the machine. For tough patches, apply baking soda paste with the brush, let it dry, then scrub it off. The fan blades matter most for airflow: a long-handled brush or cotton swabs clear the surface grease. Do not disassemble the unit, which voids the warranty. Step Three: Walls, the Steam Hack, and the Exterior Wipe the interior walls with a microfiber cloth dampened in vinegar and water, well wrung out, to cut grease and neutralize odors without leaving a soapy film that burns on the next cook. For lingering stale smells, microscopic grease is trapped in the fan assembly: place a small oven-safe dish of water with lemon slices in the basket and run the fryer at moderate heat for 10 to 15 minutes, then cool and wipe. The steam loosens grime and the lemon deodorizes. The handle and control panel are germ hotspots because air fryers get handled with greasy hands; CDC clean hands guidance stresses hand washing during food prep for this reason. Damp cloth cleans the panel, but never spray liquid directly at a digital display where moisture can seep behind the screen. Run a dry cloth over the rear vents, which attract dust that sticks to warm plastic. For kitchen hygiene overall, CDC advice on cleaning and disinfecting your home provides a useful baseline on where germs live. Prevent the Grime Before It Bakes On Use perforated parchment liners or silicone inserts designed for air fryers to catch grease; blocked airflow cooks unevenly. Never put an empty paper liner in the machine; the air current lifts it into the heating element where it can catch fire. Once every few uses, wipe the cooled but still slightly warm element with a damp cloth to prevent grease from baking on repeatedly. Inspect the power cord regularly; the cord can get crushed against the hot exhaust vent behind the appliance. Air Fryer Cleaning FAQ Why is my air fryer smoking after I cleaned it? Residue remains on the element or cleaning liquid seeped toward the electronics. Unplug it, wipe everything damp rather than wet, and run it empty for a few minutes to confirm the smoke is gone. How often should I deep clean the air fryer? The basket needs attention after every use, but the full element, fan, and chamber clean described above is due roughly once a month with regular cooking, or sooner if any of the five warning signs appear. Can I use oven cleaner on the heating element? No. Aggressive caustic sprays damage coatings, drip into the motor, and leave fumes that coat your next meal. Warm soapy water, baking soda paste, and diluted vinegar handle everything safely. The non-stick coating is flaking. Can I still cook with it? Stop once coating lifts past a light scratch; flaking means food and metal contact. Replacement baskets are cheap next to the risk of eating coating flakes. A Clean Appliance in a Healthy Kitchen A clean air fryer heats faster, smells better, and produces food that tastes like itself, and the full clean is no five-minute task: awkward angles, delicate parts, stubborn grease. When appliance maintenance piles up alongside everything else, hand the whole kitchen to professionals who apply

5 Signs Your Air Fryer Needs a Deep Clean Immediately Read More »