Pet cleaning

matress

Mattress Cleaning: 5 Proven Methods to Remove Urine and Sweat Odors From Your Mattress

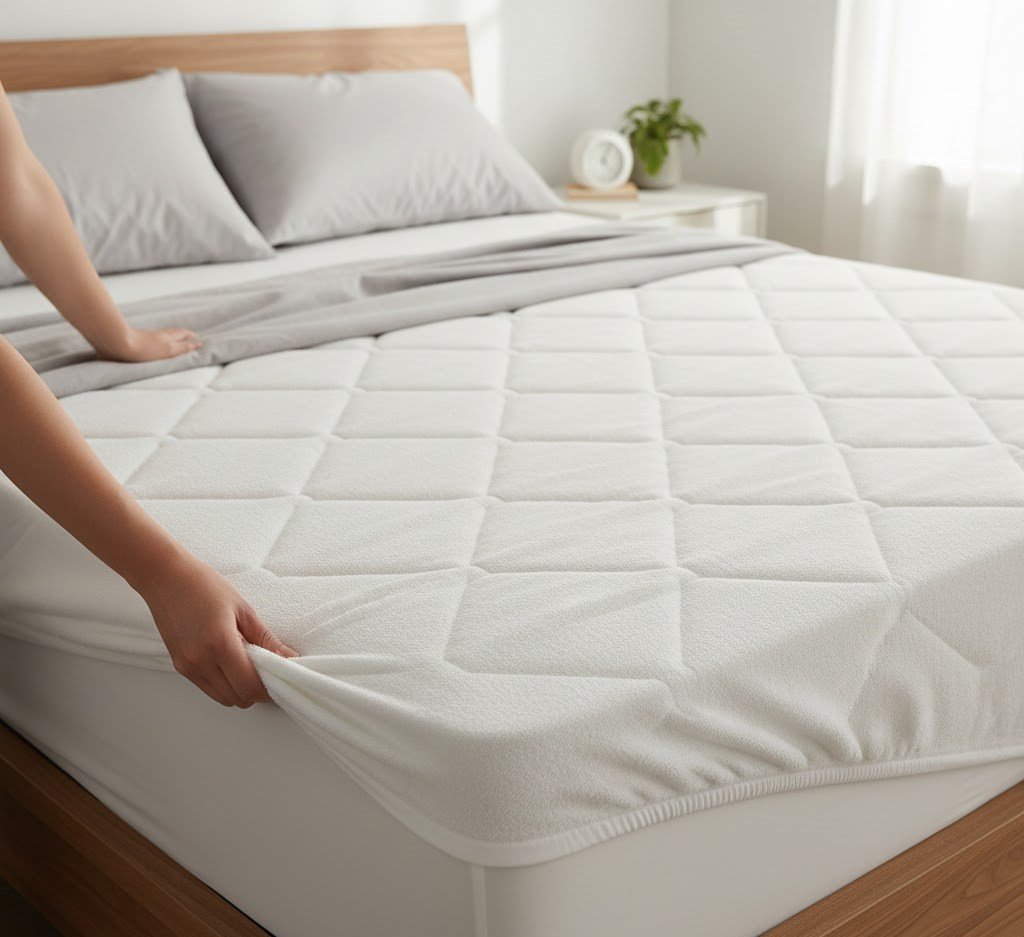
Mattress Cleaning: 5 Proven Methods to Remove Urine and Sweat Odors A mattress is the largest piece of furniture in most homes, and the one we clean least. Every night it absorbs sweat, dead skin cells, and body oils that settle into the seams and tufting, feeding dust mites, bacteria, and fungal spores. The result is a mattress that smells stale and compromises the air quality of the bedroom. Removing urine and sweat odors is not a matter of a quick spray. It takes a systematic approach that uses chemistry to break down biological bonds and careful moisture control to protect the foam and springs. Here are 5 proven methods that work. Method 1: Start With Dry Extraction Before any liquid touches the mattress, remove the dry particulate matter. If you wet a mattress full of dust and skin cells, you create a layer of mud inside the fabric. Strip the bed completely, including the mattress protector and any foam topper, then vacuum the entire surface with a clean upholstery attachment using slow, deliberate strokes. Pay special attention to the piping around the edges and the valleys of the quilting, where debris collects. This dry pass removes the food source for dust mites and prepares the surface for treatment. Method 2: Neutralize General Odors With Baking Soda Baking soda (sodium bicarbonate) is the industry standard for a reason: it is not a perfume that masks odor, it chemically neutralizes both acidic and basic odor molecules. Sift a generous layer over the whole top surface, enough that the mattress looks dusted with snow. For an antimicrobial boost, mix in a few drops of lavender or tea tree essential oil. The critical element is time: let it sit for at least four hours, though a full day is preferable. During the dwell time the powder draws moisture and oils out of the fabric and binds odor molecules. Vacuum again thoroughly, and you will likely see that the powder has turned grey, visual evidence that it absorbed what was in the mattress. Method 3: Spot-Treat Sweat Stains With Hydrogen Peroxide Sweat and body oil stains need a liquid intervention, but water is dangerous inside a mattress: trapped moisture leads to mold growing from the inside out. The golden rule is to treat the stain, not the bed, and use as little liquid as possible. A mixture of hydrogen peroxide, a small amount of dish soap, and baking soda creates a powerful oxidizing paste. The peroxide breaks down the protein structure of the sweat while the soap cuts through the oil. Apply by blotting with a clean white cloth. Never scrub, because scrubbing damages the ticking and pushes the stain deeper into the cushioning. Blot until the stain lifts, then use a fresh damp cloth to remove soap residue, which turns sticky and attracts new dirt once dry. Press dry towels into the spot and finish with a hair dryer on a cool setting or a fan to speed evaporation. Method 4: Use an Enzymatic Cleaner for Urine and Other Biological Stains Urine, vomit, and blood contain uric acid and enzymes that crystallize and smell stronger over time. Standard soap cleans the surface while the odor source stays in the padding. An enzymatic cleaner is the only reliable fix: it contains bio-engineered bacteria that digest the organic matter. Saturate the stain just enough to reach the depth of the accident, and keep it wet for the time stated on the bottle so the enzymes can break down the uric acid crystals. The smell may temporarily worsen as the bacteria work, then disappear completely. This is the only way to permanently remove the memory of the stain. Method 5: Use Sunlight, Dry Steam, and Humidity Control For a mildew smell from a humid environment, sunlight is the most powerful disinfectant. On a warm, dry day, move the mattress outside: ultraviolet radiation kills mold spores and bacteria that chemical cleaners miss, while fresh air circulates trapped moisture out of the layers. If you cannot move it, place it near an open sunny window and run a dehumidifier in the room. Steam cleaning works only with a commercial-grade dry steam machine that produces vapor with very little liquid water, and it must be a rapid pass. A standard clothes steamer or wet vac can inject water that never dries before mold sets in. The CDC notes that mold grows wherever moisture collects, so keeping humidity low is the real prevention. Mattress Care at a Glance Method Best For Key Step Vacuuming Dust, skin cells, dust mites Upholstery attachment, slow strokes Baking soda General musty and sweat odors Sit for 4+ hours, then vacuum Peroxide paste Yellow sweat and oil stains Blot, never scrub Enzymatic cleaner Urine, vomit, blood Keep wet per label time Sunlight or dry steam Mildew and deep sanitizing Dry fully before remaking the bed Prevent Odors From Coming Back Prevention is the final step. A high-quality, waterproof mattress protector is a shield: modern protectors are breathable, so they block liquids, skin cells, and dust mites while letting air circulate. Washing the protector becomes the whole cleaning routine. Also let the mattress breathe when you change the sheets, leaving it bare for an hour with the window open to evaporate the moisture from the previous week. Health Canada’s mould guidance stresses controlling humidity and fixing moisture problems quickly, which applies directly to the bedroom environment. When to Call a Professional Mattress Cleaner We spend about one third of our lives in bed, and deep mattress cleaning is heavy, labour-intensive work that needs the right extraction tools and dwell times. If the job feels like too much, or you want industrial-grade results, Toronto Shine Cleaning provides deep home cleaning with professional equipment and specialized solutions for soft furnishings, so your sleeping environment is not just visually clean but biologically sanitized. You can also book regular maid cleaning to keep the rest of the home fresh, check our transparent pricing, or read what customers say on

Mattress Cleaning: 5 Proven Methods to Remove Urine and Sweat Odors From Your Mattress Read More »
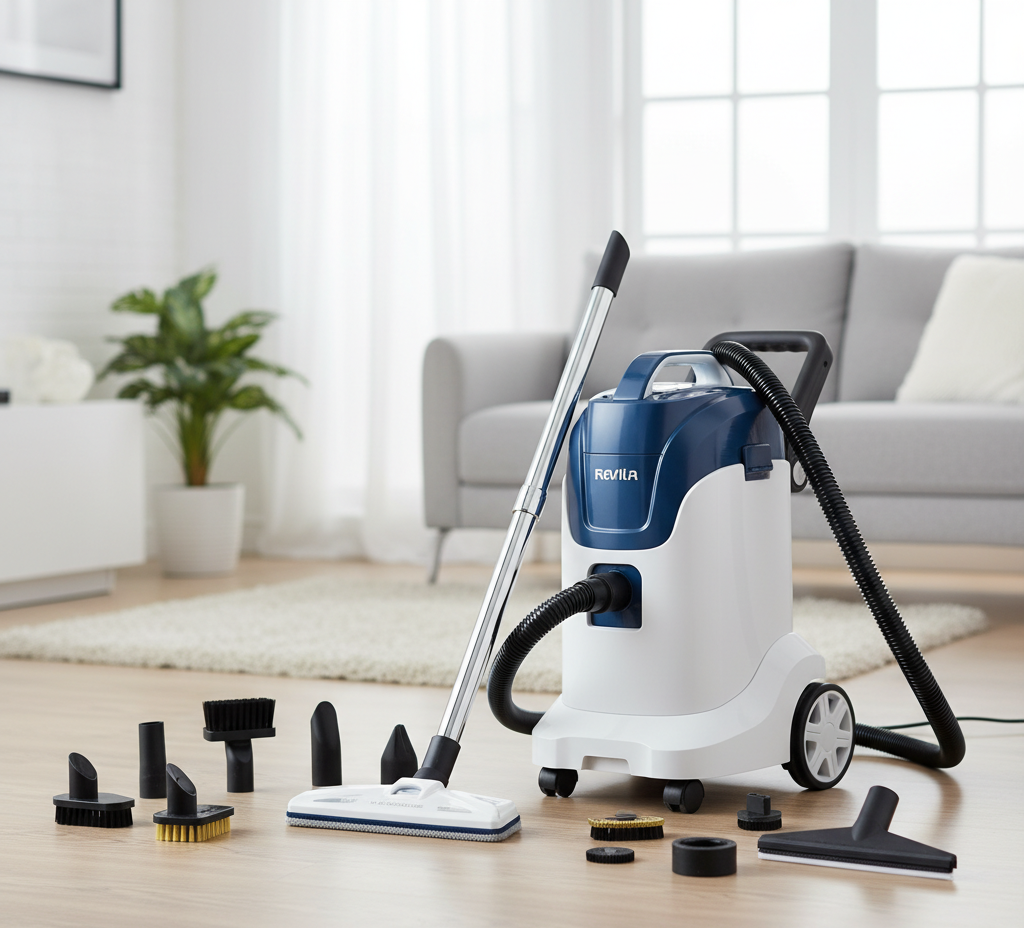
Best Steam Cleaner: 5 Tips for Choosing the Ideal Steam Cleaner for Your Home

Choosing the Best Steam Cleaner for Your Home Steam cleaning replaces harsh chemicals with superheated, pressurized water that pushes heat into tiny crevices, loosens dirt, and neutralizes bacteria on contact. For households that want fewer chemical residues, a steam cleaner handles everything from kitchen grease to mattress allergens, but only when the right machine is chosen. Cheap units with weak pumps disappoint quickly, so shop with these five tips in mind to find the model that truly earns the title of best steam cleaner for your home. Tip 1: Match the Machine Type to the Job The market splits into three broad categories, and the best machine for a tiled mudroom is rarely the best one for detailed kitchen work. Handheld units are the scalpels of the steam world: portable, quick to heat, and perfect for targeted jobs such as faucet grease, window tracks, and doorknobs, though their small tanks limit run time. Steam mops specialize in sealed hard floors and avoid the cross contamination of a bucket and mop, but they cannot clean vertical surfaces or upholstery. Canister systems separate the boiler from the wand, which allows a bigger water capacity and more power, making them the most versatile choice for whole home cleaning. Machine type Best for Limits to know Handheld steamer Grease spots, grout, small surfaces Short run time, lower pressure Steam mop Sealed tile, stone, and hard floors No vertical or fabric cleaning Canister steamer Whole home, fabrics, kitchens Bigger, heavier, pricier Tip 2: Demand Dry Steam and Real Pressure Dry steam sounds like a contradiction, but it describes vapor superheated well above boiling, often reaching 240-300 F while carrying less than five percent liquid water. That low moisture vapor is what makes steam safe for mattresses, upholstery, and carpets: wet steam soaks fabric and invites mildew, but dry vapor flashes off in seconds. Pressure is the second metric that separates professional grade machines from toys. Look for at least four to five bars of pressure, because low pressure simply billows hot fog that may kill surface bacteria but cannot blast the black gunk out of grout lines. Check the heating system too: flash heating models drip water onto a hot plate and produce sputtering, inconsistent steam, while a pressurized boiler tank holds a steady, powerful stream. Tip 3: Buy the Boiler You Can Refill Mid-Clean A standard pressurized boiler must cool down before it can be refilled, which stops momentum cold. The best machines feature a continuous refill system: a secondary, non pressurized reservoir pumps water into the boiler as needed, so long cleaning sessions never need a pause. Boiler quality also decides how long the machine lasts. Plastic boilers and weak pumps often give out after a year or two of limescale and heat stress, while premium units with stainless steel boilers and replaceable heating elements are built to serve for decades. Treat the purchase as a long term investment in one machine that retires the mop, the chemical caddy, and the scrub brush. Tip 4: Count the Accessories Before You Commit Versatility lives in the attachments, so a truly great steamer should arrive with more than a floor head. Look for a triangular brush for corners, a jet nozzle for blasting stuck on grime, plus compact nylon and brass brushes for detail work. Brass bristles sparkle on oven racks and grill grates, where steam softens burned on food and the stiff wires take over the scrubbing. Add the window squeegee attachment and the steamer delivers a streak free glass finish with no chemical spray. Flimsy bristles that melt under high heat make a machine useless, so inspect attachment quality before buying. Use the kit like a transformer: Floor head for mopping hard floors without detergent residue. Jet nozzle for shower tracks, radiators, and tight crevices. Brass brushes for oven racks, grill grates, and burned on food. Squeegee for streak free windows and mirrors. Tip 5: Verify the Heat for Pests, Allergens, and Delicate Surfaces Dust mites and bed bugs resist many poisons but cannot survive thermal shock, and a steamer that holds a tip temperature above 160 F is lethal to them and their eggs on contact. For allergy sufferers that makes the machine a genuine health tool: pillows, mattresses, and plush toys can be sanitized without the potential allergens found in chemical sprays. Heat this powerful demands respect, however, so use it with care: Never steam unsealed hardwood floors; the moisture can strip the finish, grey the wood, and make it swell. Avoid blasting cold window glass in winter, which can shatter it; warm the pane first. Skip surfaces where heat can melt glue, such as some laminate countertops and luxury vinyl tile. Machines with variable steam control solve this: turn the dial down for silk plants and velvet curtains, and crank it up for barbecue grills. In the kitchen, steam melts the polymerized grease on range hoods and backsplashes so it wipes away with a microfiber cloth, sanitizes the sink drain by melting odor causing biofilm, and even defrosts a freezer in minutes. The CDC’s home cleaning and disinfecting guidance notes that routine cleaning removes most germs from surfaces, with disinfecting reserved for illness situations, which is why steam fits so well into a healthy home routine. And because steam leaves no residue, Health Canada’s household chemical safety advice becomes easier to follow: fewer products in the house means fewer poisoning, burn, and storage risks to manage. Frequently Asked Questions About Steam Cleaners What is dry steam and why does it matter? Dry steam is vapor heated well above boiling, typically 240-300 F with less than five percent liquid water, so it cleans and evaporates quickly instead of leaving fabrics wet and prone to mold. Can a steam cleaner damage hardwood floors? Steam can strip the finish from unsealed hardwood, turning the wood grey and causing it to swell, so use a steamer only on sealed floors and always follow the manufacturer’s guidance for delicate surfaces. Does steam cleaning kill

Best Steam Cleaner: 5 Tips for Choosing the Ideal Steam Cleaner for Your Home Read More »

Winter bedRoom Cleaning

Winter Room Cleaning: Why You Need to Deep Clean Your Bed Now

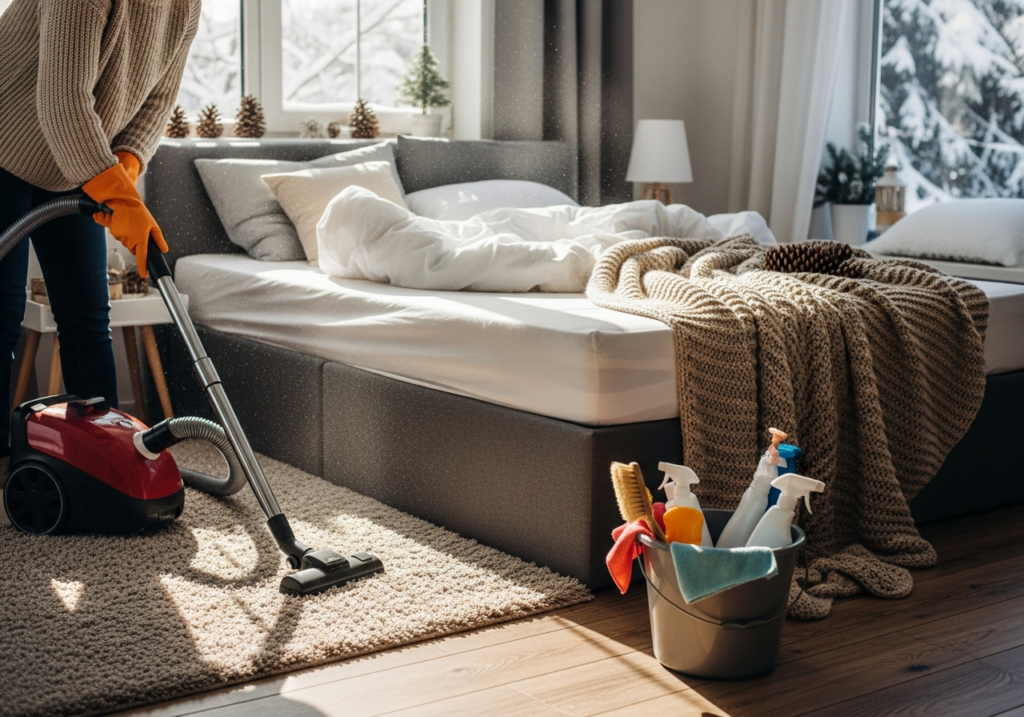
Winter Room Cleaning: Why You Need to Deep Clean Your Bed Now February turns the bed into the most-used room in the house. Short days and deep cold push everything indoors: sleep, streaming, reading, recovery. All those extra hours come with a hidden cost, because the windows stay locked and the furnace recirculates the same air, while the bed quietly collects sweat, dead skin, and the dust mites that feed on both. Deep cleaning the bed in mid-winter is not a chore for spring; it is a health intervention, and it cannot wait for the windows to open again. The Winter Bed Is a Biological Reservoir There is a myth that we sweat less in winter. The ambient air is cooler, but under a heavy duvet and flannel sheets the microclimate against your skin stays warm and humid, and the body keeps releasing moisture all night. That trapped humidity plus constant warmth is the ideal breeding ground for dust mites, microscopic creatures that feed on the thousands of skin cells every person sheds nightly. Their waste is a potent allergen, and in a sealed winter bedroom it concentrates: morning congestion, itchy eyes, and restless sleep are the classic symptoms. Health Canada’s guidance on humidity and mould makes the connection plain: trapped moisture is the root of most bedroom allergen problems, and it needs managing even in February, especially since any dampness in bedding also risks mold on a mattress, the health hazard the CDC’s mold resources warn about for respiratory health. Step 1: Vacuum the Mattress Properly Everything the job needs, gathered before the stripping starts: Vacuum with an upholstery attachment A box of baking soda, plus a few drops of lavender or eucalyptus oil Wool dryer balls or clean tennis balls White vinegar for the sheet rinse cycle A laundromat plan for king size duvets Strip the bed completely: sheets, protector, toppers, everything. A mattress cannot be machine washed, and you cannot haul it into the February sun, so the cleaning has to be dry and mechanical. Use the upholstery attachment of a strong vacuum and go over the entire surface with slow, deliberate strokes. Speed is the enemy here; rushed passes do not generate enough suction to pull dust mites and skin flakes out of the quilting and seams. Work in overlapping rows across the top, then give the sides the same treatment. Step 2: Deodorize with Baking Soda Sweat and body oils oxidize into that stale bedding smell, and since liquid cleaners would soak the mattress and invite mold, baking soda is the right tool. Sift a generous, even layer over the whole surface, and for a winter refresh add a few drops of eucalyptus or lavender essential oil to the soda before sprinkling. The sodium bicarbonate binds to acidic odor molecules and moisture and pulls them out of the fabric. Let it sit for several hours, ideally the whole day, then vacuum it up slowly. The result is a neutral, fresh-smelling mattress with zero water damage risk. Step 3: Wash the Pillows Like You Mean It Pillows are the most neglected items in the bed and the closest to your respiratory system, sponging up saliva, sweat, and hair oils for months. Most synthetic and down pillows are machine washable with the right care: wash in pairs to balance the drum, use hot water to kill bacteria and dust mites, and then be patient with drying. Low heat, several cycles, plus wool dryer balls or clean tennis balls to break up wet clumps and restore loft. A pillow that stays even slightly damp in the middle grows mold from the inside out, so keep going until the core is bone dry. Step 4: Refresh the Duvet and Sheets A king size duvet will not clean properly in a home machine; cramming it in leaves soap residue that then attracts dirt faster. Take oversized duvets to a laundromat with industrial washers, and budget hours of low-heat drying with dryer balls until the down clusters are fully fluffed and completely dry. Sheets are simpler: wash weekly in hot water, and in winter add a cup of white vinegar to the rinse cycle to strip the body oil and detergent buildup that makes flannel feel stiff. Wash the mattress protector monthly and inspect its waterproof backing for cracks, because sweat salts degrade it over time, and once the barrier fails, the mattress starts absorbing what it should never touch. Bedding Item Winter Cadence Key Rule Sheets and pillowcases Weekly, hot water Vinegar in the rinse to strip buildup Mattress protector Monthly Inspect the waterproof backing Pillows Every one to two months Dry fully with dryer balls, no damp core Duvet insert Mid-winter refresh Industrial washer for king size Mattress Quarterly deep clean Vacuum slowly, then baking soda Step 5: Clean the Room Around the Bed A pristine mattress in a dusty room is a contradiction. Winter heating fills bedroom air with particulate that settles under the bed and on the headboard, and the convection currents around a sleeping body lift it right back into your breathing zone. Vacuum under the bed thoroughly, wipe the baseboards near the headboard with a damp cloth, and keep the room’s humidity balanced: too dry brings static that attracts dust to every surface, too damp invites mold on cold sills. If you run a humidifier, clean it regularly so it does not become a bacteria source itself. Winter Bed Cleaning FAQs Do we really sweat more in winter? In bed, effectively yes: the body releases moisture every night, and heavy insulation traps it against the mattress instead of letting it evaporate. That trapped humidity, not the cold, is what makes winter beds such a friendly habitat for dust mites. How long can baking soda stay on a mattress? Several hours minimum, and the full day is better. The longer it sits, the more odor and moisture it draws out. Vacuum slowly at the end so the extraction stage does the same careful job as

Winter Room Cleaning: Why You Need to Deep Clean Your Bed Now Read More »

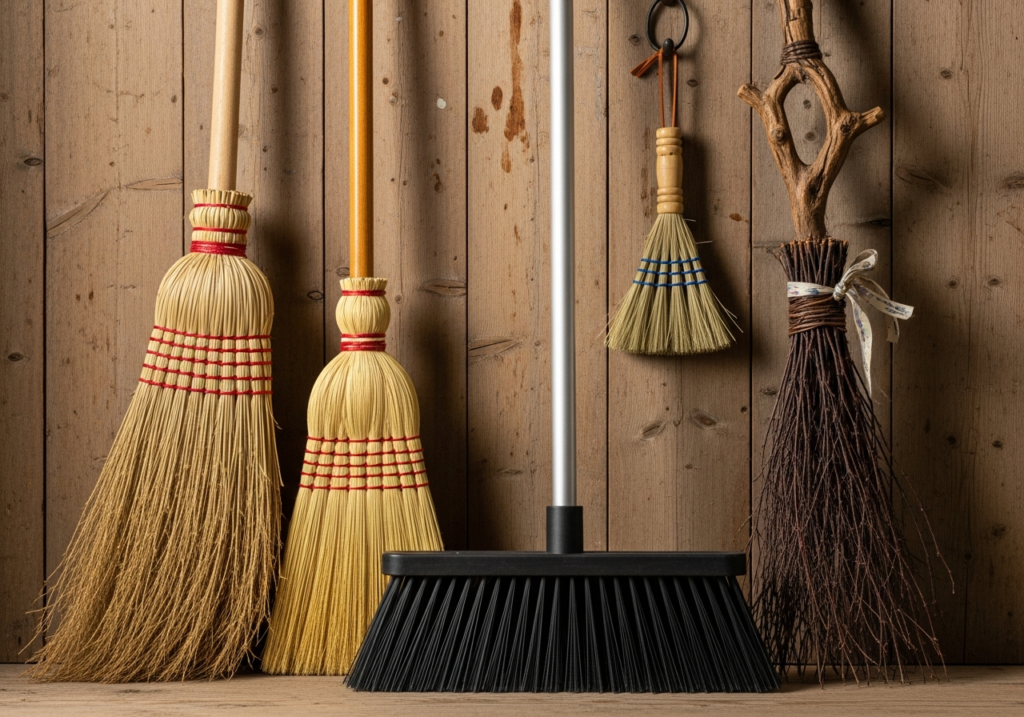
several different brooms

Let’s Compare 6 Different Types of Brooms so You Know The Best Ways To Use Them.

The humble broom is often the most underrated tool in the cleaning arsenal. To the uninitiated, it is simply a bundle of fibers attached to a stick, a primitive device designed to push debris from one location to another. However, this oversimplification is the primary cause of inefficient cleaning, damaged flooring, and unnecessary physical fatigue. The evolution of this implement has diverged into a complex taxonomy of shapes, materials, and specialized functions. Just as a carpenter would not use a sledgehammer to drive a finishing nail, a homeowner should not use a stiff straw sweeper to clean a polished hardwood floor. Understanding the mechanics of these tools-the stiffness of the bristle, the angle of the head, and the composition of the fibers-is essential for mastering the art of the sweep. Using the correct instrument transforms a chore into a seamless maintenance routine, ensuring that dirt is actually removed rather than simply redistributed into the air or the gaps between floorboards. Corn Broom The most recognizable silhouette in the world of sweeping is the traditional corn broom. Crafted from the natural fibers of the sorghum plant, this tool is a relic of agricultural history that has survived into the modern era due to its sheer durability. It is characterized by its stiffness and its rough texture. It is a heavy-duty instrument designed for high-friction environments. Its domain is the outdoors-the concrete patio, the sidewalk, the garage floor, and the barn. The rigid, straw-like bristles are strong enough to move heavy debris like wet leaves, gravel, and snow. They act as a rake and a sweeper combined. However, bringing this natural fiber tool indoors is almost always a mistake. The stiff straws are too abrasive for delicate surfaces like laminate or polished hardwood, potentially leaving micro-scratches in the finish. Furthermore, they are notorious for shedding their own bristles, adding to the mess they are supposed to be cleaning. They lack the fine, split ends required to trap microscopic dust, meaning they push the big rocks while leaving the fine silt behind. Synthetic Angle Broom For the interior of the home, particularly the kitchen and the dining room, the synthetic angle broom is the superior choice. These are typically made from plastic or nylon fibers. The genius of this design lies in its geometry. The head is cut on a diagonal bias, creating a sharp point at one end. This design acknowledges the architectural reality of a room: corners exist. A flat-headed sweeper struggles to reach the dust bunnies trapped where the baseboard meets the cabinet, but an angled head can be maneuvered into tight crevices and under the lips of appliances with precision. The bristles on these tools are usually “flagged.” If you look closely at the tips of the plastic strands, you will see they are frayed or split into tiny hairs. This flagging increases the surface area exponentially, creating a dense web that traps fine flour, pet dander, and dust particles. This implement is designed for the “pull” stroke, gathering light debris gently without kicking it into the air. Push broom When the task involves large, open spaces such as basements, driveways, or warehouses, the standard upright broom becomes inefficient. The biomechanics of the sweeping motion-twisting the waist and pulling the arm across the body-is tiring over large areas. This is where the push brush dominates. This tool features a wide, rectangular block head, ranging from eighteen to thirty-six inches, attached to a handle at an angle. The motion is a forward thrust, utilizing the power of the legs and the body’s weight rather than the lower back. These wide sweepers come in a variety of bristle textures. “Fine” versions have soft, dense fibers for moving dust on smooth concrete. “Coarse” versions have thick, stiff bristles for moving heavy mulch or rocks on asphalt. Many modern iterations utilize a dual-bristle system: a stiff inner core to move heavy objects and a soft outer border to catch the fine dust, providing a comprehensive clean in a single pass. Rubber Broom A relatively modern innovation that addresses a specific biological nuisance is the rubber broom. For households with pets, this device is nothing short of miraculous. Traditional bristle tools are ineffective against pet hair; the static electricity generated by the sweeping motion causes the hair to fly away or float over the bristles. A rubber sweeper features a head made of molded rubber nubbins or thick, flexible fingers. When dragged across a carpet or a hard floor, the rubber creates friction and a static charge that acts as a magnet for fur. It pulls hair out of the weave of a rug that a vacuum cleaner might miss. Furthermore, the head often includes a squeegee edge, making it a dual-purpose tool for cleaning up liquid spills or scrubbing a tile floor with soapy water. It is a hygienic option as well, as the rubber head can be easily washed and sanitized, unlike a straw sweeper which absorbs bacteria. Whisk Broom There is also the specialized category of the whisk broom. This is essentially a handheld version of the traditional corn sweeper or a stiff synthetic brush. It lacks a long handle, forcing the user to get close to the work. Its utility is found in the small, localized mess. It is the tool for the staircase, the upholstery of the car, or the spilled potting soil on a workbench. Because the user is closer to the debris, they can apply more directed pressure to dislodge stubborn dirt. This handheld device often pairs with a dustpan, forming a unit that is essential for “spot cleaning” rather than whole-room maintenance. “Dust Mop” The “dust mop” is technically a cousin of the broom, but it deserves inclusion in the conversation regarding dry floor cleaning. Unlike a sweeper that uses bristles to flick dirt, a dust mop uses a flat head covered in cotton or microfiber loops to glide over the surface. This is the tool of choice for large expanses of gymnasium floors, hospitals, and long hallways. It does not lift heavy

Let’s Compare 6 Different Types of Brooms so You Know The Best Ways To Use Them. Read More »

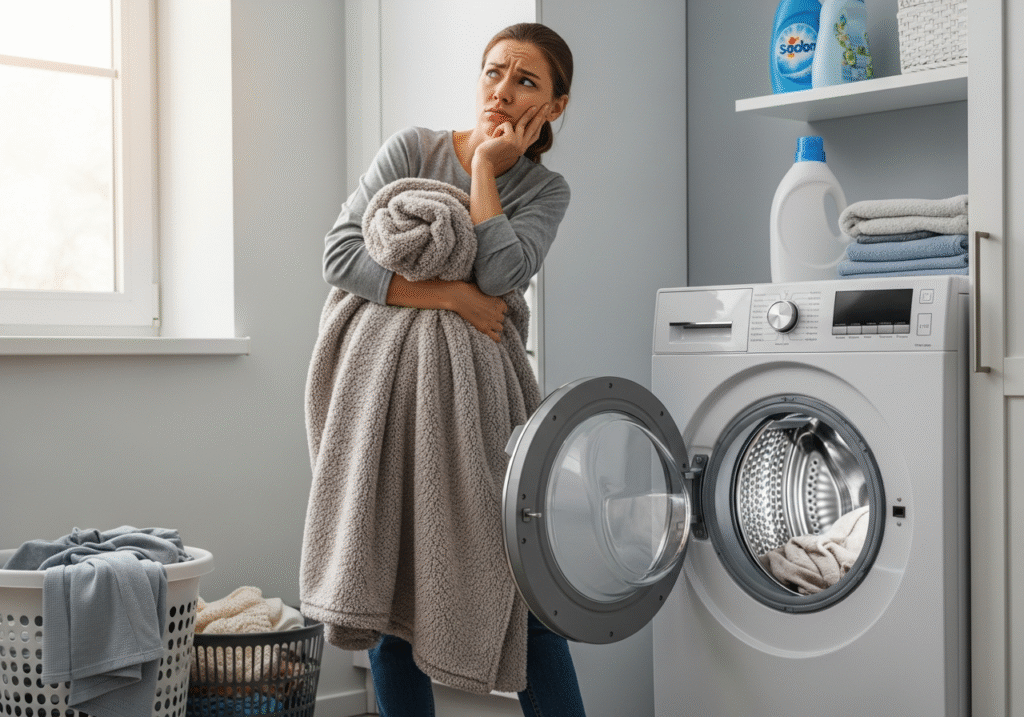
Woman unsure whether to put a blanket in the washing machine.

Blankets Washing: 9 Laundry Mistakes That Destroy Blanket Fibers

Why Blanket Care Deserves More Than a Quick Spin Blankets are the most personal textiles in the house: we sleep under them, drag them to the sofa, and share them with pets. Sheets get washed weekly, yet blankets drift into neglect, collecting dead skin, body oils, dust mites, and pet dander. That buildup mats the fibers, flattens the loft, and cuts warmth. Restoring softness takes a method matched to the material, because treating a wool heirloom like a fleece throw is a recipe for ruin. The 9 Laundry Mistakes That Destroy Blanket Fibers Drying fleece on high heat, which melts the plastic fiber tips into a rough, scratchy texture. Adding fabric softener to fleece, which coats the fibers in waxy buildup that traps dirt. Washing wool with heat and agitation, which felts the fiber scales and shrinks the blanket. Wringing or hanging wet wool, which breaks the fibers or stretches the shape. Drying down without dryer balls, leaving wet clumps that mildew inside the fill. Washing a heavy weighted blanket in a standard machine, risking motor damage. Dry cleaning electric blankets, since solvents can dissolve the wire insulation. Blasting cotton on high heat, which can shrink a king-size blanket to queen size. Storing any blanket damp or sealed in plastic, an open invitation to mould. Fleece and Microfiber: Cold Water, No Softener, No High Heat Most everyday throws are synthetic fleece or microfiber: durable and warm, but magnets for hair, lint, and static. The two classic mistakes are heat and fabric softener. Fleece is essentially plastic; a hot dryer slightly melts and fuses the fiber tips, leaving a rough feel that never recovers. Fabric softener lays a waxy film over the fibers that traps soil and reduces breathability. Wash in cold water with a mild detergent and run an extra rinse so no soap residue remains. Wool and Down: Respect the Fill Wool is a protein fiber, and its surface carries tiny overlapping scales, much like human hair. It shrugs off odours naturally, so it needs fewer washes, but heat, moisture, and churning lock those scales together in a process called felting. One cycle can turn a draping blanket into a stiff mat. Use the wool cycle or hand wash in a tub with a lanolin-based detergent. Never wring: press out the water, roll the blanket in heavy towels, and lay it flat to dry, since hanging wet wool stretches it out of shape. Down comforters and duvet inserts fail for the opposite reason: too little agitation while drying. Wet down collapses into dense clumps, and if the blanket is not tumbled thoroughly it develops mildew inside the fill. Use a down detergent, then dry with tennis balls or wool dryer balls so the clumps get pounded apart. Skipping that step leaves hard lumps and a flat, cold blanket. Weighted and Electric Blankets: Respect the Hardware Weighted blankets are filled with glass beads or plastic pellets stitched into pockets, and a typical adult version weighs fifteen to twenty pounds. Running one through a standard residential washer can throw the drum off balance or strain the motor, so anything over twenty pounds belongs in a commercial laundromat machine. Plastic pellets survive washing but melt in a hot dryer, so air dry instead. If the inner lining rips, escaping beads can damage the machine. Electric blankets are washable on most modern models once the control cord is detached, because the wiring is insulated against water but not against the twisting of a spin cycle. Use the gentlest cycle and warm water, and never dry clean them: the solvents can dissolve the insulation and create a fire hazard. Dry on low, finish by air drying, and confirm the blanket is fully dry before plugging it in. Cotton, Stains, and Storage: The Quiet Killers Cotton blankets and quilts seem low maintenance until they shrink. Wet cotton fibers swell, and high-heat drying locks in the contraction, which is how a king-size blanket becomes a queen-size one. Wash cotton in cool or warm water, dry on low until slightly damp, and air dry the rest of the way. A soaked quilt is heavy, so support its weight when lifting it from the washer. For stains, blot instead of rubbing, since a spill on a thick blanket soaks in rather than passing through. An enzyme cleaner handles organic stains like sweat by digesting the proteins ordinary soap cannot. Storage is where many blankets die: fold them only when bone dry, use breathable cotton bags rather than airtight plastic, and skip mothballs in favour of cedar blocks or lavender sachets. The CDC explains that mould grows on fabric wherever moisture lingers, and Health Canada points to uncontrolled humidity as the main driver of mould and dust mites in the home. Quick Reference Card by Blanket Material Material Wash Dry Key warning Fleece Cold water Low heat only Heat fuses tips; skip softener Wool Cold, wool cycle Lay flat, never wrung Heat and churning felt the blanket Down Warm water Tumble with dryer balls Damp clumps mildew inside the fill Cotton Cool or warm Low, finish air dried Hot drying shrinks king to queen Weighted Cold, if the machine fits Air dry only Over 20 lb needs a commercial washer Frequently Asked Questions About Washing Blankets How often should I wash my blankets? A top sheet protects the bed blanket from skin contact, so it can go several months between washes. Living room throws touch skin, hair, and pets directly, so wash those monthly. Can I put a weighted blanket in my washing machine? Only if the blanket’s weight fits the machine’s rated capacity, usually fifteen to twenty pounds or less at home. Heavier blankets need commercial machines, and the fill must be air dried. Why does my fleece blanket feel rough after drying? High heat fused the synthetic fiber tips. The damage is permanent, so switch to low or no heat and wash in cold water with an extra rinse from now on. Do wool blankets really

Blankets Washing: 9 Laundry Mistakes That Destroy Blanket Fibers Read More »

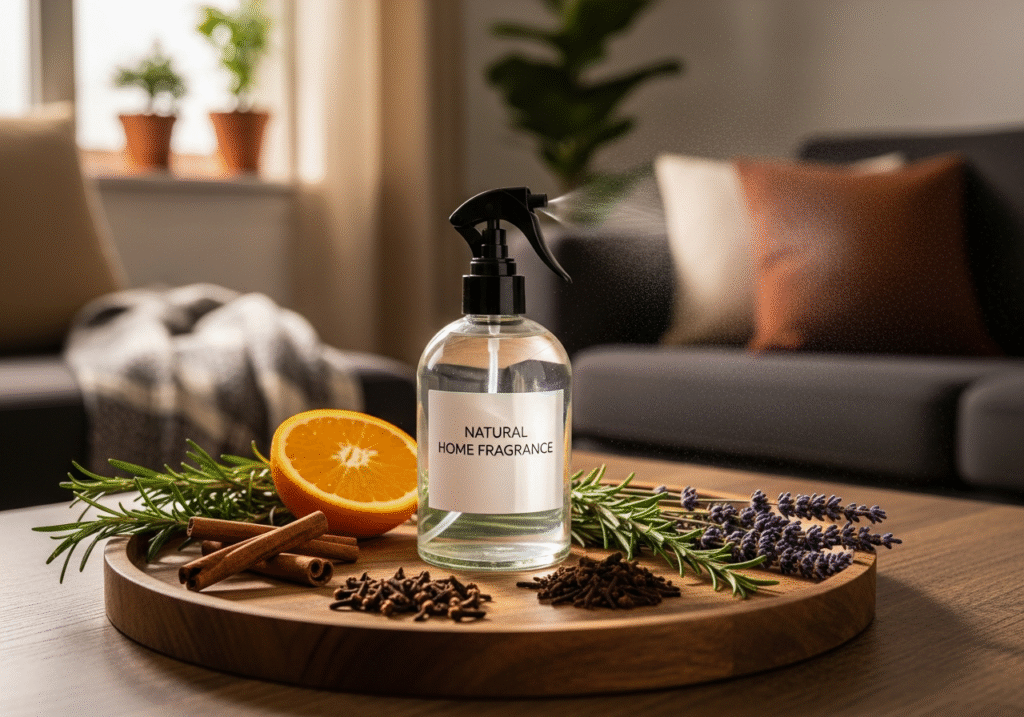
Fragrance with natural products at home

Natural Fragrance: How to Scent Your Home Using Only Natural Products

The olfactory experience of a home is arguably its most defining characteristic. While we often obsess over the visual elements of interior design-the color of the walls, the texture of the rugs, the arrangement of furniture-it is the scent of a space that hits us first and lingers longest in our memory. For decades, the standard approach to managing home fragrance has been chemical warfare. We plug in synthetic warmers that promise “Ocean Breeze” or “Linen Fresh,” we spray aerosols that mask odors with heavy, artificial perfumes, and we burn candles made of paraffin wax that release soot into the air we breathe. While these products might effectively cover up the smell of last night’s dinner or a damp dog, they often do so at the cost of indoor air quality. They coat the nasal passages with volatile organic compounds and create a flat, one-dimensional scent profile that feels sterile and manufactured. A truly inviting home, however, smells alive. Shifting to natural room fragrances is not just a health-conscious decision; it is an aesthetic upgrade that introduces complexity, freshness, and a genuine connection to the botanical world into your living space. Synthetic Fragrances To understand the superiority of natural fragrance, one must first appreciate the biological connection between scent and the brain. The olfactory bulb is directly linked to the limbic system, the ancient part of the brain responsible for emotion and memory. This is why the smell of pine can instantly transport you to a winter forest, or the scent of lavender can induce a physical sensation of relaxation. Synthetic fragrances attempt to mimic these molecules, but they often lack the subtle chemical nuances of the real thing. A real lemon contains hundreds of different chemical compounds that create its zest; a synthetic lemon scent might contain only a handful. The brain registers the difference. Natural fragrances, derived from essential oils, herbs, fruits, and spices, interact with our biology in a way that feels grounding rather than overpowering. They evolve in the air, changing slightly as they evaporate, creating a dynamic atmosphere that feels fresh and clean rather than perfumed and heavy. Steam One of the most accessible and effective methods of natural scenting is the stovetop simmer pot. This technique relies on the basic physics of evaporation and steam. By simmering water filled with aromatic ingredients, you release their essential oils into the air, carried by the humidity of the steam. This method is particularly powerful because it addresses two winter problems at once: dry air and stale odors. The beauty of the simmer pot lies in its versatility and its use of kitchen scraps. You do not need to buy expensive ingredients; the peels of an orange or a lemon, which would otherwise be composted, are packed with limonene, a potent aromatic compound. Combine these citrus peels with a cinnamon stick, a few whole cloves, and a sprig of rosemary in a small saucepan of water. As the water gently bubbles, it breaks down the cellular structure of the plants, releasing a warm, spicy, and clean scent that permeates even large open-concept spaces. Unlike a candle, which burns locally, the steam from a simmer pot travels with the airflow of the house, reaching into corners and upper floors. It is a ritualistic act of cooking that results in a home that smells welcoming and seasoned. Reed Diffusers For a more passive, constant fragrance, the reed diffuser is a staple, yet the commercial versions are often filled with mineral oils and synthetic solvents. Creating a natural version at home allows you to control the intensity and the purity of the ingredients. The mechanics of a reed diffuser rely on capillary action. The reeds are porous; they draw the liquid up through microscopic channels to the top, where it evaporates into the room. To make this work naturally, you need a carrier oil that is thin enough to travel up the reed. Safflower oil or sweet almond oil are excellent choices as they are light and odorless. You mix this base oil with a high concentration of essential oils-perhaps a blend of eucalyptus and peppermint for a bathroom, or bergamot and cedarwood for a living area. A splash of high-proof alcohol, like vodka, acts as a binding agent that thins the oil slightly and aids in evaporation. The result is a subtle, background scent that doesn’t assault the nose but simply exists in the space, lending it a signature character. Alcohol The fabric of our homes-the curtains, the sofas, the rugs-often traps odors that are difficult to remove with air fresheners alone. For these surfaces, a natural linen spray is the solution. Water and oil do not mix, so simply dropping essential oils into a spray bottle of water results in the oil floating on top and clogging the nozzle. To create a stable emulsion without synthetic chemicals, you again turn to high-proof alcohol or witch hazel. These solvents disperse the oil into tiny droplets that remain suspended in the mixture. When sprayed onto linen or upholstery, the alcohol evaporates almost instantly, leaving the essential oil molecules clinging to the fabric fibers. A spray made with lavender and chamomile is perfect for misting pillows before bed, creating a sensory cue for sleep. A blend of lemon and tea tree oil, both known for their antibacterial properties, works wonders on a sofa that has seen too much pet traffic, neutralizing the odor at the source rather than masking it. Baking Soda However, adding scent is only half the battle. A truly fresh-smelling home requires the neutralization of bad odors. This is where the chemistry of baking soda becomes invaluable. Bad smells, such as those from garbage, compost, or sweat, are often acidic in nature. Baking soda (sodium bicarbonate) is a base. When it comes into contact with these acidic odors, it neutralizes them chemically, turning them into inert, odorless salts. A small jar of baking soda mixed with a few drops of lemon essential oil, placed at the bottom

Natural Fragrance: How to Scent Your Home Using Only Natural Products Read More »

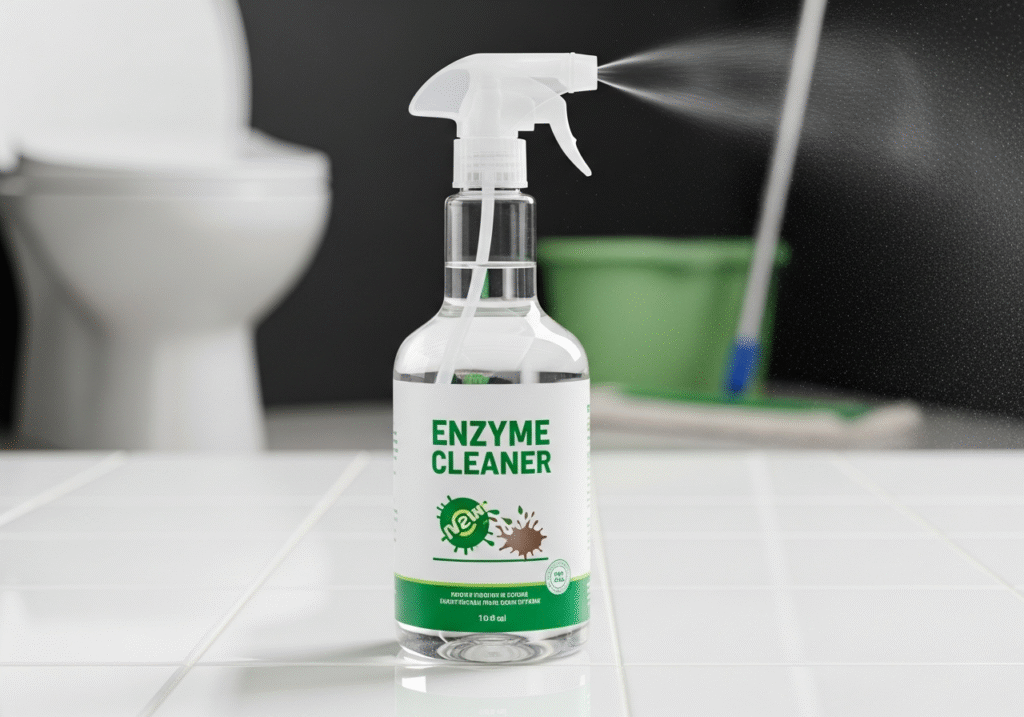
Enzyme Cleaner

5 Common Mistakes That Render Your Enzyme Cleaner Useless

In the world of cleaning, there is a constant arms race between the mess and the method. For decades, the dominant strategy has been chemical warfare: using harsh solvents, high-alkaline degreasers, and corrosive bleaches to burn, dissolve, or bleach stains into submission. While these methods are effective for many surface-level issues, they often fail when it comes to the most persistent and unpleasant biological messes. The smell of pet urine that returns on a humid day, the grime in the grout lines that never seems to whiten, or the lingering odor in a drain are all symptoms of organic matter that standard chemicals cannot remove. The solution to these problems is not found in a stronger acid or a harsher solvent, but in biology. Enzyme cleaners represent a fundamental shift in how we approach hygiene, utilizing the power of nature to digest dirt rather than simply wiping it away. How Does it Work? To understand why enzyme cleaners are unique, one must understand what they are composed of. These cleaners are bio-enzymatic formulations. They contain beneficial bacteria along with enzymes. The bacteria are the workers, and the enzymes are the tools they produce. When you spray an enzyme cleaner on a stain, the bacteria remain dormant until they hit a food source-the stain. Once activated, they produce enzymes to break down complex molecules into smaller, simpler pieces. For example, a protease enzyme breaks down proteins (like blood or meat), a lipase enzyme breaks down fats and oils (grease), and an amylase enzyme breaks down starches. The bacteria then consume these broken-down particles, converting them into carbon dioxide and water. Essentially, the cleaner literally eats the stain until it is gone. Animal Urine The most famous and arguably most critical application for enzyme cleaners is in the realm of pet ownership. Anyone who has house-trained a puppy or cared for an aging cat knows the nightmare of urine stains. Urine is composed of urea, urochrome, and uric acid. Standard detergents and water can wash away the urea and urochrome, which removes the sticky texture and the yellow color. However, uric acid forms crystals that are nonsoluble in water and bond tightly to surfaces like carpet fibers, wood, and concrete. Traditional cleaners might mask the smell temporarily with perfume, but they leave the uric acid crystals behind. When the humidity rises or the area gets wet again, these crystals re-hydrate and release strong ammonia gas, bringing the smell back. This signals to the pet that this spot is a “bathroom,” encouraging repeat offenses. Enzyme cleaners specifically formulated with uricase are the only way to break down these crystals permanently. The enzymes digest the uric acid structure, eliminating the source of the odor completely rather than just covering it up. Beyond pet messes, enzyme cleaners are the secret weapon for bathrooms. The pink or orange slime that accumulates in shower corners and around drains is a biofilm-a colony of bacteria that feeds on soap scum and body oils. Because grout is porous, this biofilm can root itself deep into the cement, making it reachable only by scrubbing until your knuckles are raw. Enzyme cleaners work differently. When applied to grout and allowed to sit, the enzymes seep into the pores. They break down the protein and fat structures of the soap scum and body oils that bind the dirt to the tile. Over time, this biological action loosens the grime so it can be easily rinsed away. It is a slower process than using bleach, but it is far more effective at removing the root cause of the discoloration without damaging the grout sealant or etching the tile. Grease The kitchen is another arena where enzymes shine, particularly in the battle against grease. Grease traps and kitchen drains are notoriously difficult to maintain because fat hardens as it cools, coating pipes and causing slow drainage. Chemical drain openers rely on heat and caustic reactions to burn a hole through the clog, which can damage old plumbing and is dangerous to handle. Enzyme drain maintainers are a safer, preventative alternative. When poured down the drain, the lipase enzymes coat the inside of the pipe and slowly digest the organic buildup. They turn the hard grease into water-soluble liquid that flushes away. While they won’t clear a solid hair clog instantly like a snake would, regular use keeps the pipes flowing freely and eliminates the rotting food smell that often rises from the sink. Laundry is perhaps the most undervalued use case for these biological cleaners. Many organic stains-blood, sweat, grass, and baby formula-are protein-based. Hot water and standard detergent can actually “cook” these proteins, setting the stain into the fabric permanently. Cold water and an enzyme soak are the antidote. The enzymes locate the protein strands woven into the fabric and snip the chemical bonds holding them to the cloth. This is why many high-end laundry detergents now boast “bio-active” ingredients. For athletic wear that retains the smell of sweat even after washing, an enzyme soak is often the only way to remove the body oils trapped in the tight synthetic weave of modern performance fabrics. Dwell Time However, the effectiveness of enzyme cleaners comes with a specific set of rules that differs from traditional cleaning. The most important variable is time. In the cleaning industry, this is known as “dwell time.” Unlike a spray-and-wipe glass cleaner, enzymes need time to eat. If you spray a urine stain and wipe it up ten seconds later, you have accomplished nothing. The bacteria need hours, sometimes even days, to fully digest a deep stain. For a carpet stain, the instruction is often to saturate the area-soaking it all the way down to the pad-and then cover it with a damp towel to keep the area moist. Enzymes stop working if they dry out. The bacteria need a moist environment to survive and reproduce. By keeping the stain wet and covered, you allow the colony to expand and consume the waste until the food source is

5 Common Mistakes That Render Your Enzyme Cleaner Useless Read More »

flu season

Flu Season: Is Your “Clean” Home Making You Sick? The Hidden Germs You Missed

Why Your “Clean” Home Can Still Spread the Flu Flu season in Canada peaks in December and January, when homes are sealed tight against the cold and filled with guests. Influenza viruses travel in droplets from coughs and sneezes, but they also ride on hands and settle on surfaces, where they can survive on hard materials like stainless steel and plastic for up to 48 hours. A home that looks spotless can still be a transmission hub, because the germs are hiding on the objects everyone touches and almost no one sanitizes. Protecting your household means shifting from cosmetic cleaning to targeted, health-focused cleaning. Clean First, Then Disinfect: the Order Matters Cleaning and disinfecting are two different steps, and skipping the first one makes the second fail. Cleaning physically removes dirt, dust, and germs from a surface using soap or detergent and water. Disinfecting then kills the germs that remain, using a registered chemical product. If you spray disinfectant onto a visibly dirty surface, the organic soil shields the germs and inactivates the product, so the process wastes time and leaves pathogens behind. The CDC home cleaning guidance recommends always cleaning surfaces before disinfecting them, and doing both steps more often during cold and flu season. Respect the Dwell Time The most common mistake is wiping disinfectant off too soon. Registered disinfectants need to stay visibly wet on the surface for a set contact time, usually three to ten minutes depending on the product, before they actually kill viruses. Spray and immediately wipe removes the product before it works. Read the label, apply enough product to keep the surface wet for the full dwell time, and let it air dry. This one habit separates real disinfecting from just moving germs around. The Hidden Germ Hotspots Most Homes Miss We all wipe kitchen counters, but the flu spreads through the objects fingers touch constantly. The handle of the refrigerator, the buttons on the microwave, the flush lever in the bathroom, the light switch plate, and the remote control all pass from hand to hand dozens of times a day, and they rarely see a disinfectant. Door hardware deserves special attention in winter: the entry doorknob, the deadbolt, the storm door handle, and any garage keypad or smart lock are touched by every person entering the house, often right after touching outdoor surfaces. These surfaces turn a family home into a germ relay during a busy holiday week. Room Hidden hotspots Flu-season routine Entryway Doorknobs, deadbolt, keypad, handrails Wipe with disinfectant daily Kitchen Fridge and oven handles, coffee maker, salt and pepper shakers Clean, then disinfect twice weekly Living room Remote controls, game controllers, light switches Sanitize weekly with alcohol wipes Bathroom Flush lever, faucet handles, toothbrush holder Disinfect every day during peak season Home office Keyboard, mouse, phone screen Wipe weekly, never drip liquid inside Electronics, Towels, and the Germs You Carry Daily Smartphones are the ultimate high-touch objects: they go from kitchen counter to bathroom to bed, and they are pressed against the face dozens of times a day. Most modern phone screens handle gentle disinfection well; wipes with 70 percent isopropyl alcohol are generally safe for touchscreens, while bleach, abrasive cleaners, and dripping liquids are not. Apply the wipe, let the surface dry completely, and avoid pooling moisture in ports and speakers. Keyboards and mice need the same attention, especially in households where several people share one workspace. Hand towels are another overlooked link in the chain. A shared bathroom towel can be touched by every member of a household, plus guests, many times a day during the December party season. During flu season, swap bathroom hand towels daily, wash them in hot water, and consider paper towels for gatherings so every guest dries their hands on a fresh sheet. The CDC handwashing guidance reminds us that clean hands stop the spread, but only if the towel that dries them is not itself a shared surface. Pillowcases and bedding deserve more frequent washing too, since flu sufferers shed virus onto linens while they sleep. Air, Humidity, and the Bigger Picture Viruses do not only wait on surfaces. Flu droplets hang in the air and attach to dust particles, which is why heating vents, ceiling fans, and dusty baseboards deserve a vacuum pass before and during flu season. Keeping indoor humidity around 40 to 60 percent also helps: flu viruses survive longer and transmit more easily in dry air, and comfortably moist air keeps the nasal passages that trap viruses working properly. A humidifier, regular ventilation, and thorough dusting work alongside surface disinfection to lower the viral load. Build a Daily Germ-Breaking Routine Disinfect entry door hardware and light switches every morning Wipe down kitchen appliance handles and counter zones after each meal Sanitize the flush lever, faucet handles, and toothbrush holder daily Give remotes, phones, and keyboards an alcohol wipe weekly Switch to fresh hand towels daily or paper towels when guests visit Vacuum vents, baseboards, and under furniture to remove dust that carries particles Consistency beats intensity. A two-minute pass over the high-touch map every day does more to protect a family than a marathon cleaning session once a month, because germs are reintroduced constantly by the people who live there. When someone in the house is already sick, add daily disinfection of everything they touch, wash your own hands after contact, and keep their linens and towels separate until they recover. Frequently Asked Questions About Flu Season Germs What is the difference between cleaning and disinfecting? Cleaning removes dirt and some germs with soap and water; disinfecting uses chemicals to kill the germs that remain. You need both, in that order, because dirt stops disinfectants from working. How long should disinfectant stay on a surface? Read the label: most registered disinfectants need to stay visibly wet for three to ten minutes to kill viruses. Wiping them off early defeats the purpose, so apply enough product and let it air dry. Is it safe to clean my

Flu Season: Is Your “Clean” Home Making You Sick? The Hidden Germs You Missed Read More »

Dangerous to Your Health: 5 Common Products That are Dangerous For Your Daily Life

Are Everyday Cleaning Products Dangerous to Your Health? Your home feels like the safe place, sealed off from city pollution. Inside many Toronto houses the opposite is true: the sprays under the sink can make indoor air more toxic than the air outside. Health Canada warns that household chemical products can cause poisonings, burns, fires and explosions when handled unsafely. A strong chemical smell is not proof of clean. Here is what five everyday products actually do, and the simpler habits that keep homes safe. Five Common Products Dangerous to Your Health 1. Bleach Bleach, the sodium hypochlorite default against mold, mildew and bathroom grime, is corrosive enough to burn skin and eyes on contact, and it is highly volatile. In a closed shower stall or small bathroom, its fumes react with organic matter and form chlorinated volatile organic compounds that immediately inflame the mucous membranes of the throat and lungs, especially dangerous with respiratory conditions. The deadliest habit is mixing: bleach plus ammonia, which lives in urine and many glass cleaners, generates chloramine gas, and bleach plus an acidic cleaner releases chlorine gas. Both can lead to hospitalization or worse. 2. Ammonia Glass and Window Cleaners Ammonia is why glass cleaner dries fast without streaks, and why it demands respect. It hunts moisture, so inhaled ammonia attacks the eyes, throat and lungs directly. High concentrations cause chemical burns in the respiratory tract and aggravate chronic conditions like asthma. Trigger-sprays aerosolize it into a fine mist that lingers in your breathing zone. That sharp odor is a warning signal, not evidence the glass needs you. 3. Fragrance, Air Fresheners and Fabric Deodorizers The word fragrance, or parfum, on a label is a regulatory loophole: scents count as trade secrets, so the hundreds of chemicals behind the scent are never listed. The cocktail commonly includes phthalates, added to make scents linger, which are known endocrine disruptors that mimic hormones and can interfere with reproductive development over long-term exposure. Air fresheners and fabric sprays do not clean anything. Some release agents that deaden your nerves or coat nasal passages with oily film; others bury odors under volatile organic compounds tied to headaches, dizziness and fatigue. Aerosol propellants add flammable lung irritants. The Government of Canada’s household products safety hub lists hazards in everyday cleaning items. 4. Oven Cleaners and Drain Openers Oven cleaners are built on lye, or sodium hydroxide, which strips baked-on grease by turning it into soap. That same reaction destroys living tissue: splashes cause severe burns and permanent blindness. Spraying a warm oven vaporizes the lye into a toxic cloud that fills the kitchen. Drain openers burn through hair and grease clogs with concentrated sulfuric acid or lye, generating intense heat that can damage old pipes; if a plumber later snakes a surviving clog, the splash-back is caustic. 5. Disinfectant Wipes and Sprays Quaternary ammonium compounds, the quats behind most disinfectant wipes and sprays, kill germs well, but they are powerful lung irritants. Growing evidence suggests frequent exposure can cause asthma even in otherwise healthy users. Quats also leave a residue, and a child who touches a wiped table then sucks their fingers is ingesting a pesticide. Blanketing whole rooms instead of high-touch points adds chemical load and feeds antibiotic resistance. Two Traps Behind Friendly Labels Carpet cleaners and upholstery shampoos bring their own risks. Many spot removers rely on perchloroethylene, a dry-cleaning solvent that is a neurotoxin and a classified carcinogen, and across a large floor it keeps off-gassing for days or weeks. Naphthalene, the mothball chemical in some carpet cleaners, releases fumes that can cause confusion, nausea and liver damage. Fibers trap all of it and release it back with every step and sit. Green labels deserve the same skepticism. The word natural is largely unregulated in cleaning products, and a green bottle can still carry allergens like limonene, a citrus oil that reacts with ozone in your air to form formaldehyde, a known carcinogen. Concentrated plant-based detergents can still irritate skin and lungs. Read the ingredient list, not the leaf on the label. The Real Risk Is the Daily Total Toxicologists call the running tally your body burden. One spray does little; a weekly ritual of glass cleaner, floor polish, counter spray, toilet cleaner and air freshener becomes a chemical soup the body must filter. When that load stays high, chronic inflammation, skin conditions and respiratory sensitivity can follow. Children and pets pay the most because smaller bodies and faster metabolisms process the same exposure less efficiently. Safer Swaps That Still Clean The most effective cleaner is usually the simplest: mechanical action. Removing dirt beats masking it. Instead of Reach for Why it works Everyday surface sprays Microfiber cloth, water and real scrubbing Fibers trap dirt and pathogens, removing more bacteria than a light chemical wipe, with no residue left behind Bleach on general surfaces Hydrogen peroxide Disinfects without chlorine fumes or toxic residue Commercial limescale removers White vinegar A mild acid that dissolves mineral deposits and soap scum without off-gassing Scouring powders Baking soda Gentle physical abrasion for sinks, tubs and baked-on messes Ventilation and Protection: The Free Upgrades Even safe cleaners need discipline. Health Canada’s page on using household chemicals safely covers the buying, use and storage rules that prevent accidents, and these habits carry it into daily practice: Ventilate. Never clean a sealed room: open a window and run the exhaust fan, especially in small bathrooms where fume levels spike fastest. Protect your skin. It is the body’s largest organ and absorbs chemicals readily, so glove up around degreasers and solvents and wear a mask for concentrated products. Remove, don’t mask. The goal is neutral air and residue-free surfaces, not a perfume cloud that signals a fresh chemical dose. Frequently Asked Questions Is it really dangerous to mix cleaning products? Yes. Bleach plus ammonia releases chloramine gas, and bleach plus any acidic cleaner releases chlorine gas. Both react within seconds in a closed room and can lead to hospitalization. Use one product

Dangerous to Your Health: 5 Common Products That are Dangerous For Your Daily Life Read More »

Washing Machine Cleaning Tablets: Are You Wasting Money on Washer Tablets?

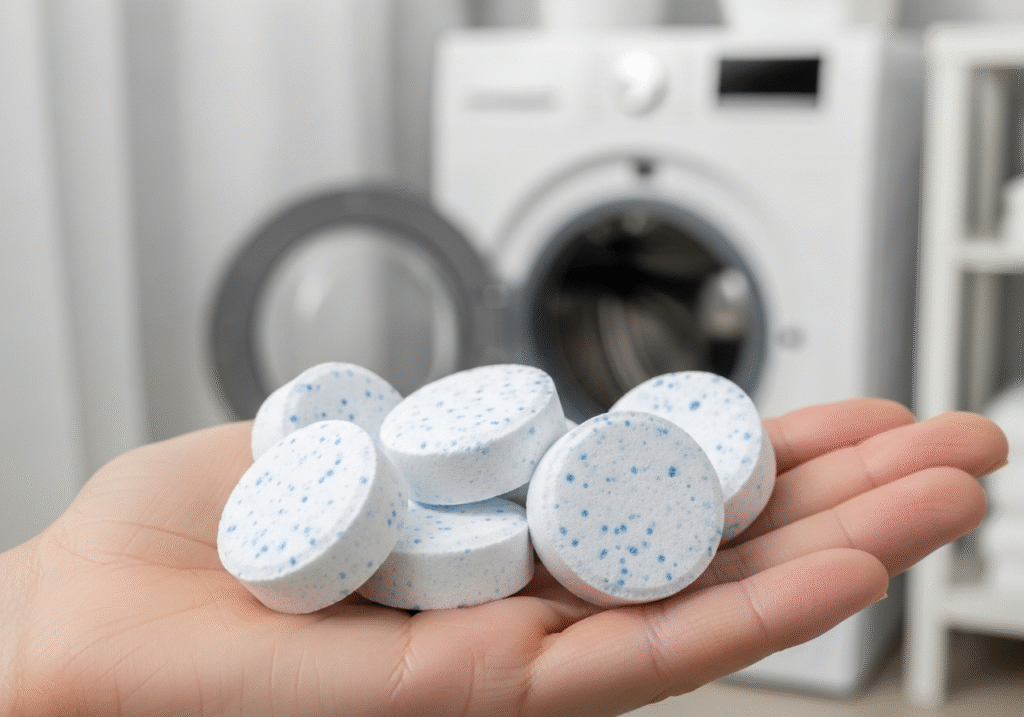
Let’s understand how to use washing machine cleaning tablets? The modern laundry room is often viewed as a sanctuary of hygiene, a place where the grime of the outside world is washed away, leaving behind only the scent of fresh linen. Central to this operation is the washing machine, an appliance that we instinctively trust to be the cleanest object in the house. We assume that because gallons of hot water and detergent flow through it daily, it must be self-cleaning. However, this assumption is the primary cause of a domestic crisis that affects millions of households: the slow, invisible accumulation of biological sludge that destroys appliances and ruins clothing. In response to the rise of high-efficiency machines and the foul odors that accompany them, the market has introduced a specific chemical solution: washing machine tablets. These small, effervescent pucks have become a staple in the cleaning aisle, promising to strip away years of neglect with a single cycle. Yet, to truly understand their value and their limitations, one must look past the marketing and understand the chemistry and mechanics of why our machines get dirty in the first place. Sustainability or Disaster? To understand the necessity of washing machine tablets, one must first look at the engineering shift that created the problem. Decades ago, traditional top-loading washers used massive volumes of water. They filled the tub to the brim, allowing clothes to float freely, and the aggressive mechanical agitation flushed soil and residue down the drain effectively. Today, in the name of environmental preservation and energy efficiency, we use front-loading or high-efficiency top-loading machines. These devices use a fraction of the water, relying on the tumbling action of the drum to clean clothes through friction and gravity. While this is a victory for sustainability, it is a disaster for internal hygiene. The dirt, dead skin cells, body oils, and excess detergent that are stripped from your clothing are not always flushed away. Instead, due to the low water volume, they are often cast onto the walls of the outer tub-a stationary drum that surrounds the spinning basket you see. In this dark, warm, and damp crevice, a layer of biofilm begins to grow. This biofilm is a sticky, living matrix of bacteria and mold that feeds on the residual laundry products we leave behind. Washing machine tablets are engineered specifically to target this hidden environment. Unlike laundry detergent, which is chemically formulated to lift soil from fabrics and suspend it in water using surfactants, cleaning tablets are designed to be aggressive against hard surfaces. They are typically composed of concentrated oxidative agents, such as sodium percarbonate, which breaks down into hydrogen peroxide and soda ash when dissolved in water. When a tablet is dropped into the drum and the cycle begins, it effervesces violently. This fizzing action is not merely theatrical; it serves a crucial mechanical purpose. It helps to disperse the active chemical ingredients throughout the entire volume of the drum, splashing the cleaning solution up to the “roof” of the tub and into the crevices of the spider arm-the metal bracket that holds the drum in place and is notorious for corroding and snapping due to chemical buildup. Alkaline Cleaning Products The chemistry of washing machine tablets is typically alkaline, which is essential for their function. Most of the grime inside a washer is acidic in nature-fatty acids from soap scum, body lipids, and grease. By introducing a highly alkaline solution, the tablets can saponify these fats, turning them into a soluble soap that can be rinsed away. Many advanced formulations also include specific enzymes. These enzymes act as biological catalysts that digest the organic matter within the biofilm, effectively eating away the food source that allows mold to thrive in the damp recesses of the pump and drain lines. By breaking down the structural integrity of the sludge, the tablet allows the water to flush it out of the system. However, a dangerous misconception exists regarding what these tablets can actually achieve. Many homeowners treat them as a repair tool rather than a maintenance tool. If a washing machine has been neglected for five years and has developed a thick, black ring of mold on the rubber door gasket, a washing machine tablet will not remove it. Mold has root structures that penetrate the porous rubber of the seal. No amount of splashing chemical water will scrub that physical infestation away. The tablet is designed to maintain the hard, non-porous surfaces-the stainless steel of the drum and the heavy plastic of the outer tub. Relying solely on a tablet while ignoring the physical gaskets is why many frustrated users claim the product “doesn’t work.” It works perfectly for its intended chemical purpose, but it cannot perform miracles on permanent organic staining that requires manual agitation and a mildewcide. Water Temperature The effectiveness of washing machine tablets is also entirely dependent on how they are used, particularly regarding water temperature. This is where user error runs rampant. Almost all cleaning tablets rely on chemical reactions that require heat energy to activate. The oxygen release from the bleaching agents is significantly more vigorous and effective in scalding hot water. If a user throws a tablet in and runs a “Quick Wash” or a cold cycle, they are essentially wasting their money. The tablet may not even fully dissolve, leaving a gritty, chalky residue at the bottom of the drum that adds to the mess rather than resolving it. To get the full benefit, the machine must be set to its hottest possible setting-often labeled “Sanitize” or “Extra Hot.” This heat ensures that the tablet dissolves completely and that the chemical solution is energetic enough to penetrate the layers of calcified grime. A major contributor to the sludge that tablets are fighting is the overuse of fabric softener. Fabric softener is, essentially, liquid fat. It is designed to coat the fibers of your clothing with a thin layer of lipids to make them feel slick and reduce static.

Washing Machine Cleaning Tablets: Are You Wasting Money on Washer Tablets? Read More »