AirBnB Cleaning

Razor Blade Scraper to Your Cleaning Kit Today

Why You Should Add a Razor Blade Scraper to Your Cleaning Kit Today

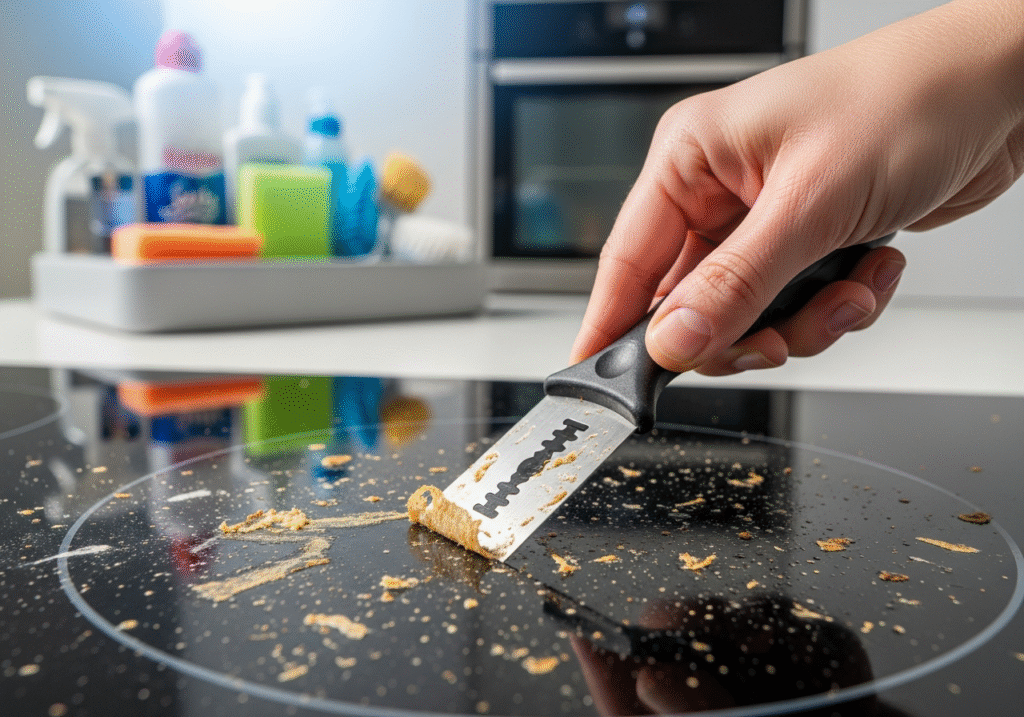
In the vast arsenal of cleaning tools, ranging from high-tech steam machines to complex chemical solvents, the humble razor blade scraper stands out as an anomaly. It is technologically primitive-a simple shard of steel held in a plastic or metal housing-yet it remains the ultimate problem solver for the most stubborn household soils. While the average homeowner often views the razor blade with trepidation, fearing that bringing a sharp edge near a delicate surface will result in catastrophic scratching, professional cleaners understand that the scraper is often safer and more effective than a scrubbing pad. The razor blade scraper operates on the principle of mechanical leverage, shearing the bond between the dirt and the surface rather than relying on abrasion. Understanding how to wield this tool transforms the cleaning process, turning hours of frustrating scrubbing into minutes of precise removal. How it Works To appreciate the utility of the razor blade scraper, one must first understand the physics of adhesion. When substances like paint, tree sap, burnt sugar, or hardened adhesives stick to a surface like glass or ceramic, they form a bond that is stronger than the friction provided by a cloth or a sponge. Attempting to remove these substances with a scouring pad requires applying significant downward pressure. This pressure creates friction, but because the scouring pad is abrasive, it acts like sandpaper. It grinds the soil, but it also grinds the surrounding surface. This is why glass cooktops often develop a hazy, swirled appearance over time; they have been micro-scratched by abrasive sponges. A razor blade scraper, by contrast, applies force laterally. It slides underneath the soil, exploiting the microscopic gap between the contaminant and the substrate. The blade acts as a wedge, lifting the debris off in a single sheet or flake without ever needing to grind the surface itself. The primary domain of the razor blade scraper is glass. Windows, mirrors, and glass-ceramic cooktops are materials that are harder than the steel of the blade, which allows the metal to glide over them without digging in. The glass cooktop is perhaps the most common application. When pasta water boils over or sugary sauces drip onto a hot burner, they carbonize instantly. Once cooled, this residue becomes concrete-like. Chemical cleaners can soften the top layer, but they rarely penetrate to the base of the burn. A razor blade scraper, held at a forty-five-degree angle, slices through this carbonization effortlessly. The key is lubrication. A scraper should never be used on a dry surface. The presence of a liquid-whether it is a specialized glass cooktop cleaner, soapy water, or even a glass cleaner-reduces friction and allows the blade to hydroplane slightly. This prevents the “chatter” or skipping of the blade that can cause gouges. Windows Windows are another area where the scraper is indispensable, particularly after renovations or painting projects. Painters tape is effective, but paint splatter is inevitable. Removing dried latex or oil paint from a windowpane with a rag is nearly impossible; it simply smears the paint into a thinner, more stubborn film. A razor blade snaps the dried paint off the glass in satisfying, solid chips. Similarly, stickers and decals that leave behind a gummy residue are easily conquered. Solvents like acetone can dissolve the glue, but they create a sticky mess that spreads. A scraper pushes the adhesive and the paper backing off together, leaving clean glass behind. This is also true for biological assaults, such as bird droppings or insect residue on exterior windows, which bake onto the glass in the sun and resist standard washing. However, the power of the razor blade scraper comes with strict rules of engagement. The first rule is the angle of attack. The blade must be held at a shallow angle, typically between thirty and forty-five degrees relative to the surface. If the angle is too steep, approaching ninety degrees, the blade ceases to act as a scraper and begins to act as a chisel. This is where damage occurs. A steep angle drives the edge into the glass rather than along it. Conversely, an angle that is too shallow prevents the edge from biting into the residue. Finding the “sweet spot” is a tactile skill; you can feel when the blade catches the dirt and begins to lift it. How to Use The second rule is unidirectional motion. A razor blade scraper is a pushing tool, not a pulling tool. You push the blade forward into the dirt, lift it away from the glass, pull it back, and push again. Dragging the blade backward across the surface is a cardinal sin. The edge of a razor blade is incredibly thin and fragile. If you drag it backward, the microscopic edge can roll over or chip. A chipped blade is essentially a serrated knife. The next time you push that damaged blade forward, the tiny burr on the metal will etch a scratch into the glass. This is why inspecting the blade before every use is mandatory. If the blade looks rusty, dull, or uneven, it must be discarded immediately. A fresh blade is a safe blade. There is also a critical distinction to be made regarding the type of glass being cleaned. Not all glass is created equal. Standard annealed glass and heat-strengthened glass are generally safe for scraping. However, tempered glass-often found in safety doors, shower screens, and side windows of cars-presents a unique risk. During the tempering process, microscopic glass dust, known as fabricating debris, can bake onto the surface of the glass. These particles are invisible to the naked eye. When a razor blade slides over them, it can dislodge these tiny glass rocks and drag them across the surface, creating deep, chaotic scratches. This is not the fault of the metal blade, but the fault of the debris being dragged by it. Professional window cleaners often perform a sound test on a small, inconspicuous corner of tempered glass. If the scraper makes a gritty, grinding sound, they stop immediately. For

Why You Should Add a Razor Blade Scraper to Your Cleaning Kit Today Read More »

woman needing to organize the house for holiday guests

5 Ways to Organize Your Home to Accommodate Extra Guests

The end of the year brings a significant change to the atmosphere of a home, and we need to organize for guests; the house transforms from a private sanctuary, used for daily work and study routines, into a semi-public space dedicated to hospitality and celebrations. This metamorphosis brings with it a unique set of logistical challenges. Hosting guests, whether for a single dinner party or an extended stay, requires more than just a surface-level clean; it demands a structural reorganization of the living environment. The house must function differently when occupancy doubles or triples. Pathways need to be clearer, storage needs to be accessible, and the visual noise of daily life needs to be silenced to create a welcoming backdrop for the festivities. Organizing for guests is an exercise in empathy, requiring the host to walk through their own home with the eyes of a stranger to identify the friction points that might go unnoticed during the rest of the year. Entryway The organization process must begin at the threshold. The entryway is the bottleneck of the holiday home. In the winter months, this area is subjected to an onslaught of bulky coats, wet boots, scarves, and bags. A common mistake is failing to clear the family’s personal gear before the guests arrive. If the coat rack is already full of the host’s jackets, guests are left holding their outerwear or piling it on a bed in a distant room. The first step of organization is a ruthless purge of the front hall closet. Move the family’s winter gear to a secondary location, such as a garage, a basement, or a bedroom closet, to leave the prime real estate empty for visitors. Provide ample, sturdy hangers-not the flimsy wire ones that buckle under the weight of a wool peacoat. If the closet is small, setting up a temporary garment rack can prevent the “coat pile” on the sofa, which immediately clutters the living space. Floor space in the entryway is equally critical. In many regions, the end of the year means snow, mud, and salt. A standard doormat is rarely sufficient for a party’s worth of wet boots. Investing in large, rubber boot trays protects the flooring and keeps the slush contained. Organizing this area also means removing the visual clutter of mail, keys, and school permissions forms that tend to accumulate on entry tables. A clear surface at the door allows guests to set down a purse or a gift comfortably without knocking over a stack of bills. It sets the tone for the rest of the home; a chaotic entryway signals a chaotic visit, while a streamlined one suggests order and calm. Guest Room Moving into the guest accommodations, the definition of organization shifts from storage to comfort. If you have a dedicated guest room, it often serves as a storage unit for the other eleven months of the year, housing wrapping paper, out-of-season clothes, or exercise equipment. This debris must be removed, not just pushed into the corner. The guest needs to feel that the room was prepared specifically for them, not that they are invading a storage locker. This means clearing out the closet and the dresser drawers. It is uncomfortable for a guest to live out of a suitcase for a week because the drawers are full of the host’s old sweaters. Empty at least two drawers and provide cleared hanging space. The bedside area requires specific attention to modern needs. In the past, a lamp and a clock were sufficient. Today, the most important amenity is an accessible power outlet. Guests should not have to crawl under the bed or move heavy furniture to charge their phones. Organizing the room means checking the outlet situation and, if necessary, adding a power strip or an extension cord that sits on the nightstand. Bedding should be checked for freshness well in advance. Linens that have sat in a cupboard for a year often develop a stale, musty smell. Washing everything, including the duvet cover and the mattress protector, ensures the bed feels fresh. Adding an extra blanket at the foot of the bed is a functional organizational touch that prevents the guest from having to ask for more heat in the middle of the night. The bathroom is perhaps the most scrutinized room in the house. When organizing for guests, the goal is to make the space intuitive. Guests should never have to search for the essentials. Toilet paper should be stocked visibly, either in a basket or a clear stack, so there is no awkwardness when a roll runs out. Towels need to be distinct and plentiful. A common organizing tactic is to provide a specific color of towel for guests, separating them from the family’s daily linens. This prevents confusion and ensures that the guest always knows which towel is theirs. The countertops must be cleared of the host’s personal clutter. Toothbrushes, makeup bags, and razor stands should be stowed away in drawers or medicine cabinets. A guest needs surface area to place their own toiletries. If the shower is to be shared, clear the rim of the tub of half-empty shampoo bottles. A streamlined shower feels cleaner and more inviting than one crowded with the family’s grooming products. Kitchen The kitchen, usually the hub of the holiday, requires a zoning strategy. The danger in a kitchen during a party is that guests naturally congregate there, often blocking the work triangle (stove, sink, refrigerator) and hindering the cook. Organizing the kitchen for guests involves creating “self-serve” stations that draw people away from the active cooking zones. Set up a drinks station with glasses, ice, and beverages on a sideboard or a separate table. Create a snack zone on the island or a coffee table in the adjacent room. By physically separating the consumption areas from the preparation areas, you manage the flow of traffic. Inside the kitchen, the countertops must be ruthlessly decluttered. Appliances that are not essential for the holiday meal-the toaster,

5 Ways to Organize Your Home to Accommodate Extra Guests Read More »

flu season

Flu Season: Is Your “Clean” Home Making You Sick? The Hidden Germs You Missed

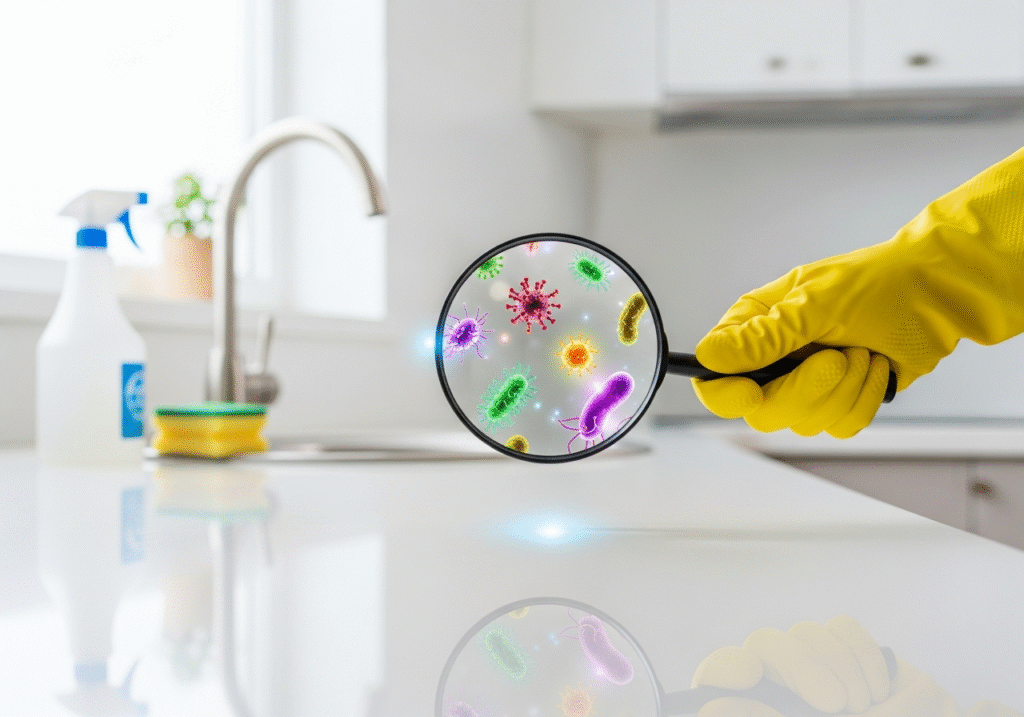
Why Your “Clean” Home Can Still Spread the Flu Flu season in Canada peaks in December and January, when homes are sealed tight against the cold and filled with guests. Influenza viruses travel in droplets from coughs and sneezes, but they also ride on hands and settle on surfaces, where they can survive on hard materials like stainless steel and plastic for up to 48 hours. A home that looks spotless can still be a transmission hub, because the germs are hiding on the objects everyone touches and almost no one sanitizes. Protecting your household means shifting from cosmetic cleaning to targeted, health-focused cleaning. Clean First, Then Disinfect: the Order Matters Cleaning and disinfecting are two different steps, and skipping the first one makes the second fail. Cleaning physically removes dirt, dust, and germs from a surface using soap or detergent and water. Disinfecting then kills the germs that remain, using a registered chemical product. If you spray disinfectant onto a visibly dirty surface, the organic soil shields the germs and inactivates the product, so the process wastes time and leaves pathogens behind. The CDC home cleaning guidance recommends always cleaning surfaces before disinfecting them, and doing both steps more often during cold and flu season. Respect the Dwell Time The most common mistake is wiping disinfectant off too soon. Registered disinfectants need to stay visibly wet on the surface for a set contact time, usually three to ten minutes depending on the product, before they actually kill viruses. Spray and immediately wipe removes the product before it works. Read the label, apply enough product to keep the surface wet for the full dwell time, and let it air dry. This one habit separates real disinfecting from just moving germs around. The Hidden Germ Hotspots Most Homes Miss We all wipe kitchen counters, but the flu spreads through the objects fingers touch constantly. The handle of the refrigerator, the buttons on the microwave, the flush lever in the bathroom, the light switch plate, and the remote control all pass from hand to hand dozens of times a day, and they rarely see a disinfectant. Door hardware deserves special attention in winter: the entry doorknob, the deadbolt, the storm door handle, and any garage keypad or smart lock are touched by every person entering the house, often right after touching outdoor surfaces. These surfaces turn a family home into a germ relay during a busy holiday week. Room Hidden hotspots Flu-season routine Entryway Doorknobs, deadbolt, keypad, handrails Wipe with disinfectant daily Kitchen Fridge and oven handles, coffee maker, salt and pepper shakers Clean, then disinfect twice weekly Living room Remote controls, game controllers, light switches Sanitize weekly with alcohol wipes Bathroom Flush lever, faucet handles, toothbrush holder Disinfect every day during peak season Home office Keyboard, mouse, phone screen Wipe weekly, never drip liquid inside Electronics, Towels, and the Germs You Carry Daily Smartphones are the ultimate high-touch objects: they go from kitchen counter to bathroom to bed, and they are pressed against the face dozens of times a day. Most modern phone screens handle gentle disinfection well; wipes with 70 percent isopropyl alcohol are generally safe for touchscreens, while bleach, abrasive cleaners, and dripping liquids are not. Apply the wipe, let the surface dry completely, and avoid pooling moisture in ports and speakers. Keyboards and mice need the same attention, especially in households where several people share one workspace. Hand towels are another overlooked link in the chain. A shared bathroom towel can be touched by every member of a household, plus guests, many times a day during the December party season. During flu season, swap bathroom hand towels daily, wash them in hot water, and consider paper towels for gatherings so every guest dries their hands on a fresh sheet. The CDC handwashing guidance reminds us that clean hands stop the spread, but only if the towel that dries them is not itself a shared surface. Pillowcases and bedding deserve more frequent washing too, since flu sufferers shed virus onto linens while they sleep. Air, Humidity, and the Bigger Picture Viruses do not only wait on surfaces. Flu droplets hang in the air and attach to dust particles, which is why heating vents, ceiling fans, and dusty baseboards deserve a vacuum pass before and during flu season. Keeping indoor humidity around 40 to 60 percent also helps: flu viruses survive longer and transmit more easily in dry air, and comfortably moist air keeps the nasal passages that trap viruses working properly. A humidifier, regular ventilation, and thorough dusting work alongside surface disinfection to lower the viral load. Build a Daily Germ-Breaking Routine Disinfect entry door hardware and light switches every morning Wipe down kitchen appliance handles and counter zones after each meal Sanitize the flush lever, faucet handles, and toothbrush holder daily Give remotes, phones, and keyboards an alcohol wipe weekly Switch to fresh hand towels daily or paper towels when guests visit Vacuum vents, baseboards, and under furniture to remove dust that carries particles Consistency beats intensity. A two-minute pass over the high-touch map every day does more to protect a family than a marathon cleaning session once a month, because germs are reintroduced constantly by the people who live there. When someone in the house is already sick, add daily disinfection of everything they touch, wash your own hands after contact, and keep their linens and towels separate until they recover. Frequently Asked Questions About Flu Season Germs What is the difference between cleaning and disinfecting? Cleaning removes dirt and some germs with soap and water; disinfecting uses chemicals to kill the germs that remain. You need both, in that order, because dirt stops disinfectants from working. How long should disinfectant stay on a surface? Read the label: most registered disinfectants need to stay visibly wet for three to ten minutes to kill viruses. Wiping them off early defeats the purpose, so apply enough product and let it air dry. Is it safe to clean my

Flu Season: Is Your “Clean” Home Making You Sick? The Hidden Germs You Missed Read More »

Washroom Cleaning

Beyond the Surface: Why Washroom Cleaning Requires a Different Strategy

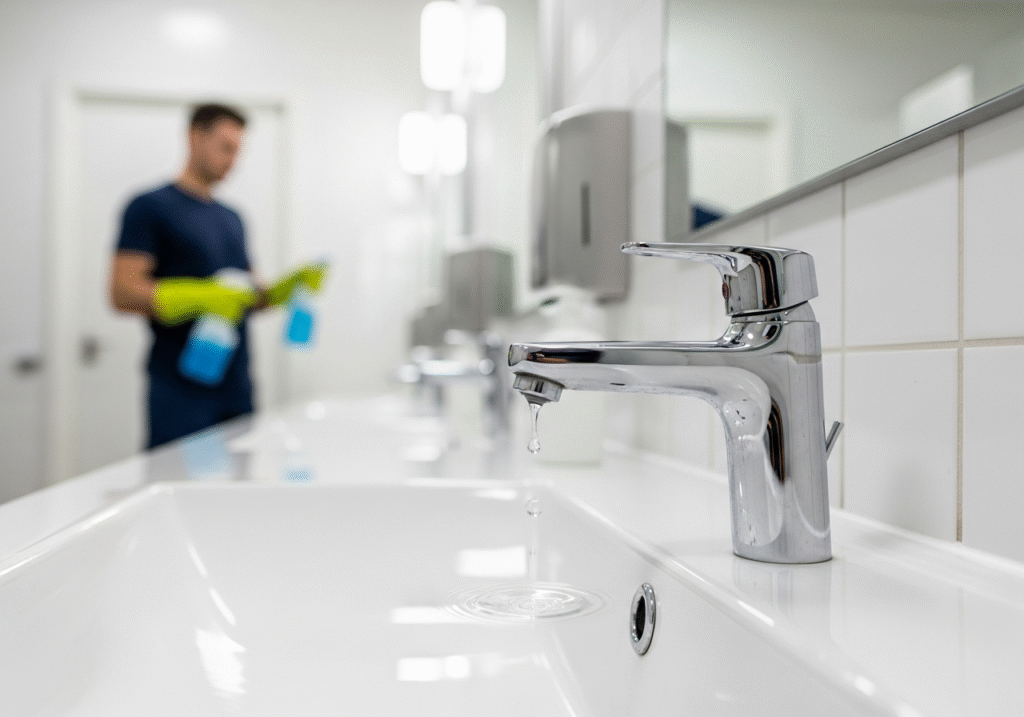
The washroom is undeniably the most functionally demanding environment within any architectural structure. It is a dedicated zone where the biological realities of human life intersect with the rigid requirements of sanitation. Unlike a living room or a bedroom, where cleaning is largely a matter of aesthetics and dust management, washroom cleaning is a constant battle against microbiology and chemistry. Every surface in a bathroom is subjected to a relentless cycle of wetting and drying, a process that creates distinct layers of mineral deposits, soap scum, and bacterial colonies known as biofilm. To clean a washroom effectively, one must move beyond the superficial act of wiping surfaces and understand the microscopic warfare taking place on the tile, the porcelain, and the grout. 1.Soap Residue The foundation of effective washroom hygiene lies in understanding the nature of the dirt you are fighting. In the shower and bathtub, the primary enemy is calcium stearate, commonly known as soap scum. This substance acts as a binding agent for filth, formed when the fatty acids in bar soap react with the minerals in hard water. This reaction creates a waxy, insoluble precipitate that clings tenaciously to fiberglass, glass, and tile. Trying to remove this substance with a standard all-purpose cleaner is often an exercise in futility because most general cleaners are pH-neutral. To break down the alkaline mineral bonds of soap scum, you need an acidic cleaner. This is why professional cleaners often rely on products containing phosphoric or citric acid. However, this chemical warfare requires caution; acid can etch natural stone like marble or travertine, destroying the finish permanently. 2.Mold Biofilm presents a different, more insidious challenge than simple dirt. This slime layer is a complex colony of bacteria that adheres to surfaces and secretes a protective, glue-like substance. In the washroom, this often manifests as the pink or orange discoloration seen in the corners of the shower. While it wipes away easily, it returns rapidly because the colony is resilient. True mold, typically black or dark green, is a fungus that roots into porous surfaces. The grout lines between your tiles are the most vulnerable points in the room. Grout is essentially cement, a porous material that absorbs water and organic matter like a sponge. When mold establishes itself in grout, surface scrubbing is often insufficient because the root structure lies deep within the pores. Effective remediation requires penetrating cleaners that can reach the sub-surface level to kill the root, followed by a sealer to lock moisture out. 3.Toilet The toilet, often viewed as the centerpiece of washroom cleaning, is frequently cleaned incorrectly due to a focus on the visible bowl rather than the invisible hygiene hazards. The mechanics of the flush create what is known as an aerosol plume. When a toilet is flushed with the lid up, microscopic droplets of water mixed with waste are ejected into the air, settling on nearby surfaces. Cleaning the toilet requires a top-down approach that addresses this spread. The most neglected area is the intersection between the toilet base and the floor. This area often accumulates a mix of condensation, dust, and stray urine, creating a persistent odor that no amount of air freshener can mask. Furthermore, the siphon jets-the small holes under the rim where water enters the bowl-often become clogged with mineral deposits and mold, reducing flush power and harboring bacteria. A bent brush is necessary to physically dislodge this buildup. 4.Faucet Aerator The sink and vanity area suffer from a unique cocktail of toothpaste splatters, hair, and makeup residues. The faucet aerator, the small mesh screen at the tip of the spout, is a hidden trap. It filters sediment from the water lines, but it also creates a damp environment where bacteria can grow. If the water flow seems irregular, it is likely because the aerator is calcified. Unscrewing this piece and soaking it in vinegar is a maintenance step that ensures the water you use to brush your teeth is actually clean. The sink drain, specifically the overflow hole near the top of the basin, is a dark, damp cave that rarely gets cleaned. It creates a perfect breeding ground for biofilm, which releases a musty, sewer-like odor. Pouring a cleaning solution down the overflow and using a small brush to agitate the interior walls is necessary to eliminate this phantom smell. 5.Mirrors and Glass Surfaces Mirrors and glass surfaces in the washroom are unforgiving of poor technique. The high humidity of the room often causes dust to stick to the glass, creating a muddy streak when wiped with a damp cloth. The secret to streak-free glass is not the chemical, but the tool. Traditional cotton cloths often leave lint or residues that cause streaking. A high-quality microfiber cloth, specifically woven for glass, uses microscopic hooks to lift oils and dust without the need for heavy detergents. Furthermore, the edges of the mirror, where the glass meets the frame, are often prone to corrosion caused by harsh ammonia-based cleaners seeping behind the glass. Cleaners should always be sprayed onto the cloth, never directly onto the mirror. 6.Floor The floor of the washroom is the final resting place for everything that falls or settles in the room. Because of the high moisture levels, dust on a bathroom floor does not sweep up easily; it smears. This mud-like dust packs into the corners and the grout lines. Mopping is often ineffective because it simply pushes this dirty water around, filling the low-lying grout lines with a slurry of gray filth. True floor hygiene in a washroom requires hand-cleaning the perimeter and the corners where the mop cannot reach. The area behind the toilet, often cramped and difficult to access, is a prime location for dust bunnies to collect moisture and begin to rot. This area should always be cleaned by hand to ensure that the source of potential odors is physically removed. 7. Exhaust Fan Ventilation is the invisible cleaner of the washroom. The exhaust fan is the single most important

Beyond the Surface: Why Washroom Cleaning Requires a Different Strategy Read More »

Persian rug being used

Persian Carpet: How to Identify if Your Rug Needs a Professional Wash or Just a Vacuum

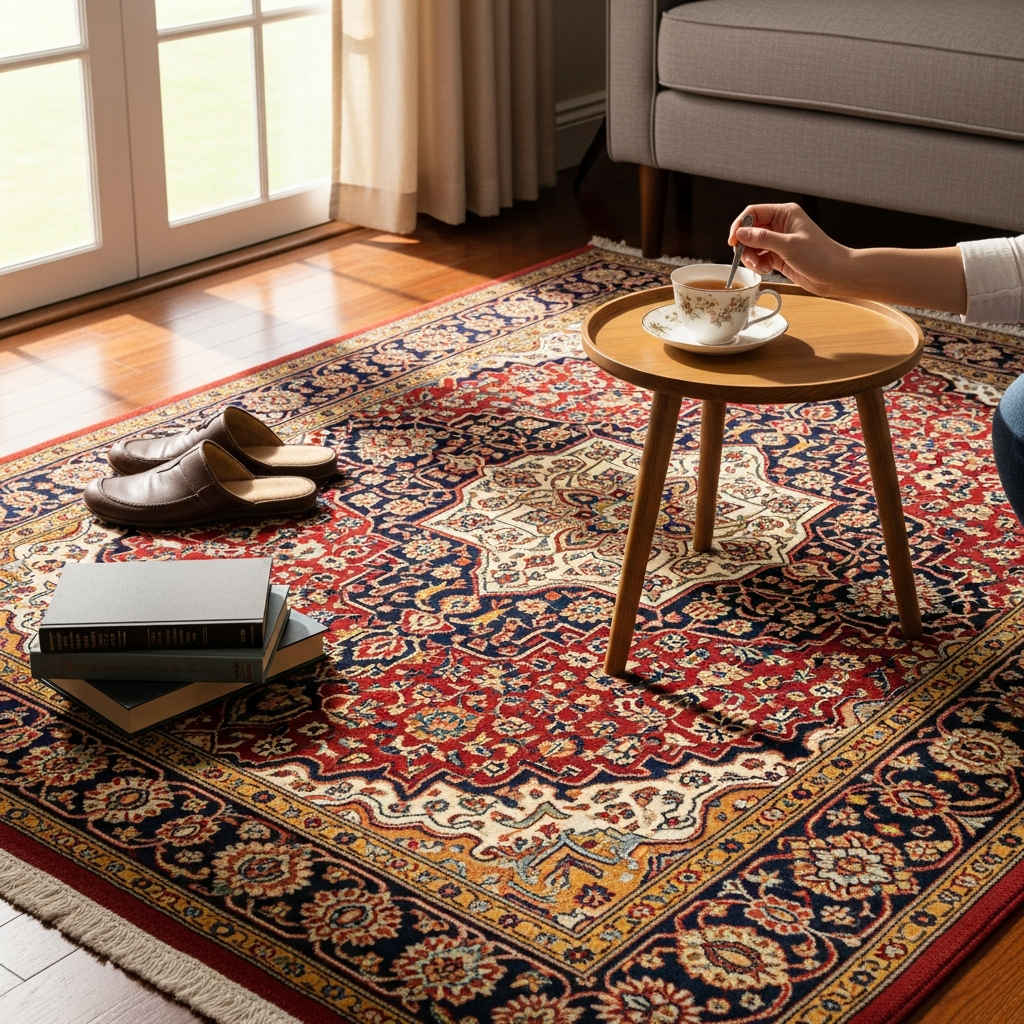
Persian Carpet Care: Professional Wash or Just a Vacuum? A Persian carpet is far more than a floor covering. It is a piece of art, a family heirloom, and a historical document woven from wool, silk, and cotton with complex natural pigments. Because it is an organic textile, its care follows a different philosophy from synthetic wall-to-wall carpeting. Treating a hand-knotted Persian rug with the same chemicals and mechanical aggression used on a polyester rug is the fastest way to destroy its value. The Anatomy of a Hand-Knotted Rug: Why Grit Is Destructive A Persian rug is held together by millions of hand-tied knots, and that density creates a unique soiling problem. Fine dust and grit migrate down through the pile and settle deep in the foundation, where they act like tiny shards of glass. Every footstep grinds those particles against the wool, slicing fibers at the base like a guillotine. Standard vacuuming cannot remove this deep sediment, and the beater bar on most upright machines is a primary cause of damage: it pulls at the knots, shreds the pile, and can tear the fringes. The correct approach is suction only, plus the occasional vacuum of the back of the rug so gravity helps vibrate grit out of the foundation. Alkaline Cleaners and the Chemistry of Wool Wool is a protein fiber protected by a layer of scales and natural oils called lanolin, which give the rug its sheen and stain resistance. Most commercial carpet cleaners are highly alkaline, formulated for synthetic grease, and they strip the lanolin, leaving wool brittle, dry, and dull. High alkalinity can even cause a chemical burn that turns the wool yellow or brown permanently. Persian rugs need a pH-neutral or slightly acidic solution that respects the protein structure, which is why traditional methods favor vinegar or plant-based shampoos. Dyes, Heat, and the Risks of DIY Spot Cleaning Many older and tribal rugs use vegetable dyes that are not chemically locked into the fiber. These dyes bleed when wet, and a common tragedy happens when a homeowner spot-cleans a spill with hot water and a generic cleaner. The heat opens the fiber cuticles, the dye migrates, and deep reds bleed into creamy white areas, creating a muddy, irreversible stain. Hot water is almost always a mistake: heat and agitation cause felting, so the fibers shrink and the rug distorts, buckles, and no longer lies flat. Stain response is where most rugs are lost. Panic leads to frantic scrubbing, but wet wool fibers are swollen and vulnerable. Scrubbing distorts the pile, untwists the fibers, and creates a texture difference called blooming that remains even after the stain is gone. The only correct immediate action is blotting: pressing straight down with a clean white cotton towel to absorb liquid without lateral movement. Pet Urine, the Fringe, and Water Damage Pet urine is a severe threat that goes beyond staining. It starts as an acid but becomes highly alkaline as it decomposes, which destabilizes dyes and, more insidiously, rots the cotton foundation in a condition known as dry rot. The salts left behind pull moisture from the air, keep the foundation damp, and feed bacteria until the threads crack or tear when the rug is moved. Standard enzymatic cleaners often leave sticky residues that attract more dirt, so pet urine usually requires a full immersion wash by a professional to flush the salts out completely. The fringe is the end of the warp threads that form the rug’s skeleton, and if it unravels the knots slide off. Never bleach it, because bleach degrades cotton and makes the threads brittle. Clean it gently with the same mild solution as the rest of the rug, and never let a beater bar touch it. Water damage is usually the result of improper drying after a DIY wash. A dense Persian rug traps moisture in its center, and mold and mildew can develop in as little as 24 hours, leaving a permanent odor and fungal growth that eats the cellulosic fibers. Professional facilities use centrifuges and temperature-controlled drying rooms to get the rug bone dry; washing it on a driveway leaves it wet for days, inviting rot. Steam Cleaning vs True Rug Washing Treatment What it does Safe for Persian rugs? Suction-only vacuuming Lifts surface dust without agitation Yes, as routine maintenance Spot blotting Absorbs fresh spills straight down Yes, with a clean white towel Hot water extraction Injects hot detergent into the pile No, heat and alkalinity damage wool Immersion rug wash Dusting, dye test, cool water, controlled drying Yes, at a dedicated facility Most in-home carpet cleaners use hot water extraction, which is catastrophic for Persian rugs: the heat and high alkalinity are wrong for wool, and cleaning on the floor means the back is never rinsed properly. A true wash happens at a dedicated facility where the rug is dusted, tested for dye stability, submerged in cool flowing water, and dried under controlled conditions. The CDC notes that mold grows on carpet and fabric wherever moisture lingers, and Health Canada’s mould guidance is the same message: damp textiles need rapid, thorough drying. For routine upkeep, follow the CDC’s soft surface cleaning guidance for carpet and rugs. Deep grit that suction cannot lift from the knot foundation. Any dye bleed, color migration, or bloomed pile after a spill. Pet urine accidents, which leave salts and may cause dry rot. Fringe damage, musty odor, or a rug that stayed wet more than a day. When these signs appear, a professional wash is the safe answer. Toronto Shine Cleaning applies the same rigorous, knowledgeable approach to your whole home, with a $1,000,000 insurance policy and $10,000 breakage and surety bond behind every visit. Call (647) 424-0355, see our cleaning prices, or book a deep home cleaning for the rest of your residence. A regular maid service keeps everyday dust from settling into fine textiles, and we serve locations across the GTA. Frequently Asked Questions Can I steam clean a Persian rug?

Persian Carpet: How to Identify if Your Rug Needs a Professional Wash or Just a Vacuum Read More »

laundry basket in the laundry room

Washing Clothes: 10 Mistakes You Need to Stop Making When Washing Your Clothes

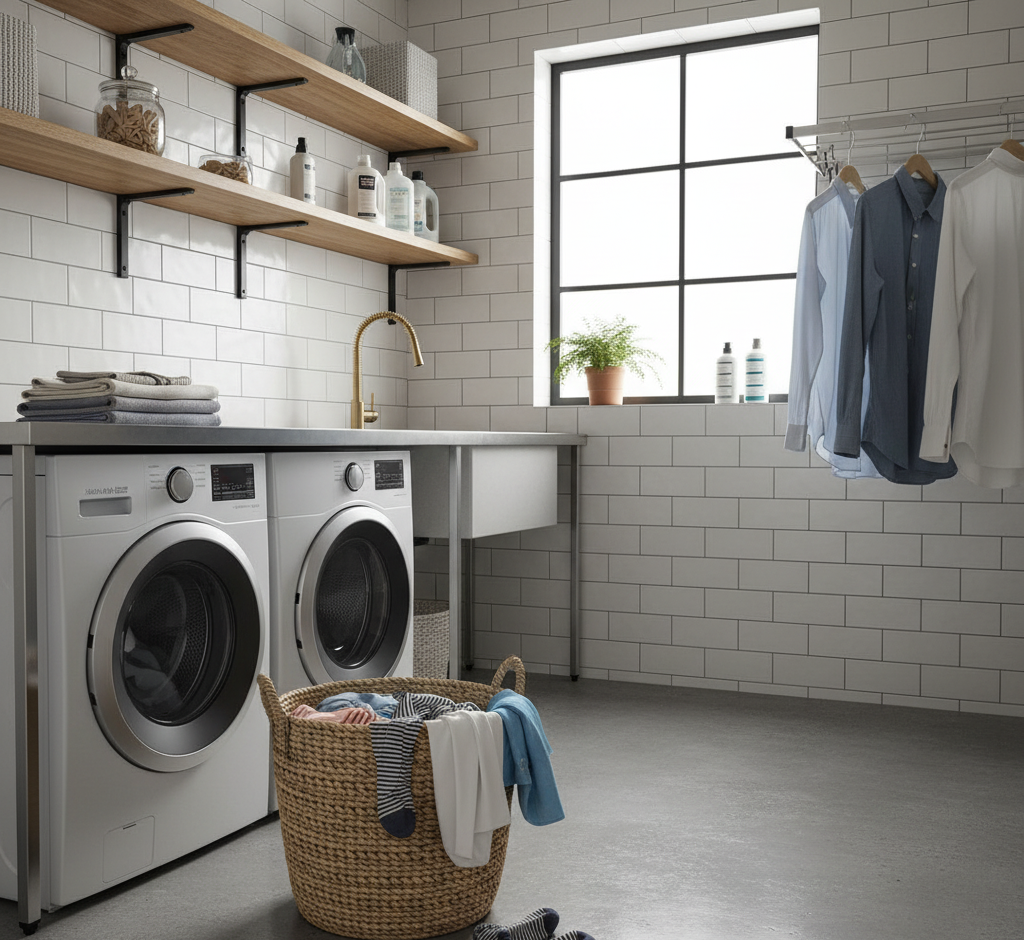
The act of washing clothes is often dismissed as a mundane necessity, a background task that requires little thought beyond separating whites from colors and pressing a button. However, this perceived simplicity is deceptive. Laundry is a chemical and mechanical process that involves a delicate balance of water temperature, agitation, chemical agents, and fabric types. When this balance is disrupted by habitual errors, the consequences are expensive and frustrating. Clothes fade prematurely, fibers break down, elastic snaps, and mysterious holes appear in favorite garments. Furthermore, the appliances themselves, often significant financial investments, suffer from misuse, leading to mechanical failures and mold growth. To truly care for a wardrobe and maintain the efficiency of a household, one must unlearn the common practices that have likely been passed down through generations or assumed out of convenience. 1.First Mistake The first critical error occurs long before the start button is pressed, during the sorting phase. Most people operate under the assumption that sorting is purely a chromatic exercise-keeping red socks away from white shirts to prevent pink underwear. While preventing dye transfer is important, sorting by fabric weight and texture is arguably more critical for the physical preservation of the garments. A washing machine cleans through agitation; clothes rub against each other to dislodge soil. When you mix heavy, abrasive fabrics like denim jeans with delicate materials like silk or fine cotton, you are effectively creating a sandpaper effect. The heavy items thrash against the lighter ones, causing micro-abrasions that manifest as pilling, holes, and a general loss of softness. Furthermore, the texture of fabrics dictates their lint behavior. Washing lint-shedding items, such as heavy cotton towels, with lint-attracting fabrics, like synthetic leggings or corduroy, results in a visual disaster that makes dark clothes look permanently dirty. 2.Individual Preparation Once the piles are sorted, the preparation of individual garments is often neglected. This mechanical oversight leads to tearing and stretching. The rule for hardware is simple yet frequently confused: zippers must be closed, and buttons must be open. A zipper left unzipped is essentially a flexible saw blade loose in the drum. As it spins, the metal teeth can snag on lace, scratch the surface of other fabrics, and even chip the interior paint of the washing machine. Conversely, buttoned shirts suffer from the opposite problem. When a shirt is wet, it is heavy. If it is buttoned up, the centrifugal force of the spin cycle pulls aggressively at the threads holding the buttons, distorting the buttonholes and causing buttons to pop off. Pockets also require vigilant inspection. A stray tissue can disintegrate and cover an entire load in white confetti, while heavier objects like coins can bypass the seal and damage the drain pump. 3.Detergent The application of detergent is the area most rife with misconceptions. Decades of marketing have convinced consumers that more foam equals more cleaning power. In reality, the opposite is true for modern high-efficiency machines. These appliances use very little water, relying on friction to clean. When you use too much detergent, you generate a massive volume of suds that acts as a cushion between the clothes, preventing the necessary friction that scrubs away dirt. The clothes simply float in a bubble bath, emerging with their stains intact. Worse, the rinse cycle cannot remove this excess chemical load. The result is a layer of soap residue left on the fibers, which acts as a magnet for dirt and skin oils, creating a breeding ground for bacteria and leading to the “sour” smell often associated with old towels. 4.Fabric Softener Compound this issue with the habitual use of fabric softener, and you have a recipe for textile ruin. Fabric softener works by coating fibers with a layer of lipid-based chemicals to force them to feel slick. While this feels nice instantly, it functionally destroys the utility of absorbent fabrics. Towels coated in softener lose their ability to wick water; they simply push moisture around the skin. Athletic wear, engineered to breathe and wick sweat, becomes clogged and sealed by these waxy deposits, trapping body odors deep within the weave. A simple substitution of white vinegar in the rinse cycle can soften fabrics by stripping away detergent residue and neutralizing static without leaving a damaging coating behind. 5.Amount The physical loading of the machine also requires a specific balance. There is a tendency to stuff the drum to capacity to minimize the number of loads, but a packed machine is a useless machine. For the chemistry of the detergent to work, it must dissolve and circulate. For the mechanical action to work, clothes must have room to tumble. A solid brick of wet fabric in the center of the drum will never get clean. Conversely, washing a single heavy item is a mechanical hazard. A lone wet blanket creates a severe imbalance during the spin cycle, causing the drum to bang violently against the chassis, wearing out the suspension and bearings. 6.Water Temperature selection is another variable where habit often overrides logic. The default to cold water for everything, driven by eco-consciousness, is noble but insufficient for sanitation. While cold water is excellent for preventing shrinkage and protecting dyes, it often lacks the thermal energy required to activate the enzymes in detergents that target heavy oils. Bed sheets and towels, which are reservoirs for dead skin and dust mites, require hot water to be truly sanitized. A cold wash for these items is merely a rinse. However, using hot water indiscriminately is equally damaging, as it sets protein-based stains like blood and sweat into the fabric permanently. A nuanced understanding of temperature-hot for sanitation, warm for average soil, and cold for delicate protection-is necessary. 7.Stains When stains do occur, the immediate reaction is often the wrong one. The instinct to rub a spill vigorously is a destructive reflex. Rubbing drives the stain deeper into the yarn and abrades the surface of the fabric, often causing color loss that is more noticeable than the stain itself. The correct technique is

Washing Clothes: 10 Mistakes You Need to Stop Making When Washing Your Clothes Read More »

entryway for winter dirt and salt

How to Set Up Your Entryway for Winter Muck and Salt – 6 Professional Tips

The Entryway Is Your Home’s First Line of Defense Against Winter Muck When November settles over Canada, the entryway stops being a pretty threshold and becomes a work zone. Wet leaves, mud, melting frost, and the first applications of road salt all arrive on the soles of boots within seconds of every trip outside. Anything you fail to trap at the door gets tracked deeper, staining carpet, scratching hardwood, and leaving a permanent gritty film on every surface. A purpose-built winter entryway is not decoration. It is containment, and it protects the floors you have already paid for. Here are six professional setups that make the muck season manageable. Tip 1: Put a Real Scraping Mat Outside the Door Everything starts with an exterior mat whose one job is aggressive scraping. A thin decorative welcome mat cannot handle clumps of mud, snow, and gravel; a Canadian winter needs a workhorse. Coir coconut fiber, heavy-duty rubber with deep grooves, and synthetic turf designs all shrug off freezing temperatures and moisture without cracking or rotting, and their texture nudges people into a proper shoe wipe. Shake the mat out often, and give it a hard hose-down before the deep freeze so its scraping surface stays sharp rather than cemented with old mud. Tip 2: Let the Interior Mat Absorb What the First Mat Misses Inside, the second mat plays a different role: soaking up moisture and trapping the fine grit and salt dust that slips past the scraper. Size matters. Choose one long enough that a person can step fully onto it, close the door, and kick off shoes without touching clean floor. High-absorbency cotton or microfiber surfaces pull up a surprising volume of water, and a non-slip rubber backing prevents dangerous slips while keeping trapped dampness off your flooring. Vacuum this mat daily through the high-traffic season, then shake it or launder it weekly. A saturated, filthy mat absorbs nothing; it just becomes a launchpad for the mess. Tip 3: Give Soaking Boots a Containment Zone Even a double-mat system loses to truly drenched footwear. A boot tray, a shallow plastic or rubber basin with a raised lip, catches melting snow, mud drips, and salty brine before any of it meets your floor. That single habit saves polyurethane finishes from salt stripping and keeps grout lines from slowly crumbling. Rinse and wipe the tray often: boots left sitting in days-old brine just reabsorb the corrosive water you were trying to keep out. Tip 4: Build a Complete Unloading Station Think through the whole arrival ritual, not just the floor. A small sturdy bench beside the boot tray lets people sit while wrestling stiff winter boots, instead of hopping and stamping slush onto clean boards. Strong hooks mounted above the mat zone catch dripping jackets and scarves so wet outerwear sheds its moisture inside your one easy-to-clean area rather than onto carpets and furniture further in. The essentials of a working station: A low bench or stool rated for repeated sitting Heavy hooks for coats, backpacks, and leashes Baskets for hats, gloves, and mufflers The boot tray, sized to the household’s shoe volume A hook or shelf for the daily bag, keys, and pass Tip 5: Dissolve Salt Film, Then Rinse, in That Order The defensive line will be breached, and how you respond decides whether floors survive the season. Act fast: salt attracts moisture, and once it dissolves into brine it can dull and strip the protective finish on hardwood, then creep into porous grout on tile and slowly crack it. Never mop a gritty floor first; that is like scrubbing with sandpaper, grinding sharp particles into the clear coat. Vacuum with a hard-floor head or sweep with a soft broom to lift dry grit, then work the salt marks with a damp, not wet, mop, because excess water swells and warps hardwood and laminate. For routine mopping of tile and sealed stone, a diluted pH-neutral cleaner lifts grime without attacking grout. For stubborn white haze, dissolve the alkaline deposits with one cup of white vinegar per gallon of warm water, then follow immediately with a second pass using a clean mop head and plain water to rinse. Dissolve, then rinse: skipping the rinse just re-deposits a new film as it dries. Store any vinegar or salt-removal solution carefully and follow the federal guidance on household chemical safety about labels, storage, and never mixing products. Tip 6: Keep Dedicated Cleaning Tools in the Front Closet Cleanup happens when supplies are five seconds away. Park a small dustpan and brush, a roll of paper towels or a designated muck cloth, and a spray bottle of your salt solution right in the entry closet so spills get wiped before they set. Use the same effort to organize the closet itself: room for bulky parkas without bursting doors, a shelf for boots mid-dry, and bins for the endless parade of toques and gloves. A tidy closet keeps the whole zone calm, because a clean entryway is an organized entryway. Your Winter Entryway Kit at a Glance Component Job Best picks Maintenance Outdoor mat Scrape heavy debris Coir, grooved rubber, turf Shake often; hose before freeze Indoor mat Absorb water, trap fine grit Cotton or microfiber, rubber backing Vacuum daily; wash weekly Boot tray Contain meltwater and brine Plastic or rubber with raised lip Wipe and rinse frequently Bench and hooks Safe unloading of people and coats Sturdy, wipeable surfaces Declutter weekly Tool caddy Instant spill response Dustpan, cloths, salt spray Restock as used The CDC’s overview of cleaning and disinfecting household surfaces reinforces the same sequence you need at the door: remove the gross stuff first, then clean the surface itself. Winter Entryway FAQ How big should an indoor winter mat be? Long enough that both feet land fully on it and you still have room to shut the door and remove shoes. A small rug that slides aside when kicked is worse than useless in slush season. Will road salt ruin hardwood

How to Set Up Your Entryway for Winter Muck and Salt – 6 Professional Tips Read More »

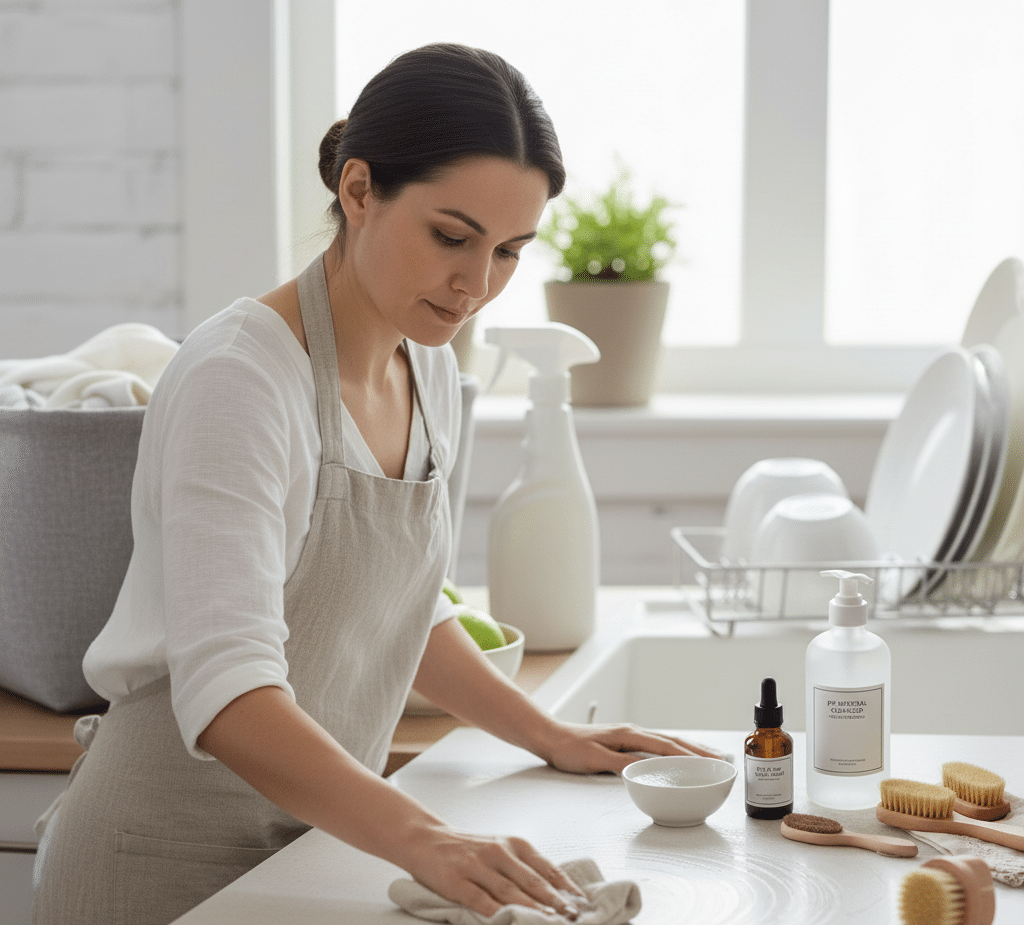
Woman cleaning the counter with pH-neutral products next to her.

Understanding pH-Neutral Cleaners: The Complete Guide

What pH-Neutral Cleaners Are and Why Your Surfaces Thank You for Them Somewhere between the vinegar bottle and the oven degreaser sits the most important concept in household chemistry: a balanced pH. Master it and you move from aggressive scrubbing that quietly damages finishes to gentle, sustainable maintenance that keeps stone, wood, and tile looking new for decades. This guide explains what a pH-neutral cleaner actually does, exactly where it is essential, where it fails, and how to use one like a professional. The pH Scale in Plain Language The pH scale measures how acidic or alkaline a water-based solution is, running from 0 to 14. Pure water sits at 7, dead center, and is the model of neutral. Below 7 lands acid, with vinegar and lemon juice as the classic household examples. Above 7 is alkaline, also called basic, a club that includes bleach, ammonia, and most oven degreasers. The further a product strays from 7, the more chemically reactive and potentially caustic it becomes. That reactivity is a double-edged sword: it is what lets strong cleaners dissolve hard water stain or cut heavy grease, and it is also what ruins surfaces that never stood a chance against them. Health Canada’s resource on using household products safely makes the same point about reading labels and respecting product strength. What a Neutral Cleaner Actually Does A pH-neutral soap is a surfactant formulated to sit at or very near 7. It lifts dirt, oils, and grime off a surface and suspends them so they can be wiped away, without trying to dissolve, etch, or strip the material underneath. Its action is mechanical, breaking the bond between soil and surface rather than attacking the surface itself. Think of it as the do-no-harm principle of cleaning: the default choice for any material that a strong acid or alkali would permanently damage. Natural Stone: The Strongest Case for pH 7 Marble, limestone, travertine, and onyx bring luxury into a home and extraordinary vulnerability with them. These stones are largely calcium carbonate, which reacts violently with acid. Even a “natural” splash of vinegar on a marble counter sets off a reaction that dissolves a microscopic layer of stone. The result, called etching, looks like a dull whitish stain but is physical damage that no wipe can undo; removing it means professional re-honing and polishing. Alkaline cleaners are less dramatic but still wrong, dulling the finish and working into pores over time. A pH-neutral cleaner is the only recommended routine product for these calcium-based stones. Granite etches far less readily, yet harsh chemicals degrade the sealant that protects it from stains, so neutral soap remains the wisest daily choice. Floors, Leather, and Fabrics The same preservation logic protects your floors. A sealed hardwood floor is defended by its finish, not the wood beneath, and repeated washes with high-alkaline cleaners slowly strip that polyurethane layer. The floor may look clean today while growing duller and thinner with every mop. A properly diluted pH-neutral floor cleaner lifts soil off the finish without eating it. Manufacturers of luxury vinyl tile and laminate almost universally specify neutral cleaners for the same reason: harsh chemistry clouds or embrittles the factory wear layer, permanently marring the look and often voiding the warranty. Leather, a natural skin kept supple by its own oils, reacts the same way to alkaline soaps by drying, cracking, and fading, while delicate upholstery and clothing respond far better to a neutral spot-cleaning solution. Professionals follow that order of force: start with the gentlest method that can work. Where pH-Neutral Cleaners Hit Their Limits Neutral products are masters of maintenance, not miracle workers. Three common jobs need something else: Hard water stains and soap scum. These are alkaline mineral deposits of calcium and magnesium, so an acidic cleaner is required to break the bonds. Baked-on stovetop or oven grease. Polymerized oil needs a moderately alkaline degreaser; a neutral soap simply lacks the power. Disinfecting. Neutral soaps clean but do not inherently kill germs. Countertops touched by raw meat or a bathroom during flu season need a dedicated disinfectant applied after cleaning, as the CDC’s home cleaning and disinfecting guidance describes. Strong chemistry also demands respect: never blend cleaning products, and store them per Health Canada’s household chemical safety rules, since mix-ups like combining bleach with other cleaners can release toxic gas. Smart Technique: Dilute, Two-Bucket, Microfiber Most neutral cleaners ship as concentrates, so dilute exactly to the label. Too much product leaves a sticky film that attracts fresh dirt, the opposite of the goal. For floors, the two-bucket method keeps things honest: one bucket holds cleaning solution, the second holds clean rinse water, so the mop never redistributes what it lifted. On countertops, pair the cleaner with a quality microfiber cloth whose fibers trap soil instead of pushing it around. Lift the dirt, remove it, leave nothing behind but a clean surface. The sensible arsenal is small: a neutral workhorse for the vast majority of daily and weekly tasks, plus acidic and alkaline specialists reserved for the specific problems that truly need them. Which Cleaner for Which Surface Surface or soil Right chemistry Why Marble, limestone, travertine, onyx pH-neutral Acids etch calcium carbonate instantly Granite and sealed stone pH-neutral Protects the stain-blocking sealant Sealed hardwood, LVT, laminate pH-neutral, diluted Spares the wear layer and the warranty Leather, upholstery, delicates pH-neutral Keeps natural oils and dyes intact Hard water and soap scum Mildly acidic Alkaline minerals dissolve in acid Baked-on grease Mildly alkaline degreaser Saponifies polymerized oils Germ-sensitive counters Clean, then disinfect Neutral soap lifts soil, not pathogens pH-Neutral Cleaner FAQ How do I know if a cleaner is truly pH-neutral? The label should say pH neutral or pH 7. If it does not, contact the manufacturer; a generic “all surface” claim is not a promise, since many multi-purpose products lean alkaline. Is a diluted neutral cleaner safe for everyday mopping? Yes, and it is the recommended routine for sealed floors and stone. Use weak solution, a well-rinsed mop

Understanding pH-Neutral Cleaners: The Complete Guide Read More »

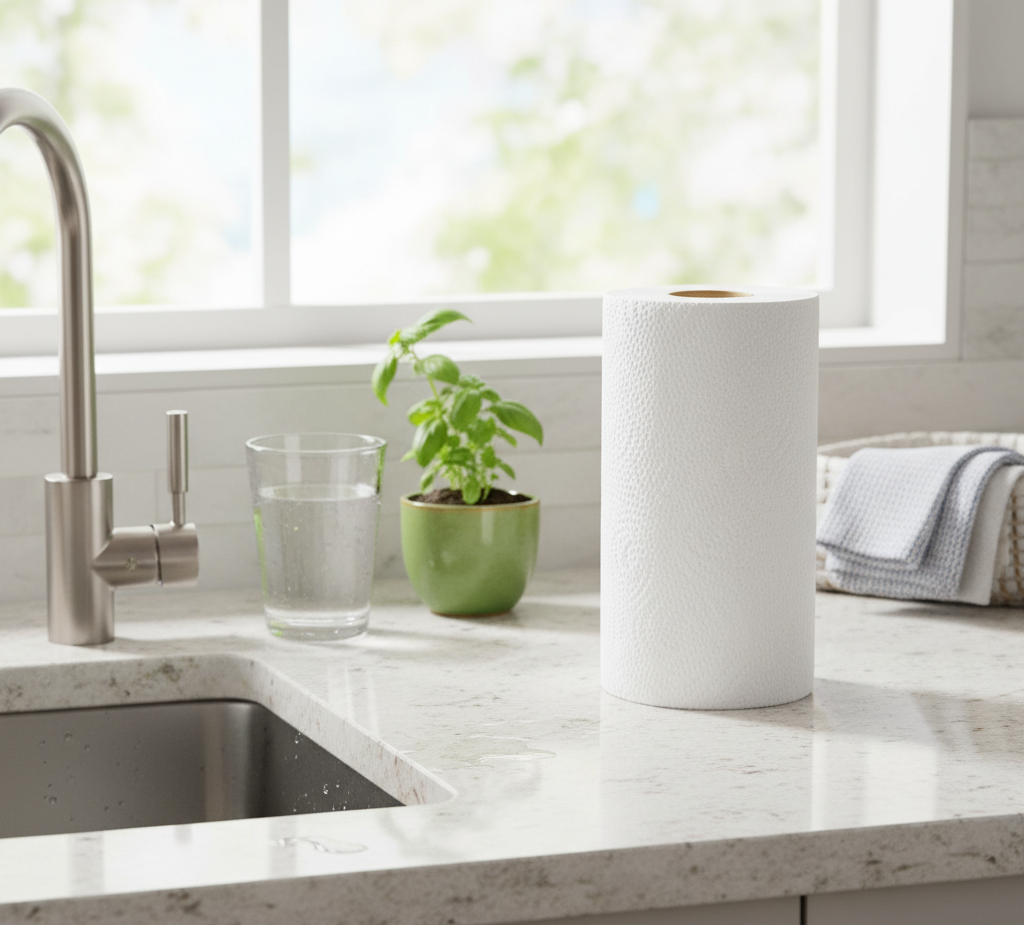
paper towels on a kitchen counter

The Right and Wrong Way to Use Paper Towels for Cleaning – 6 Best Tips

Paper Towels: When the Roll Is Right and When It Is Dead Wrong The paper towel is a cornerstone of modern cleaning, so embedded in daily life that we grab it without thinking: sudden spill on the counter, smudge on the window, greasy stovetop. Its virtues are real. No hunting for a clean cloth, no laundry burden, no hesitation with unpleasant messes before it hits the bin. One fresh sheet guarantees a clean slate and rules out spreading yesterday’s germs on today’s surfaces. But convenience is not the same as correctness, and most homes reach for the roll far too often. These six tips put paper towels back in their proper role. Tip 1: Blot Spills, Never Wipe Them Paper towels are engineered to absorb: cellulose fibers, usually from wood pulp, wick liquid and hold it, while texture, thickness, and quilting add scrubbing grip. That engineering only pays off if you work with it. Lay a sheet over a fresh spill and let capillary action pull the liquid up and out of the surface. An aggressive wiping motion does the opposite, pushing moisture over a wider footprint and driving it into porous wood or grout where it becomes a real stain. For large spills, layer several sheets so the pile soaks through instead of smearing. Tip 2: Use One as a Disposable Applicator Beyond mopping up liquids, the roll is a superb delivery system. Sprayed with glass cleaner, a paper towel polishes windows and mirrors streak-free precisely because it is new: a reusable cloth can carry residual oils or fabric softener from the last wash, and those residues are what leave glass hazing. Sprayed with disinfectant, a fresh sheet spreads the product evenly across counters and sinks, then leaves the house carrying whatever germs it collected. That matters more than it sounds, because a damp sponge or cloth that skips regular sanitizing becomes a breeding ground for bacteria and a vehicle for cross-contamination, the exact risk the CDC’s home cleaning and disinfection guidance warns about. Tip 3: Hit Heavy Grease Dry First Grease and oil are where paper genuinely shines. It wipes greasy cooktops, cleans microwave splatter, and blots excess oil off fried food, trapping grease in fibers destined for the trash. A reusable cloth takes that same oil into your laundry, where it lingers and transfers. For thick, heavy grease, run the dry towel first to pull up the bulk, then follow with your cleaning solution. Two steps stop the smear and make the actual cleaning dramatically shorter. Tip 4: Know the Real Downsides The disposability that makes paper towels lovable creates their two genuine weaknesses. The first is cost in every currency. Making them consumes trees, water, and energy, and seconds later the sheet heads to landfill, while the recurring purchase adds up to far more than one-time reusable alternatives. The second is performance limits: a standard sheet lacks durability for heavy scrubbing. Faced with dried-on food or textured surfaces it shreds, leaving lint and pulp behind, painfully visible on dark surfaces and screens. Any job that needs friction belongs to a scrub brush or a good cloth, not paper. Tip 5: Default to Microfiber Instead For most everyday tasks, microfiber is simply the better tool. These cloths weave extremely fine synthetic fibers, typically a polyester and polyamide blend, split during manufacturing to create huge surface area and a positive electrostatic charge that pulls dust, dirt, and microbes into the cloth instead of shuffling them around. Dry, they are exceptional dusters. Damp, their capillary action absorbs remarkable water and lifts grime with little effort, often with plain water alone. They scrub without falling apart, polish glass without lint, and survive hundreds of washes, which makes them cheaper and greener over any realistic timeline. Care is the catch: wash them apart from other laundry and skip fabric softener, which clogs the fibers and kills both the static cling and the absorbency. Tip 6: Save the Roll for Hazardous Messes Hygienic disposal is the paper towel’s trump card, and some messes should never touch reusable laundry. The list is short and specific: Raw meat juices from poultry or beef packaging Pet accidents, vomit, and illness-related fluids Litter box spills and tracked-in mud bombs Anything you would rather incinerate than launder With biological hazards, containing and discarding immediately is the responsible move against pathogens like salmonella or E. coli, since scrubbing a cloth clean enough to be safe is often impractical mid-crisis. If you finish with a bleach-based sanitizing wipe, handle it per Health Canada’s rules for household chemicals, which stress dilution accuracy and never mixing products. Paper Towel vs Microfiber by Task Task Better tool Why Fresh liquid spill Paper towel Blots and contains, then disappears Windows and mirrors Either Paper never carries softener haze; microfiber must be lint-clean Raw chicken juices Paper towel Single-use stops cross-contamination Dusting shelves Microfiber Static charge traps dust instead of airborne-izing it Stovetop grease film Paper first, cloth after Dry towel pulls bulk; washable cloth finishes Scrubbing dried messes Brush and cloth Paper shreds and leaves pulp Drying hands Cloth or paper, your call Cloth wins cost, paper wins when hands are filthy Paper Towel FAQ Are paper towels more hygienic than reusable cloths? For hazardous messes, yes, because the towel exits with the contamination instead of returning to a laundry pile. For routine wiping, a microfiber cloth washed regularly and used damp is equally sanitary and far cheaper. Why does my paper towel leave lint on dark surfaces? Cheap towels shed pulp and lint, especially when wet or when dragged across texture. Dab instead of dragging, use two layers for wet jobs, or switch to a lint-free microfiber pass for the final polish on screens and dark finishes. Can I compost used paper towels? Only if they absorbed food scraps or water. Towels dirty with cleaning chemicals, grease, or biological waste belong in the trash, since compost is meant for untreated organics. How much does the roll habit really cost? A household

The Right and Wrong Way to Use Paper Towels for Cleaning – 6 Best Tips Read More »

Sofa Cleaning: From Simple Vacuuming to Deep Stain Removal

Sofa Cleaning: From Simple Vacuuming to Deep Stain Removal A clean sofa is fundamental to a clean home. Over time, this central piece of furniture collects dust, allergens, food crumbs, and body oils that degrade the fabric and affect indoor air quality. Regular cleaning preserves the sofa’s appearance, extends its lifespan, and keeps the living space healthier for your family. Before any cleaning begins, identify your sofa’s material and check the manufacturer’s care tag, usually found under the cushions. Decode the Care Tag Before You Clean Most sofas carry a cleaning code. The code W means water-based cleaners are safe. S means only a solvent-based, water-free cleaner should be used. WS or SW means either works. An X code means the fabric should only be vacuumed; no water or solvents at all. Following these codes prevents irreversible damage like discoloration and shrinkage, and if the tag is missing, spot-test your chosen solution on a small, inconspicuous area first. Care code Meaning Example products W Water-based cleaners are safe Mild dish soap with warm water S Solvent-based cleaner only Dry-cleaning solvent, no water WS or SW Water-based or solvent-based Either type, test first X Vacuum only Upholstery brush attachment Start with a Thorough Vacuum The first step in any sofa cleaning routine is vacuuming with an upholstery attachment and crevice tool. Remove all cushions, vacuum the base of the sofa, and pay close attention to seams and corners where debris gathers. For fabric sofas, loosen dried-on dirt with a stiff brush first. Weekly vacuuming is the key maintenance practice: it prevents the abrasive dirt particles that wear down fabric fibers over time. DIY Deep Cleaning with Natural Mixtures For a fabric sofa with a W or WS code, a small amount of mild dish soap in warm water makes an effective general cleaner, and equal parts white vinegar and water is a popular natural alternative. Test on a hidden spot, apply sparingly with a microfiber cloth, and blot or scrub gently with a soft-bristled brush. Do not oversaturate: excessive moisture can cause water damage, mildew, or water marks. Finish by wiping away soap residue with a clean, damp cloth. Baking soda is a powerful deodorizer. Sprinkle it over the whole sofa, let it sit for 20 to 30 minutes or a few hours, then vacuum it up with a brush attachment. For tougher stains, make a paste of baking soda and a little water, apply it for 15 to 30 minutes, and wipe it away with a damp cloth before blotting dry. Steam Cleaning for a Deep Sanitization Steam cleaning, also known as hot water extraction, injects hot water and cleaning solution into the upholstery, then immediately extracts the dirty water with a powerful vacuum. It dislodges dirt, dust mites, and allergens, making it especially valuable in homes with allergy sufferers, children, or pets. Check the cleaning code first, start with the lowest heat setting, and avoid over-wetting. Professional equipment extracts a higher percentage of moisture, which means faster drying and less risk of mold or mildew. Stain Removal: Act Fast and Blot, Never Rub Addressing spills promptly is the most effective way to stop them becoming permanent. The golden rule is to blot, never rub: rubbing pushes the substance deeper into the fibers and spreads the stain. Use a clean, dry cloth to absorb as much liquid as possible. Water stains: blot with a mix of white vinegar and water. Grease stains: sprinkle cornstarch or baking soda, wait about 30 minutes, then vacuum. Wine or ink: use a commercial upholstery stain remover or a tested DIY mix. Stubborn marks: a baking soda paste, or hydrogen peroxide with dish soap, tested on a hidden area. Different Fabrics, Different Rules Leather sofas should not be cleaned with water-based solutions unless the manufacturer says so. Wipe them with a microfiber cloth dampened with a leather cleaner or mild soap and water, then apply a leather conditioner to prevent drying and cracking. Suede needs a suede brush, brushing in the direction of the nap, and a diluted vinegar and water solution blotted onto stains. Velvet should be treated with a soft brush and no harsh scrubbing. For deep-set stains on delicate fabrics, professional cleaning is the safest option. DIY cleaning works well for routine maintenance and light stains, but the wrong product or technique can cause discoloration, shrinkage, or water rings, and household machines often leave residue that attracts more dirt or leave the fabric overly wet. Professionals identify the fabric type, use industrial-strength extraction with higher temperatures and stronger suction, and can apply fabric protectors against future spills. The CDC’s home cleaning guidance explains how routine cleaning of soft surfaces keeps homes healthier, Health Canada’s household chemical safety page covers safe use and storage of cleaning products, and its mould guidance is worth reading if a sofa ever gets over-wet. After any deep clean, let the sofa air-dry completely, speeding things up with open windows or fans. Never use direct heat like a hairdryer, which can damage some fabrics. Once dry, fluff the fibers with a soft brush. Maintain the result by vacuuming regularly, flipping and rotating cushions, using throws or covers in homes with children and pets, and keeping the sofa out of direct sunlight to prevent fading. Professionals recommend a deep clean at least once a year, and more often with pets or heavy use. Toronto Shine Cleaning can handle that deep clean for you, bonded and insured with a $1,000,000 policy and a $10,000 breakage and surety bond. Call (647) 424-0355, compare our cleaning prices, or book a deep home cleaning that covers upholstery and more. A regular maid service keeps dust from settling in the first place, and we serve all GTA locations. Frequently Asked Questions What do the letters on my sofa care tag mean? W means water-based cleaners are safe, S means solvent-based cleaners only, WS or SW means either type works, and X means vacuum only. Sticking to the code prevents discoloration and shrinkage. If

Sofa Cleaning: From Simple Vacuuming to Deep Stain Removal Read More »