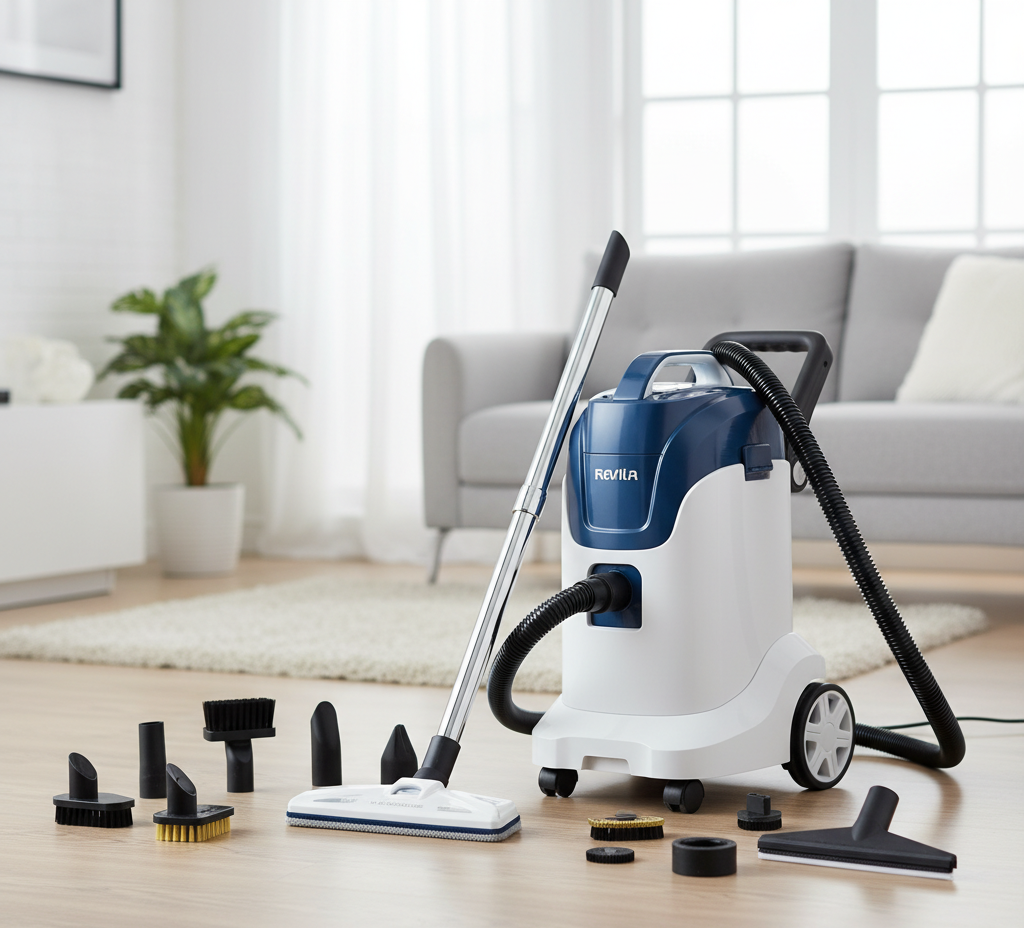
Cleaning Products

curtains and blinds

Cleaning of Blinds and Curtains: Removing the Dust Trapped in Your Curtains and Blinds Before Spring

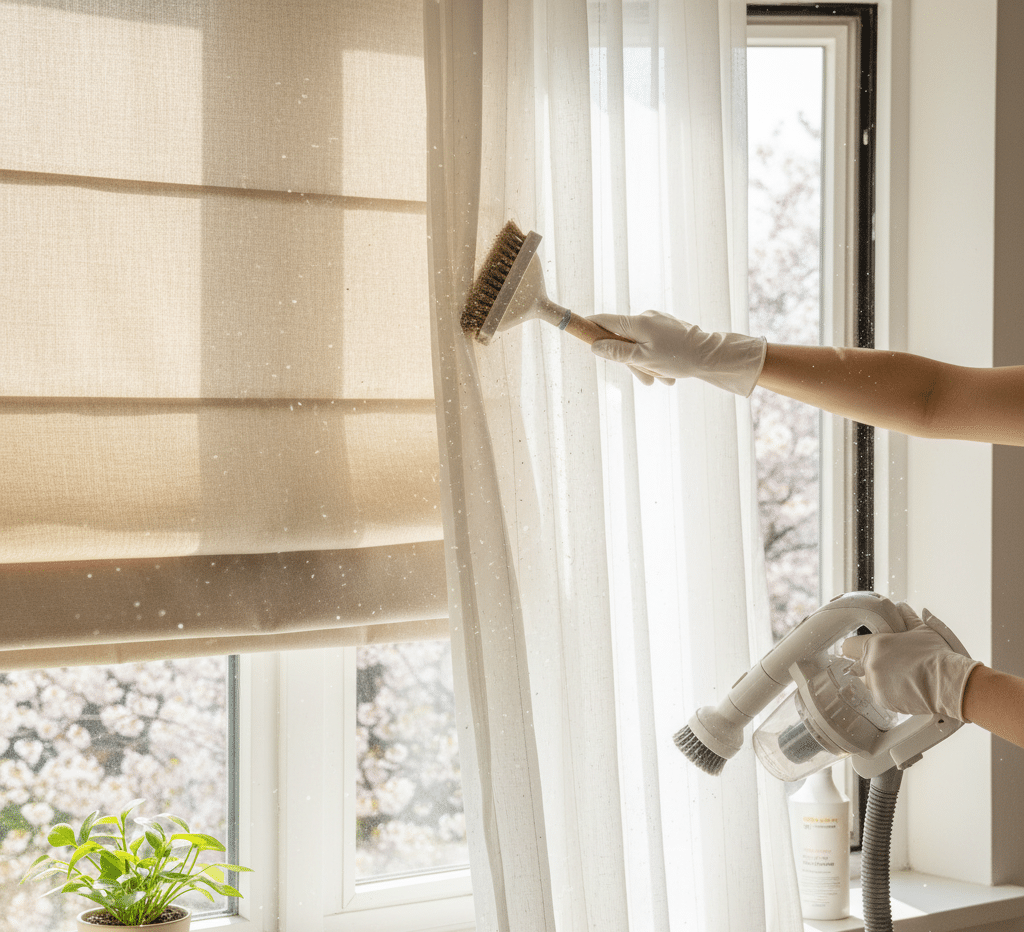
The transition from the depths of winter to the early promise of spring is heralded not by the temperature, which often remains stubbornly freezing, but by the light. In late February and early March, the angle of the sun shifts. The daylight hours extend, and the sun hangs lower in the sky, casting beams that penetrate deeper into our homes than at any other time of year. This returning light is welcome, but it is also unforgiving. It acts as a spotlight, illuminating the layers of grime that have accumulated unnoticed during the dark, cozy months of hibernation. Suddenly, the windows that seemed passable in the dim grey of December are revealed to be coated in a hazy film, the sills are dusty, and the tracks are harboring a grim ecosystem of their own. While it is physically unsafe and logically premature to drag a ladder outside into the slush to wash the exterior glass, this pre-spring period is the ideal window of opportunity to tackle the interior. Internal window maintenance is a critical, yet often neglected, facet of home hygiene that prepares the stage for the warmer days ahead. Indoor Film To understand the necessity of this task, one must first analyze the composition of the “indoor film” that coats the glass. Unlike the exterior dirt, which consists of mud, mineral dust, and bird droppings, the interior grime is a complex chemical cocktail. It is formed by the convergence of daily life in a sealed environment. Every time you cook, microscopic particles of grease and steam become airborne. Every time you light a scented candle or use a fireplace, soot and volatile organic compounds are released. Even the simple act of breathing contributes moisture and biological matter to the air. Over months of closed-window living, these particulates migrate toward the cold surface of the glass, where they condense and bond. This creates a semi-opaque, greasy haze that diffuses light and dulls the view. Standard glass cleaners often fail to cut through this specific type of buildup, simply smearing the oil around and leaving streaks. Removing it requires a degreasing agent—often a solution of water, vinegar, and a drop of dish soap—and the mechanical action of a squeegee or a microfiber cloth to physically lift the residue rather than wipe it back and forth. However, the glass is merely the cosmetic surface of the problem. The true structural and hygienic challenge lies in the window tracks. The horizontal channels that allow your windows to slide open and closed are, effectively, gutters for your home’s interior. Throughout the winter, two things happen in these tracks. First, gravity pulls dust, dead skin cells, and pet dander down from the curtains and the air, where it settles in the grooves. Second, the thermal difference between the cold outdoors and the warm indoors causes condensation to form on the glass. This water runs down the pane and pools in the dust-filled tracks. When dust mixes with stagnant water, it creates a nutrient-rich sludge that is perfect for mold growth. Window Tracks If you look closely at your window tracks in late February, you will likely see a black, crusty substance in the corners. This is a combination of decomposed organic matter—often including dead insects that sought shelter in the fall—and active fungal colonies. Leaving this sludge in place is a health risk. As the sun warms the window, it dries out this mixture, turning it into airborne spores that circulate in the room every time a draft blows through. Cleaning the tracks is a tedious, detailed excavation. It requires a vacuum with a crevice tool to remove the loose debris, followed by the application of a cleaning solution to soften the hardened grime. An old toothbrush or a steam cleaner is often the only tool capable of agitating the dirt out of the tight corners and weep holes. This is not a quick wipe; it is a restoration of the window’s mechanical function and sanitation. Framing this view are the window treatments—the blinds, shades, and curtains—which act as the lungs of the window assembly. Because windows are often the coldest part of the wall, they create convection currents. Warm air rises, hits the cold glass, cools down, and falls. This constant air movement cycles dust through the fibers of your curtains and over the slats of your blinds day and night. Synthetic blinds, in particular, generate a static charge that actively attracts dust particles, coating them in a tenacious grey fuzz that resists simple feather dusting. Curtains act as filters, trapping allergens, cooking odors, and smoke. By the end of winter, they are heavy with this invisible load. Ignoring the window treatments while cleaning the glass is a futile exercise. As soon as you disturb the curtains to open the clean window, you will release a cloud of dust that settles right back onto the pristine glass. The pre-spring protocol demands that textiles be taken down and laundered or professionally dry-cleaned according to their fabric requirements. For blinds, the process is more manual. Each slat must be wiped individually with a damp cloth or a microfiber wand to break the static bond and remove the dust. This is labor-intensive, repetitive work, but the result is a measurable improvement in indoor air quality. Window Sills and Casings The window sills and casings also require inspection and care. In older homes or homes with high humidity, winter condensation can do significant damage to the woodwork. Water that pools on the sill can seep into the paint or the wood grain, leading to rotting, bubbling, or the growth of mildew on the surface. During your cleaning, you must check for soft spots or discoloration. Scrubbing the sills with a mild fungicide or a vinegar solution not only cleans them but also kills the mold spores that thrive in the damp wood. If the paint has cracked, this is the time to sand and touch it up, sealing the wood before the humid air of spring arrives.

Cleaning of Blinds and Curtains: Removing the Dust Trapped in Your Curtains and Blinds Before Spring Read More »

Shower Cleaning Products: The Ultimate Guide to removing Hard Water Stains from Glass Shower Doors

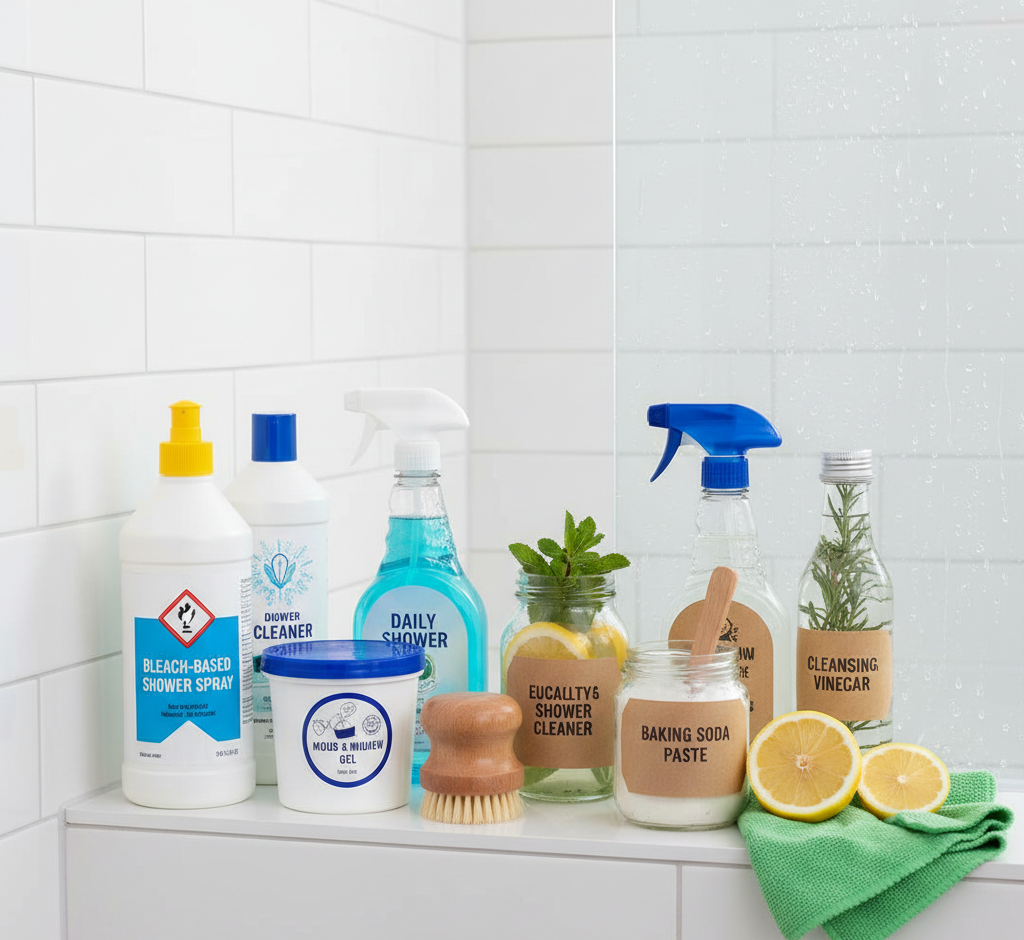
The shower is the most deceptive room in the home. Ideally, it is a pristine sanctuary of hygiene, a tiled box of steam and warmth where we wash away the cares of the day. Functionally, however, it is a biological and chemical battlefield. The shower environment creates a “perfect storm” for filth: high humidity, constant temperature fluctuations, and a steady supply of organic food sources (skin cells, oils) mixed with mineral-heavy water. This combination results in a layered defense system of grime that resists standard wiping. Soap scum, hard water scale, pink bacterial biofilm, and black mold all require different chemical approaches to defeat. Consequently, the aisle of the supermarket dedicated to “shower cleaning products” is often overwhelming, filled with neon bottles promising miracle results without scrubbing. To navigate this aisle effectively, and to actually clean your shower without damaging its surfaces or your lungs, you must understand the chemistry of the mess and the specific function of the chemicals designed to remove it. Acidic Products To choose the right product, you must first identify the primary enemy. In most North American homes, the white, cloudy film on glass doors and the rough texture on tiles is soap scum combined with limescale. Soap scum is chemically fascinating and frustrating; it is calcium stearate, a waxy solid formed when the fatty acids in bar soap react with the calcium and magnesium ions found in hard water. It is essentially waterproof grease. Limescale is purely mineral—calcium carbonate deposits left behind when water evaporates. Because these substances are alkaline (basic) in nature, the cleaning product required to remove them must be acidic. This is the fundamental rule of shower cleaning chemistry: acid dissolves mineral bonds. 1.Acidic Descalers This brings us to the first category of cleaning products: The Acidic Descalers. These are the workhorses for glass, ceramic tile, and chrome fixtures. Products in this category often contain citric acid, lactic acid, or in heavy-duty commercial versions, phosphoric or hydrochloric acid. When you spray these onto a shower door, the acid reacts with the alkaline minerals, breaking them down into soluble salts that can be rinsed away. If you see a product bubbling or fizzing upon contact with the grout or tile, you are witnessing this chemical reaction. These products are essential for restoring the shine to faucets and the transparency to glass. However, they carry a significant risk. Acid eats natural stone. If your shower is lined with marble, travertine, limestone, or slate, using a standard acidic bathroom cleaner will “etch” the stone, dissolving the calcium in the rock itself and leaving dull, rough spots that are permanent. For natural stone showers, you must bypass the heavy-duty descalers and select pH-neutral cleaners specifically formulated for stone, accepting that mechanical scrubbing will be required to do the work that the acid usually does. 2.Bleach-Based Oxidizers The second category tackles the biological threats: The Bleach-Based Oxidizers. While acids handle the minerals, they are often less effective against the living organisms that colonize the damp corners of the shower. The black spots on silicone caulk and the dark stains in the grout lines are fungal. The pink or orange slime around the drain is a bacteria called Serratia marcescens. To kill these, you need a disinfectant. Chlorine bleach (sodium hypochlorite) is the industry standard. Bleach-based sprays work by oxidizing the cell walls of the mold and bacteria, effectively destroying them. They also have a bleaching action that removes the pigment of the stain, making the grout look white again. However, there is a pervasive misconception that bleach “cleans” dirt. It does not. It kills and whitens, but it does not dissolve soap scum or limescale. In fact, if you spray bleach onto a thick layer of soap scum, the mold living underneath the scum will survive because the bleach cannot penetrate the waxy barrier. Furthermore, bleach is not a penetrating agent for porous materials like grout; it often just bleaches the surface mold while the root structure remains alive deep in the cement, leading to rapid regrowth. Therefore, bleach products should be viewed as the second step in a two-step process: first, remove the mineral/soap barrier with a cleaner, then disinfect the surface with a bleach product. 3.Abrasive Cleansers The third category is the Abrasive Cleansers, often found as creams, pastes, or powders. These products rely on physics rather than pure chemistry. They contain micro-particles—often feldspar, limestone, or silica—that physically grind the dirt off the surface. Products like “soft scrub” or scouring powders are exceptionally effective on textured shower floors (like fiberglass or acrylic pans) where dirt gets trapped in the non-slip grooves. They are also the best solution for removing grey metal marks from porcelain or stubborn rings around the drain. The carrier fluid (the cream) usually contains a surfactant (soap) to lift the loosened debris. The danger with abrasives is scratching. Using a coarse powder on a plastic shower wall or a high-gloss acrylic tub can dull the finish over time, creating a rougher surface that actually traps dirt faster in the future. These products require elbow grease and thorough rinsing to prevent a chalky residue from remaining. 4.Enzymatic Cleaners An emerging and highly effective category involves Enzymatic Cleaners. Borrowed from the pet-mess cleanup industry, these products use bio-active enzymes to digest organic matter. In a shower, enzymes can break down the protein and fat structures of body oils, skin cells, and soap residue. They are excellent for maintaining drains and keeping the “funk” out of the shower. While they work slower than acids or bleach—requiring “dwell time” to eat the dirt—they are generally safer for the user and the environment, and they pose no risk to plumbing or septic systems. 5.Daily Shower Spray The “Daily Shower Spray” represents a preventative approach. These products are chemically distinct from deep cleaners. They rely on surfactants and cheating agents (chemicals that bind to minerals) to reduce the surface tension of water. The goal is to make the water sheet off the walls and glass before it can evaporate and leave mineral deposits behind.

Shower Cleaning Products: The Ultimate Guide to removing Hard Water Stains from Glass Shower Doors Read More »

Boots are left at the entrance of the house after arriving outside during the winter.

Cleaning Boots: A Step-by-Step Guide to Deep Cleaning Winter Shoes

February in Canada is the month where winter loses its charm. The picturesque, fluffy snowflakes of December have long since been trampled into a grey, gritty slurry that lines every sidewalk and driveway. The romance of the season is replaced by the harsh reality of logistics. We are no longer walking in a winter wonderland; we are wading through a chemical bath of road salt, calcium chloride, sand, and freezing slush. In this hostile environment, your footwear is the first line of defense. Your boots are subjected to a daily assault that is both physical and chemical. Neglecting them in February is not just an aesthetic oversight; it is a financial error. The corrosive nature of winter road treatments can destroy expensive leather, ruin the waterproof seals of synthetic hikers, and turn stylish suede into a stiff, stained tragedy within weeks. Keeping your footwear clean during the deep freeze is a discipline that requires specific knowledge of materials and chemistry. Road Salt To win the war against February, one must understand the enemy: road salt. Municipalities use a variety of de-icing agents to keep roads safe, but these compounds are highly alkaline. When dissolved in melting snow, they create a brine that soaks into the pores of leather and fabric. As the water evaporates, the salt recrystallizes inside the material. This physical expansion can break fibers, but the chemical reaction is worse. The alkalinity dries out natural oils in leather, leading to the characteristic “salt line”—a white, jagged ridge that forms near the toe box. If left untreated, this line becomes a permanent scar where the leather will eventually crack and split. Therefore, the cleaning process is not just about removing dirt; it is about neutralization. The most effective weapon in your arsenal is likely already in your kitchen pantry: white vinegar. Because salt stains are alkaline, they require an acid to dissolve them. A mixture of one part water to one part white vinegar creates the perfect pH-balanced solution. When you come home and see that white haze forming on your leather boots, dip a soft cloth into this solution and gently wipe the surface. You are not scrubbing; you are wiping. The vinegar dissolves the salt bonds, allowing you to lift the mineral deposits away. It is crucial to do this while the boots are still damp or immediately after they dry. Once the salt has sat for weeks, the damage to the collagen fibers of the leather is often irreversible. Leather Conditioner However, vinegar is a stripping agent. While it removes the salt, it can also remove some of the leather’s natural moisture. This leads to the second, often skipped, step of the February protocol: conditioning. Winter air is incredibly dry, and when combined with the chemical assault of salt, leather becomes thirsty. After cleaning salt stains, you must replenish the oils. Using a high-quality leather conditioner, mink oil, or a beeswax-based balm is essential. This does two things: it keeps the leather supple, preventing cracking at the flex points (where your toes bend), and it creates a hydrophobic barrier that repels the next onslaught of slush. Think of it as moisturizing your hands after washing them; the skin of the boot needs the same care. Suede and nubuck footwear present a more delicate challenge. These materials are essentially leather that has been sanded to create a nap. They act like a sponge for slush. The “vinegar trick” can still be used on suede, but it must be applied with extreme caution to avoid matting the fibers. A better approach for suede in February is mechanical cleaning. A suede eraser (or a standard white pencil eraser) can be used to rub away dried dirt and salt crusts. Following this, a stiff suede brush is mandatory to fluff the nap back up. If suede gets soaked, stuffing the boots with newspaper immediately is critical to help them retain their shape as they dry. Never, under any circumstances, place suede (or leather) boots near a radiator or heat vent to speed up the drying process. The intense, direct heat will cause the material to shrink and harden rapidly, destroying the fit and the finish. Technical Winter Boots For those wearing synthetic, technical winter boots—the heavy-duty “pac boots” with rubber lowers and nylon uppers—the maintenance is different. The rubber shells are impervious to salt damage but can develop a white, chalky film that looks unsightly. A simple scrub with dish soap and warm water is usually sufficient here. The real issue with technical boots is the nylon or fabric upper. These are often treated with a Durable Water Repellent (DWR) coating. Over time, salt and dirt mask this coating, causing the fabric to “wet out” (absorb water) rather than shed it. If you notice your nylon boots getting dark and heavy with moisture, they need to be cleaned and then re-sprayed with a waterproofing spray designed for synthetic fabrics. This restores the beading effect and keeps your feet dry. We must also address the interior of the boot. In February, we wear thick wool socks and traverse freezing streets, only to enter heated offices or malls. This temperature fluctuation causes feet to sweat. The interior of a winter boot is a dark, damp, warm environment—the perfect incubator for bacteria and fungi. A boot that looks clean on the outside but smells like a locker room on the inside is a failure of maintenance. If your boots have removable liners (felt or foam), pull them out every Friday evening. Let them air dry completely over the weekend. If they are washable, launder them. If not, a spray of fabric disinfectant or a sprinkle of baking soda can neutralize the odors. A boot dryer—a device that gently circulates slightly warm air into the boot—is a worthwhile investment for any Canadian household, ensuring you start every morning with dry, warm feet. Boot Tray The logistics of the entryway play a massive role in keeping footwear clean. You cannot keep your boots clean

Cleaning Boots: A Step-by-Step Guide to Deep Cleaning Winter Shoes Read More »

Fabric Softener Sheets: 5 Things You Should Never Put in the Dryer with a Softener Sheet

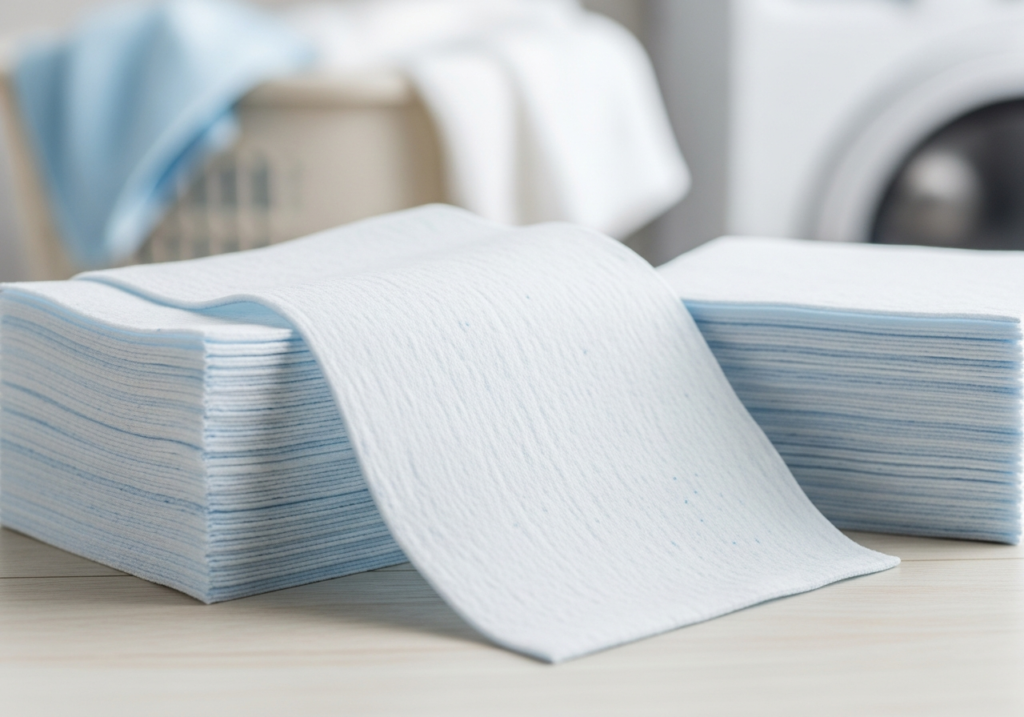
Fabric softener sheets, commonly known as dryer sheets, have become a staple of the modern household, synonymous with the concept of “freshness.” We are conditioned to believe that our clothes are not truly clean unless they emerge from the machine smelling of “Mountain Rain” or “Lavender Fields,” free of static and soft to the touch. However, this convenience product is often the subject of misunderstanding. While they solve specific problems—namely static cling and roughness—they introduce a layer of chemical complexity to our textiles and appliances that can have unintended consequences. To use them effectively, one must look past the marketing and understand the mechanics of how a dryer sheet actually works, what it leaves behind, and when it should be strictly avoided. How Does it Work? To comprehend the function of a dryer sheet, you must visualize it not as a cleaning agent, but as a delivery system. The sheet itself is merely a carrier, usually made of a synthetic non-woven fiber. It is coated in a heat-activated compound, typically comprised of stearic acid (a fatty acid often derived from animal fats), clay fillers, and heavy fragrances. In the cool air of the laundry room, this coating is solid. However, once introduced to the high heat of the dryer cycle, this waxy layer melts. As the wet clothes tumble, the sheet makes repeated contact with the fabrics, transferring this liquefied coating onto the fibers of your clothing. It is, in essence, a process of lubrication. The primary and most functional benefit of this coating is the elimination of static electricity. Static is the bane of the laundry process, particularly in the dry winter months or in climates with low humidity. It occurs when synthetic fabrics like polyester and nylon rub against each other in the dry heat, exchanging electrons and building up an electrical charge. This results in clothes that cling to the body, crackle when separated, and attract dust and hair. The coating provided by the dryer sheet contains positively charged ions. These ions neutralize the negative charge created by the tumbling fabrics, effectively canceling out the static. For households that wear a significant amount of synthetic clothing, this antistatic property is not just a luxury; it is a necessity for wearable garments. Beyond physics, there is the tactile and olfactory appeal. The fatty acids in the coating reduce the friction between individual fibers. This makes rough fabrics, such as denim or air-dried cotton, feel significantly softer and more pliable against the skin. Simultaneously, the heat activates the encapsulated fragrance molecules, embedding them into the weave of the cloth. This scent lingers far longer than detergent fragrance because it is applied at the end of the process and is not rinsed away. For many, this lingering scent is the primary indicator of hygiene, a sensory signal that the laundry chore is complete. Disadvantages However, the mechanism that provides these benefits—the coating of the fiber—is also the source of the product’s significant downsides. The most detrimental effect of dryer sheets is on absorbency. The waxy layer that makes a fabric feel soft is hydrophobic, meaning it repels water. When you use dryer sheets on bath towels, you are essentially waterproofing them. Over time, the buildup of these fatty acids coats the loops of the terry cloth. You end up with a towel that feels plush to the touch but merely pushes water around on your skin rather than soaking it up. To restore a towel’s absorbency, one often has to strip the fabric using vinegar and hot water to melt away the accumulated softener residue. This blocking of the fiber’s pores is even more catastrophic for modern athletic wear. Performance fabrics are engineered with a specific synthetic weave designed to wick moisture away from the body and allow it to evaporate quickly. This is a mechanical function of the textile. When you dry yoga pants or running shirts with a fabric softener sheet, the residue fills the micropores of the fabric. This traps sweat, dead skin cells, and bacteria inside the weave. The result is twofold: first, the garment loses its ability to wick sweat, leaving you clammy during a workout; second, it develops a “perma-stink.” Because the bacteria are trapped under a layer of silicone or wax, the detergent cannot reach them in the next wash. The clothes begin to smell musty even when they are technically clean. Manufacturers of high-end athletic gear almost universally advise against the use of softeners for this reason. Security There is also a safety concern regarding the flammability of textiles. Children’s sleepwear is legally required to be flame-resistant. This is achieved either through the use of specific synthetic fabrics or chemical treatments. The coating left by dryer sheets, being derived from emulsified fats and oils, is inherently flammable. Coating flame-resistant pajamas in a layer of flammable residue reduces their resistance to fire. Most dryer sheet boxes carry a warning label advising against use on children’s sleepwear or garments labeled as flame-resistant, yet many consumers overlook this fine print, unknowingly compromising the safety features of the clothing. The impact on the dryer itself is a “hidden cost” of dryer sheet usage. As the chemical coating melts, it does not only transfer to the clothes; it transfers to the drum and the filtration system of the machine. The most critical area of concern is the lint trap. The screen of the lint trap is designed to catch fine particles while allowing hot, moist air to pass through. Over time, the invisible waxy film from dryer sheets can coat the mesh of the screen. This blockage is often invisible to the naked eye. The screen looks clean, but air cannot pass through it efficiently. This forces the dryer to work harder, increasing energy bills and the risk of the motor overheating. A simple test is to take the lint screen to the sink and run water over it. If the water pools and beads up rather than flowing through the mesh, the screen is clogged

Fabric Softener Sheets: 5 Things You Should Never Put in the Dryer with a Softener Sheet Read More »

How to Clean a Burnt Pot

How to Clean a Burnt Pot: 5 Methods to Save Your Cookware

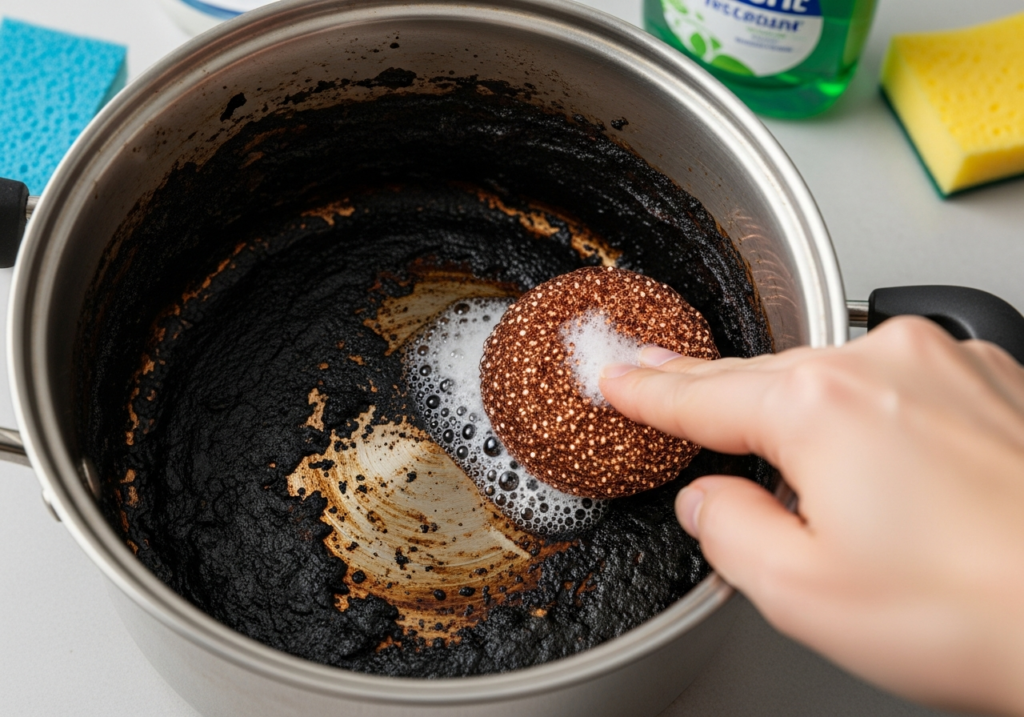
The culinary disaster of a burnt pot is a universal experience that transcends skill level. It usually happens in a split second of distraction; you turn your back to chop parsley or answer a text message, and suddenly the kitchen is filled with acrid smoke and the sinking realization that your dinner is ruined. However, the greater tragedy often follows the meal, when you are left staring at a piece of cookware coated in a thick, black, carbonized crust that seems fused to the metal at a molecular level. The instinct to throw the pot away is strong, but it is almost always unnecessary. High-quality cookware is resilient, designed to withstand high heat and abuse. With the right application of chemistry, patience, and mechanical force, even the most hopelessly scorched vessel can be restored to its former glory. Metal Scouring Pad The first step in salvaging a burnt pot is to suppress the urge to attack it immediately with a metal scouring pad. While abrasive force has its place, using it prematurely simply results in exhaustion and a scratched surface. You must first understand the material you are working with, as the cleaning protocol for stainless steel differs vastly from that of cast iron, enamel, or non-stick surfaces. Stainless steel is the most forgiving, able to withstand acidic solvents and heavy scrubbing. Enamel, like that found on Dutch ovens, is glass fused to metal and can crack or scratch if treated too roughly. Non-stick coatings are the most fragile; once the coating is compromised by a burn or a scratch, the pan is effectively dead. Cast iron, conversely, is virtually indestructible but requires a specific method to avoid stripping its seasoned finish. Identifying the metal dictates the method. Stainless Steel For the most common victim—the stainless steel pot—the most effective first line of defense utilizes thermal shock and solubility. This is essentially the culinary technique of deglazing, applied for cleaning purposes. If the pot is still hot, pour a cup of water into it immediately. The water will boil violently, turning to steam. This rapid phase change helps to lift the fond—or in this case, the char—from the bottom of the pot. Use a wooden spoon to scrape the bottom while the water boils. Often, this simple step removes the bulk of the disaster. If the pot has already cooled, fill it with water and a healthy squirt of dish soap, bring it to a boil on the stove, and let it simmer for ten minutes. The heat softens the carbonized sugar and protein matrix, turning the concrete-like crust into a sludge that can be poured away. 1.Vinegar and Baking Soda If boiling water is insufficient, we must turn to basic kitchen chemistry: the reaction between an acid and a base. This method is particularly effective for stubborn, black crusts on stainless steel. Cover the bottom of the pot with a generous layer of baking soda. Then, pour white vinegar over the powder. The mixture will fizz aggressively as it releases carbon dioxide. This chemical agitation helps to break the bonds between the burnt food and the metal. Once the fizzing stops, the mixture settles into a neutral solution. However, the real power comes from the dwell time. Top the pot up with hot water and let it sit for several hours, or preferably overnight. By the next morning, the alkalinity of the baking soda will have weakened the organic structure of the burnt food, allowing it to be scrubbed away with a standard sponge. 2.Laundry Staple For burns that have defied both heat and chemistry, there is a surprising hack involving a laundry staple: the dryer sheet. This method works exceptionally well on casserole dishes and stainless steel pots. Place a new dryer sheet in the bottom of the burnt pot and fill it with warm water. Press the sheet down so it is submerged and leave it for an hour. The conditioning agents in the dryer sheet—designed to soften fabric fibers—act as surfactants that reduce the surface tension of the water and loosen the bond of the burnt food. It turns the crust into a soft layer that slides right off. While this method requires a thorough washing afterward to ensure no laundry chemicals remain, it is remarkably effective for saving elbow grease. 3.Oxalic Acid There comes a point, however, where household pantry items fail. This usually occurs with polymerized oil stains—those brown, sticky spots that turn black and hard, often found on the sides of the pot or the bottom exterior. For this, you need a specialized abrasive containing oxalic acid. Products like Bar Keepers Friend are the gold standard for this. Oxalic acid attacks the rust and oxidation on a molecular level while the micro-abrasives polish the surface. Make a paste with the powder and a little water, apply it to the burnt area, and let it sit for a minute—but no longer, as it can etch the metal. Then, scrub. This is the only method that will restore the mirror-like shine to stainless steel and remove the rainbow-colored heat tint that often accompanies a high-heat disaster. Cast Iron Cast iron requires a completely different philosophy. You cannot boil water in it for long periods, and you generally want to avoid soaking it in soap, as this risks rust and stripping the seasoning. The best method for a burnt cast iron skillet is the salt scrub. Pour a cup of coarse kosher salt into the pot while it is still warm (but not hot enough to burn you). Use a folded paper towel or a dedicated rag to scour the salt into the iron. The salt acts as a hard abrasive that grinds away the char without damaging the metal. It also absorbs the excess grease. Once the salt turns black and the pot feels smooth, dump it out, rinse quickly with hot water, dry thoroughly over a flame, and apply a thin coat of oil. If the burn is truly catastrophic—meaning the food is

How to Clean a Burnt Pot: 5 Methods to Save Your Cookware Read More »

Fabric Softener vs. Vinegar: Which is Better for Your Laundry?

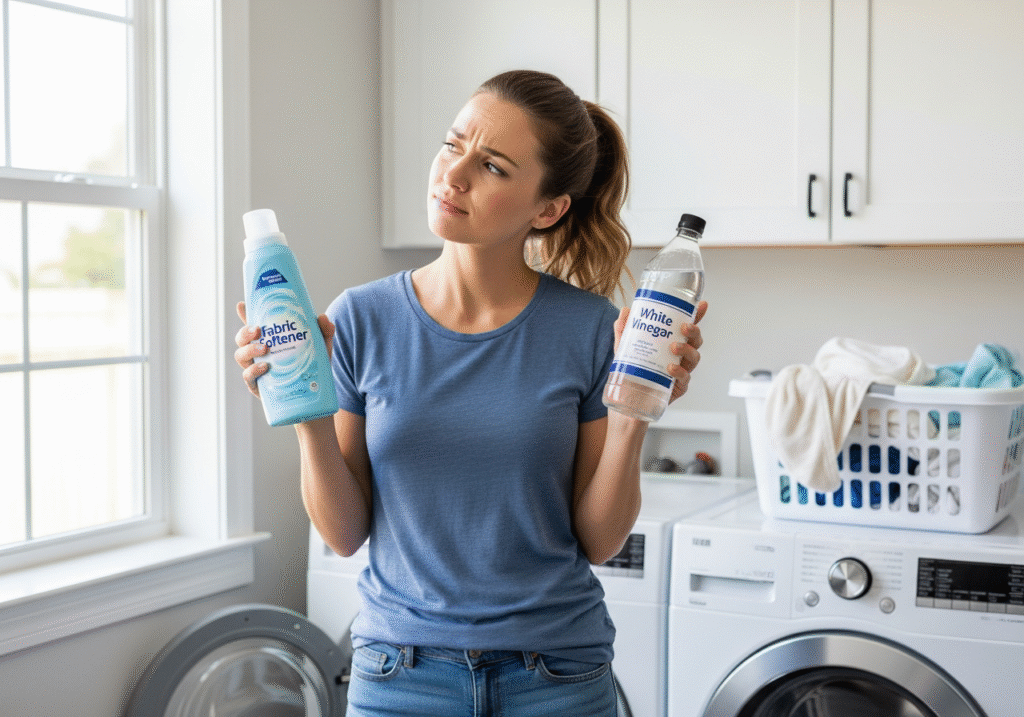
Fabric softener has become synonymous with the concept of “clean” for millions of households. We are conditioned to believe that clothes are not truly finished until they are perfumed with “ocean breeze” or “lavender fields” and feel silky to the touch. However, this staple of the laundry room is currently the subject of a significant debate in the world of textile care and appliance maintenance. While the immediate sensory benefits of fabric softener are undeniable, the long-term chemical effects on your wardrobe and your washing machine tell a more complicated story. To make an informed decision about whether to use these products, one must understand that fabric softener is not a cleaning agent; it is a conditioning agent that operates by coating fibers in a specific type of chemical residue. How Does Fabric Softener Work? To understand the pros and cons, we must first understand the mechanism of action. When you wash clothes, the agitation and the detergents strip away oils and dirt, leaving the fibers clean but often stripped of their natural lubricity. Furthermore, the mechanical action of the wash can leave natural fibers like cotton feeling rough or stiff, especially in areas with hard water where mineral deposits settle on the fabric. Fabric softeners are composed primarily of cationic surfactants. These are positively charged chemical molecules. Wet fabric fibers are generally negatively charged. Due to electrostatic attraction, the softener molecules bind tightly to the surface of the fabric, creating a thin, lubricating layer of fatty acids or silicones. It is essentially a layer of wax that stays on your clothes after the rinse cycle. The primary argument for the use of fabric softener is, naturally, the tactile improvement. For natural fibers like cotton and linen, which can become harsh and scratchy after repeated washing, softener restores a feeling of plushness. This is particularly noticeable with bedsheets and everyday clothing like t-shirts. The lubricating layer reduces friction between the individual fibers within the thread, allowing them to move against each other more freely. This results in a fabric that drapes better and feels smoother against the skin. For individuals with sensitive skin that is easily irritated by rough textures, this softening effect can make the difference between a comfortable garment and an unwearable one. Static Electricity Beyond the feel, there is the issue of static electricity. Static cling is a common annoyance, particularly in the winter months when the air is dry. Synthetic fabrics like polyester and nylon are prone to building up electrical charges as they tumble against each other in the dryer. The coating provided by fabric softeners and dryer sheets is conductive, which helps to neutralize these charges and prevent the fabrics from sticking together or sparking. If you live in a dry climate or wear a lot of synthetics, the anti-static properties of softener are a significant functional benefit that saves you from the embarrassment of a skirt clinging to your legs. The aesthetic appeal of fragrance is another massive driver of softener use. Laundry detergents often have scents that wash away or fade quickly. Fabric softeners are engineered with encapsulation technology, where fragrance molecules are trapped in microscopic bubbles that burst when the fabric is rubbed or moved. This ensures that the scent lingers for days or even weeks after the wash. For many, this lingering scent is the primary indicator of hygiene. A home that smells like fresh laundry is perceived as a clean home, and softener is the easiest way to achieve that olfactory standard. Additionally, the lubricating effect of the softener can help reduce wrinkling, making ironing easier or, in some cases, unnecessary for casual clothing. Absorption However, the very mechanism that provides these benefits—the coating of the fibers—is the source of the product’s significant downsides. The most detrimental effect of fabric softener is on absorbency. The waxy layer that makes a towel feel soft also makes it hydrophobic, meaning it repels water. When you use softener on bath towels, you are essentially waterproofing them. Over time, the buildup of these fatty acids coats the loops of the terry cloth. You end up with a towel that feels plush to the touch but merely pushes water around on your skin rather than soaking it up. This defeat of the towel’s primary function is a major drawback. To restore a towel’s absorbency, one often has to strip the fabric using vinegar and hot water to melt away the accumulated softener. This blocking of the fiber’s pores is even more catastrophic for modern athletic wear. Performance fabrics are engineered with a specific weave designed to wick moisture away from the body and allow it to evaporate quickly. This is a mechanical function of the textile. When you wash yoga pants or running shirts with fabric softener, the residue fills the micropores of the fabric. This traps sweat, dead skin cells, and bacteria inside the weave. The result is twofold: first, the garment loses its ability to wick sweat, leaving you clammy during a workout; second, it develops a “perma-stink.” Because the bacteria are trapped under a layer of silicone or wax, the detergent cannot reach them in the next wash. The clothes begin to smell musty even when they are technically clean. Manufacturers of high-end athletic gear almost universally advise against the use of softeners for this reason. Children’s Clothing The flammability of textiles is another serious safety concern that is often overlooked. Children’s sleepwear is legally required to be flame-resistant. This is achieved either through the use of specific synthetic fabrics or chemical treatments. Fabric softener, being derived from emulsified fats and oils, is inherently flammable. Coating flame-resistant pajamas in a layer of flammable residue reduces their resistance to fire. Most fabric softener bottles carry a warning label advising against use on children’s sleepwear or garments labeled as flame-resistant, yet many consumers pour it into every load indiscriminately, unknowingly compromising the safety features of the clothing. The impact on the washing machine itself is a “hidden cost” of fabric softener usage.

Fabric Softener vs. Vinegar: Which is Better for Your Laundry? Read More »

Mugs, Thermal Bottles, and Travel Mugs

3 Smart and Effective Ways to Clean Mugs, Thermal Bottles, and Travel Mugs

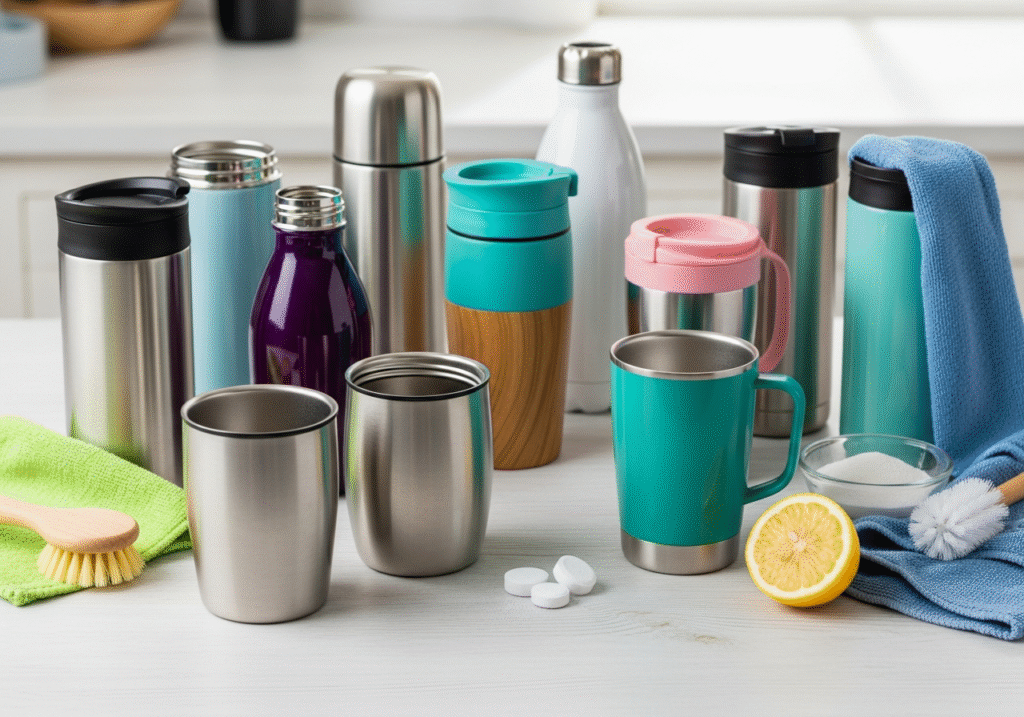
The daily ritual of a morning coffee or an afternoon tea is a simple comfort, centered around a favorite mug or a trusted thermos. These vessels are constant companions, yet over time, they begin to show the signs of their service. A once-pristine white ceramic interior develops a stubborn brown film, and the clean, metallic sheen of a stainless steel thermos becomes dull and stained. A faint, stale odor might begin to linger, tainting the taste of a fresh brew. Standard washing with soap and water often proves futile against this gradual buildup, leaving behind a frustrating residue that seems impossible to remove. Restoring these daily essentials to their original, pristine state requires a deeper understanding of the stains and a more targeted approach to cleaning. Rinse Immediately The foundation of maintaining any mug or thermos is the immediate rinse. As soon as you finish your beverage, giving the vessel a quick but thorough rinse with hot water removes the majority of the liquid residue before it has a chance to dry and set into a stain. This single, simple habit can dramatically reduce the frequency and intensity of deep cleaning required. For daily washing, a soft sponge or a dedicated bottle brush with a non-scratch head, combined with a small amount of mild dish soap and warm water, is perfectly sufficient. It is crucial to avoid abrasive tools like steel wool or harsh scouring pads, especially on ceramic mugs with printed designs or on the interior of insulated thermoses, as these can create microscopic scratches that will paradoxically hold onto stains even more tenaciously in the future. While many ceramic and glass mugs are dishwasher safe, most insulated thermoses and travel mugs are not. The high heat and harsh detergents of a dishwasher can damage the vacuum seal that is essential for insulation, and can degrade the rubber or silicone gaskets in the lid, causing them to leak. Always check the manufacturer’s instructions, but when in doubt, hand washing is the safest and most effective method. When the daily wash is no longer enough to combat the brown film left by the tannins in coffee and tea, it is time to employ more powerful, yet simple, household remedies. The first and most gentle of these is baking soda. Its power lies in its nature as a mild alkali and a very fine, gentle abrasive. To clean a stained mug or thermos, simply sprinkle about a tablespoon of baking soda into the bottom. Add just enough warm water to form a thick paste, similar in consistency to toothpaste. Using a soft cloth or a sponge, scrub this paste around the interior of the vessel, concentrating on the stained areas. The fine particles will gently lift the set-in stains from the surface without scratching. For a deeper clean, let the paste sit in the mug for twenty to thirty minutes before scrubbing and rinsing thoroughly. The baking soda not only removes stains but is also a fantastic natural deodorizer, absorbing any stale coffee smells that have lingered. Homemade Combination For thermoses or bottles with narrow openings where a sponge cannot easily reach, a more mechanical cleaning method is highly effective. A combination of coarse salt and either crushed ice or lemon wedges can work wonders. Pour a few tablespoons of coarse salt—like kosher or sea salt—into the empty thermos. If using ice, fill the thermos about a quarter of the way with crushed ice. If using lemon, add a few thickly sliced wedges. Seal the lid tightly and shake the thermos vigorously for several minutes. The coarse salt acts as a powerful abrasive, scouring the interior walls, while the ice or lemon wedges help to agitate the salt and reach every corner. The acid in the lemon also provides an additional chemical cleaning and deodorizing boost. After shaking, empty the contents and rinse the thermos thoroughly with hot water to remove all traces of salt.   Another powerful tool is white vinegar, a mild acid that is excellent at dissolving both organic stains and mineral deposits. If your mugs suffer from hard water spots or a chalky film in addition to coffee stains, vinegar is the ideal solution. To use it, fill the mug or thermos about halfway with white vinegar and top it off with hot water. Let this solution soak for at least an hour, or even overnight for the most stubborn, set-in stains. The acetic acid will work to break down and dissolve the buildup. After the soak, pour out the solution and wash the vessel as usual with soap and water, using a bottle brush to scrub away any remaining loosened particles. The initial smell of vinegar will be strong, but it dissipates completely after a thorough rinse, leaving the interior fresh and odor-free. Denture Cleaning Tablets A surprisingly effective and effortless method for deep cleaning involves a product found in the dental care aisle: denture cleaning tablets. These tablets are specifically designed to remove tough stains and kill odor-causing bacteria in a gentle, non-abrasive way. Their effervescent, fizzing action is what makes them so effective. To use them, simply drop one or two tablets into your mug or thermos, fill it with warm water, and let it sit. The tablet will begin to fizz, creating a powerful cleaning solution that lifts the brown film from the surface with minimal effort. After about thirty minutes, or whenever the fizzing stops, pour out the water and give the interior a light scrub with a bottle brush before rinsing it thoroughly. This method is particularly useful for complex travel mug lids and the hard-to-reach bottoms of tall thermoses. Speaking of thermoses and travel mugs, the lid is often the true culprit behind persistent odors and a less-than-clean experience. These lids are marvels of engineering, designed to be leak-proof with complex mechanisms involving push-buttons, sliders, and multiple silicone or rubber gaskets. This complexity, however, creates countless tiny crevices where old coffee, cream, and sugar can become trapped. Over time,

3 Smart and Effective Ways to Clean Mugs, Thermal Bottles, and Travel Mugs Read More »

Sticker Removal

Sticker Removal: 5 Expert Tips For Removing Stickers From Different Types of Surfaces

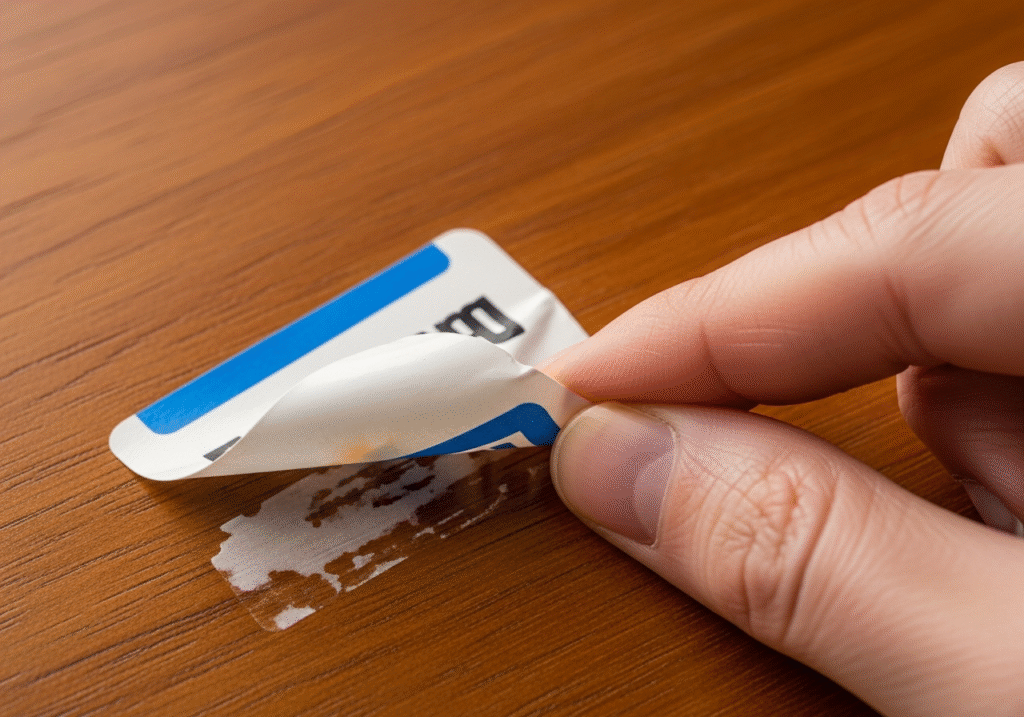
The presence of a sticker on a newly purchased item is one of the most baffling contradictions in modern retail. We buy a beautiful glass vase, a sleek stainless steel appliance, or a handcrafted wooden picture frame because we admire its aesthetic qualities. Yet, directly across the face of this pristine object, the manufacturer or the retailer often places a price tag or a brand decal using an adhesive that seems engineered to survive atmospheric reentry. The attempt to remove it usually results in one of two tragedies: the paper tears, leaving a fuzzy, white layer of impossible-to-remove strata, or the sticker comes off but leaves behind a gummy, sticky residue that attracts dust and turns grey within days. Mastering the removal of stickers is not just about having strong fingernails; it is a lesson in chemistry and material science. To defeat the adhesive, one must understand the nature of the bond and select the correct solvent or mechanical agent to break it without destroying the substrate beneath. Heat up The first rule of sticker removal is to resist the urge to scrape immediately. When we see a sticker, our instinct is to pick at the corner. While this works for the rare, low-tack adhesive, it is usually a trap. By picking at the sticker, you often separate the top layer of paper or plastic from the adhesive layer below. Once that top layer is gone, you lose your leverage. You are left with the adhesive exposed, which is infinitely harder to remove than when it was attached to the label. Therefore, the removal process should begin with preparation, not aggression. The method you choose must be dictated entirely by the surface the sticker is on. What works for a glass jar will ruin a wooden table, and what saves a hardcover book will melt a plastic laptop case. For the vast majority of stickers, particularly those on hard, non-porous surfaces like glass, ceramic, or metal, heat is the most effective and least damaging first line of defense. The adhesive used on stickers is typically a polymer that exists in a semi-solid state. When heated, these polymers soften and become more viscous. A standard hair dryer is the tool of choice here. Set the dryer to medium heat and hold it a few inches away from the sticker for about forty-five seconds to a minute. You are not trying to scorch the item; you are trying to warm the glue. Once heated, the adhesive loosens its grip on the surface and adheres more tightly to the sticker backing. If you lift the corner slowly while applying heat, the sticker often peels away in one satisfying, clean sheet. This method is particularly crucial for removing decals from car bumpers or stickers from laptops, where liquid solvents might cause damage to the paint or internal electronics. Oil However, heat has its limits. On certain plastics, high heat can warp the material. On items where the adhesive has cured for years—such as a price tag on a thrift store find—heat might not be enough to reactivate the dried-out glue. In these instances, we must turn to chemistry. The principle of “like dissolves like” is the guiding star of adhesive removal. Most sticker adhesives are lipid-based or rubber-based. Therefore, oil is a potent solvent. This is why common pantry items like cooking oil, olive oil, or even peanut butter are legendary sticker removers. The fats in the oil seep through the paper of the sticker (or around the edges if it is plastic) and mix with the adhesive, essentially diluting it until it loses its stickiness. To use this method effectively, one must score the surface of a paper sticker to allow the oil to penetrate, apply a generous layer of oil, and let it sit. Patience is the active ingredient. After twenty minutes, the sticker should slide off, leaving an oily residue that can be easily washed away with soap and water. This method is exceptionally safe for glass and reactive plastics but should be avoided on unsealed wood or porous stone, which will absorb the oil and stain permanently. Alcohol For surfaces where oil is not an option, or for stubborn residues that oil cannot touch, alcohol is the next tier of escalation. Isopropyl alcohol, commonly known as rubbing alcohol, is a solvent that breaks down the chemical bonds of the adhesive. It dries instantly, making it safe for electronics (when applied to a cloth, not sprayed directly) and unfinished surfaces that cannot get wet. It is particularly effective on the gummy residue left behind after a sticker has been peeled off. A microfiber cloth dampened with alcohol acts as an eraser for this goop. However, caution is required. Alcohol can act as a paint thinner. If used on certain painted surfaces or varnished wood, it can strip the finish along with the sticker. A spot test in an inconspicuous area is always mandatory before attacking the main stain. There is a specific category of stickers that creates a unique nightmare: the plastic-coated or laminated label. These are waterproof, meaning that oil, water, and vinegar cannot penetrate them from the top. To remove these, you must attack from the edges or compromise the surface. This is where mechanical removal tools come into play. A plastic razor blade or a specialized scraper is infinitely superior to a metal razor blade or a fingernail. Metal blades scratch glass and gouge plastic. A plastic scraper is harder than the adhesive but softer than the substrate. It allows you to get under the rim of the label and apply the necessary lifting force. For glass windows, a metal razor blade held at a precise forty-five-degree angle is permissible and effective, provided the glass is wet to provide lubrication, but this requires a steady hand to avoid scratching. Vinegar Vinegar, specifically white distilled vinegar, offers a different chemical approach. It is acidic. For old, dried-out masking tape or stickers on windows that have been baked by

Sticker Removal: 5 Expert Tips For Removing Stickers From Different Types of Surfaces Read More »

Woman using a squeegee in the bathroom to prevent mold.

Preventing Shower Mold: Daily Habits You Should Adopt to Fight Fungi

The bathroom is intended to be a sanctuary of hygiene, a bright and tiled space where we wash away the grime of the day. However, this room is also the site of a relentless biological siege. The combination of high humidity, warmth, and organic matter creates an environment that is hostile to cleanliness but perfectly suited for the growth of fungi. The appearance of dark, fuzzy spots on the grout or a slimy film on the tiles is not just an aesthetic failure; it is the arrival of shower mold. This invader is tenacious, unsightly, and potentially hazardous to your health. Unlike the dust in a living room that sits passively on a shelf, shower mold is a living organism that eats into the surfaces of your home. Removing it requires more than just a quick wipe; it demands a strategic understanding of what allows it to thrive and the chemical weapons necessary to destroy it at the root. Fungi To effectively combat this enemy, one must first understand what shower mold actually is. It is a fungus that reproduces by releasing microscopic spores into the air. These spores are everywhere, floating dormant until they find a hospitable surface. In a bathroom, they find everything they need: moisture from the steam, low light, and a food source. The food source for shower mold is often the soap scum, dead skin cells, and body oils that accumulate on the walls and floor. When you see a colony establishing itself, you are witnessing a complex biological system that has taken root in the porous materials of your washroom. Ignoring shower mold allows it to spread rapidly, moving from the surface of the tile into the drywall and insulation behind it, where it can cause structural damage that costs thousands to repair. What does mold look like? A common point of confusion arises between true shower mold and the pinkish-orange slime that often appears around drains and shampoo bottles. This pink substance is technically not a mold; it is a bacterium known as Serratia marcescens. While it thrives in the same damp conditions as shower mold, it is generally easier to clean. True shower mold is usually black, dark green, or brown, and it possesses a root structure known as hyphae. These roots dig deep into porous surfaces like grout and silicone caulk. This is why you can scrub a black spot until it disappears, only to see the shower mold return in the exact same spot three days later. You removed the visible “bloom,” but you left the roots alive and intact beneath the surface. Bleach The instinct for most homeowners when faced with shower mold is to reach for a bottle of chlorine bleach. There is a pervasive belief that bleach is the ultimate fungicide. This is a dangerous misconception. Bleach is highly effective at killing surface mold on non-porous materials like glass or glazed tile. However, on porous surfaces like grout and caulk, bleach cannot penetrate deep enough to reach the roots of the shower mold. Instead, the chemical structure of bleach prevents it from soaking in. It effectively bleaches the color out of the mold, making it invisible, but it leaves the root structure alive. Furthermore, the water component of the bleach solution soaks into the grout, actually feeding the roots that remain. The shower mold then regenerates, often coming back stronger and more resistant than before. Vinegar For a truly deep kill, the chemistry must be different. White distilled vinegar is often a superior weapon against shower mold in porous areas. Vinegar is a mild acid that penetrates porous materials. It does not just bleach the color; it attacks the membrane of the fungal cells, causing them to rupture and die. To treat shower mold effectively, one should spray undiluted vinegar onto the affected grout and let it sit for at least an hour. This dwell time is critical. It allows the acid to seep into the microscopic holes of the cement. Following the soak, a paste made of baking soda and water can be applied. The scrubbing action of the baking soda, combined with the foaming reaction from the vinegar, helps to physically lift the dead shower mold out of the pores. Hydrogen Peroxide Another powerful alternative for battling shower mold is hydrogen peroxide. Like vinegar, it is an antifungal agent that penetrates better than bleach. A three percent solution can be sprayed directly onto the moldy areas. It will fizz upon contact with organic matter, a visual signal that it is reacting with the fungal proteins. For those who dislike the smell of vinegar, peroxide is a scent-free option that effectively oxidizes the shower mold, killing it and helping to whiten the stains it leaves behind. However, one must be careful not to mix these chemicals. Mixing vinegar and bleach creates toxic chlorine gas, a deadly hazard that is far worse than the shower mold itself. Silicone Caulk The hardest battleground in the war on shower mold is the silicone caulk. Caulk is used to seal the joints between the tub and the wall, or the corners of the shower stall. Over time, the adhesion of the silicone can fail, creating microscopic pockets between the caulk and the wall. Water gets trapped in these pockets, and shower mold begins to grow from the back. If you see black spots that seem to be inside the clear or white silicone, surface cleaning will be futile. No amount of scrubbing or chemical soaking can reach shower mold that is encapsulated within or behind the waterproof sealant. In this scenario, the only effective cleaning method is removal. The infected caulk must be cut out completely using a razor knife, the area must be sterilized and dried thoroughly, and new, mold-resistant silicone must be applied. It is a maintenance task that many avoid, but leaving compromised caulk allows water to leak into the wall studs, inviting rot alongside the shower mold. Safety Equipment Safety is paramount during this cleaning process. When you scrub dry shower mold, you release thousands of spores into the air. In a small, enclosed space like a bathroom, the concentration of spores can become high enough to trigger asthma attacks, allergic reactions, and respiratory inflammation. It is essential

Preventing Shower Mold: Daily Habits You Should Adopt to Fight Fungi Read More »

Woman unsure whether to put a blanket in the washing machine.

Blankets Washing: 9 Laundry Mistakes That Destroy Blanket Fibers

Blankets are perhaps the most intimate object in the domestic ecosystem. It is the vessel of comfort, the shield against the cold, and the companion to our most vulnerable moments of sleep and relaxation. Unlike the bedsheets, which are generally subjected to a rigorous weekly washing cycle, the blanket often occupies a hygienic gray zone. We wrap ourselves in it daily, dragging it from the bed to the sofa, sharing it with pets, and occasionally spilling coffee or tea on its fibers. Yet, because it does not sit directly against the mattress, we frequently underestimate the biological load it carries. A blanket is a trap for dead skin cells, body oils, dust mites, and pet dander. Over time, this accumulation does not just create a musty odor; it degrades the fabric, matting the fibers and reducing the thermal efficiency of the item. Restoring a blanket to its original state of softness and sanitation requires a nuanced approach that respects the diversity of materials found in the modern linen closet. 1.Synthetic Fleece The cleaning process must begin with a proper diagnosis of the material. Treating a heavy wool heirloom with the same aggression as a synthetic fleece throw is a recipe for disaster. The most common household blanket is the synthetic fleece or microfiber. These are durable, warm, and generally hydrophobic, meaning they repel water. However, their texture acts as a magnet for hair, lint, and static electricity. The greatest mistake made when washing fleece is the use of high heat and fabric softener. Fleece is essentially made of plastic fibers. When exposed to high heat in a dryer, these fibers can slightly melt or fuse at the tips, creating a rough, scratchy texture that can never be reversed. Furthermore, fabric softener coats these fibers in a waxy lipid layer. While this might feel soft initially, it eventually builds up, trapping dirt and making the blanket less breathable and more flammable. Fleece should always be washed in cold water with a small amount of mild detergent and an extra rinse cycle to ensure no soap residue remains to irritate the skin. 2.Wool Blankets Wool blankets represent the opposite end of the spectrum. Wool is a protein fiber with a scaled structure similar to human hair. It is naturally antimicrobial and resistant to odors, which means it requires washing far less frequently than synthetics. However, when it does need cleaning, the stakes are high. The combination of heat, moisture, and agitation causes the scales on the wool fibers to lock together, a process known as felting. Once a wool blanket has felted, it shrinks dramatically and transforms from a soft, draping fabric into a stiff, thick mat. To wash wool safely, one must minimize agitation. If using a machine, it must be on a specific wool or hand-wash cycle with cold water. Ideally, wool should be washed by hand in a bathtub using a detergent specifically formulated with lanolin, the natural oil that keeps wool soft. Never wring out a wool blanket; twisting the wet fibers will break them. Instead, press the water out gently and roll the blanket in heavy towels to extract moisture before laying it flat to dry. Hanging wet wool will cause it to stretch under its own weight, ruining the rectangular shape. 3.Heavy Blanket The weighted blanket has become a staple for anxiety relief and better sleep, but it presents a massive logistical challenge for cleaning. These blankets are filled with glass beads or plastic pellets distributed in sewn pockets. The sheer weight of the item—often fifteen to twenty pounds—can destroy the motor of a standard residential washing machine or throw the drum off balance during the spin cycle. Before attempting to wash a weighted blanket, you must verify the weight capacity of your machine. If the blanket exceeds twenty pounds, it is safer to take it to a laundromat with industrial-sized machines. Furthermore, you must check the fill material. Plastic pellets are generally washable, but they can melt in a hot dryer. Glass beads are durable but heavy. The drying process for a weighted blanket is a multi-day affair. It must be air-dried to prevent damage to the inner lining that holds the beads. If the lining rips, the beads will leak out, ruining the blanket and potentially damaging the machine. 4.Electric Blankets Electric or heated blankets add a layer of electrical complexity to the wash. Many people assume these cannot be washed, but most modern electric blankets are designed to be submerged, provided the control cord is detached. The internal wiring is insulated against water. However, the internal wiring is not insulated against the violent twisting of a spin cycle. The danger with electric blankets is not the water; it is the mechanical stress breaking the fine heating wires inside the fabric. These blankets should be washed on the gentlest cycle possible with warm water and never, ever dry cleaned. The harsh solvents used in dry cleaning can dissolve the insulation on the wires, creating a severe fire hazard. Drying must be done carefully, usually by partially drying in a machine on low heat and finishing by air drying. The blanket must be completely bone dry before it is plugged in again; any residual moisture near the connection point can cause a short circuit. 5.Comforters Down comforters and duvet inserts require a strategy focused on loft. Down clusters are nature’s insulators, trapping warm air. When they get wet, they collapse into heavy, sodden clumps. If these clumps are not dried thoroughly and agitated during the drying process, they will develop mildew inside the blanket, ruining the item. Washing down requires a specialized detergent that does not strip the natural oils from the feathers. The drying phase is critical and requires clean tennis balls or wool dryer balls. These balls bounce around the dryer drum, pounding the blanket to break up the wet clumps of feathers and redistribute them evenly. Without this agitation, the down will dry in hard lumps, leaving the blanket flat and

Blankets Washing: 9 Laundry Mistakes That Destroy Blanket Fibers Read More »